Learn my favorite advanced violin exercises for intermediate violinists looking to improve their technique.
If you’ve been playing the violin for a few years and have practiced with dedication, then you may want to learn some advanced techniques and skills to boost your playing. Today I’m sharing six of my favorite advanced violin exercises that are best for intermediate violinists.
I’ll talk through tricky bow strokes, shifting, and various ways to mix up your scales. Working on these techniques will help you develop some of the trickiest patterns you’ll find in intermediate to advanced violin music.
Keep reading to learn about all six exercises, and make sure to download my free sheet music to start practicing on your own!
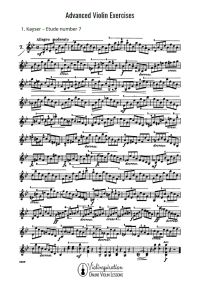
Advanced Violin Exercises
Download Free Sheet Music
1. Kayser 7 – Staccato
Perfecting a staccato bow stroke can be difficult and time-consuming. Kayser’s Seventh Etude is a great way to practice this stroke while also working on left-hand intonation.
This etude is almost similar to playing arpeggios in that we’re moving up and down the instrument in skips. Here, we’re usually skipping by sixths and thirds. If plain arpeggios are feeling boring and stale, try this example to switch things up!
A note about articulation markings in etudes
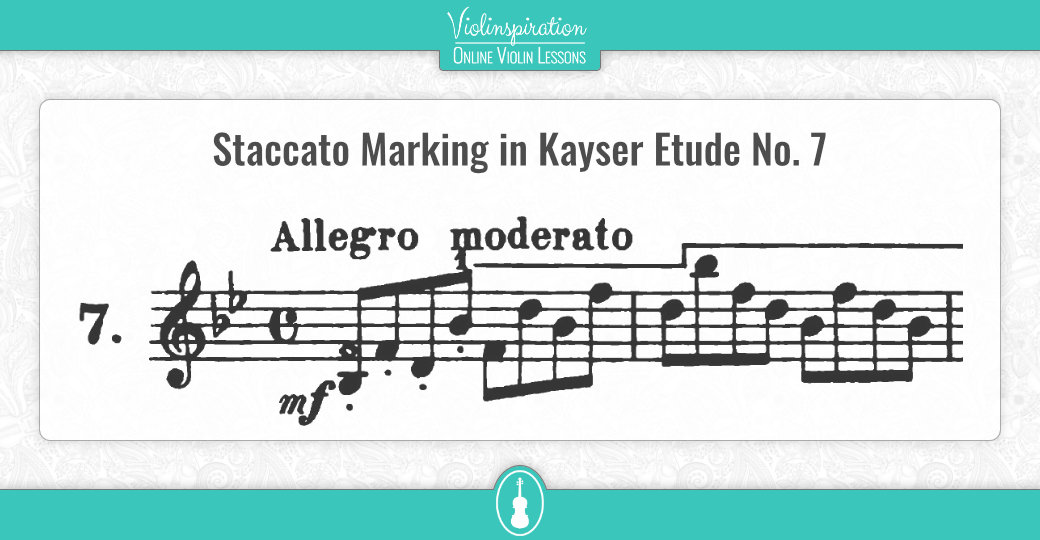
Note the staccato markings below the first four eighth notes – they want you to play staccato through the whole etude. Sometimes, in music like this, we’ll see a bowing pattern or articulation marking written just in the first measure. The composer usually wants us to assume we should continue in that fashion through the whole etude – they just don’t write it out through the entire work.
So, in Kayser Etude 7, we’ll assume each note should be played staccato. This stopped stroke is a great way to synchronize your left and right hands. Stopping the bow for the staccato gives you a quick moment to find the next note. Once you know the etude well enough to speed it up, you’ll find that both hands are working in sync to get to each upcoming note.
Advanced violinist secret
One violin technique I’ve discovered that really makes the difference between a beginner and an advanced player is syncing up the left-hand notes with right-hand bow changes.
You might notice, when you hear a beginner playing violin, it sounds sloppy – sometimes you’ll hear a note multiple times, or you might hear two strings played at once by accident. Getting both of your hands to change accurately at the same moment will help elevate the sound of your violin playing to a much more refined sound.
2. Sevcik Op. 1 No. 15 – Octaves
Playing in octaves is a difficult technique that requires stretching your fingers in a way that doesn’t hurt your muscles. Using an exercise that focuses on the left-hand frame you need to play octaves in tune is a great way to practice this specific violin technique.
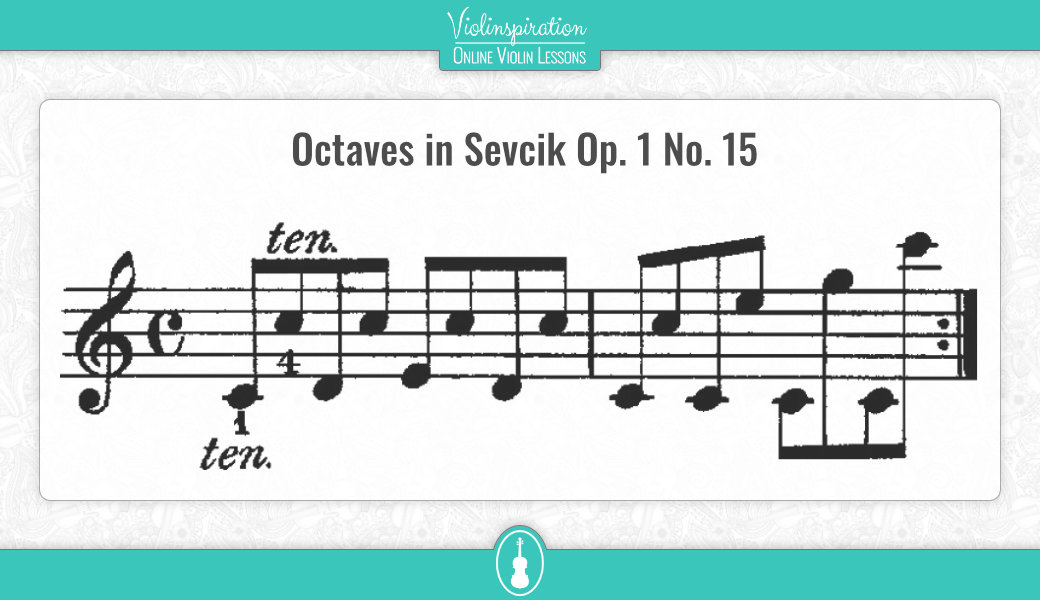
A helpful exercise to practice octaves is Sevcik Op. 1 No. 15. Sevcik is basically the father of contemporary violin technique. He wrote four School of Violin Technics books that are still well-loved today.
This particular exercise from the School of Violin Technics uses fingered octaves – extending either 1 and 3 or 2 and 4 fingers to play the octave interval, instead of the typical 0-3 and 1-4. Fingered octaves can be very useful in high positions on the violin since each note is closer together than it would be lower on the fingerboard.
Practicing octaves one note at a time, rather than as double stops, will help you develop a beautiful left-hand frame. Each finger needs to be perfectly in place on the fingerboard for the octaves to sound in tune.
Tips for practicing octaves
If you’re having trouble remembering what octaves should sound like, play an open string (for example, an open D), then the third finger on the next higher string (3rd finger stops the D note on the A string). Play the two notes separately, and then together as a double stop. As long as your violin is in tune, your open strings will be in tune and help remind you what the octave interval sounds like.
Instead of stretching the fourth finger to play the higher octave note, think of stretching your index finger back. This will release some strain from the delicate fourth finger and can help the octaves feel less strenuous. Eventually, it becomes muscle memory.
3. Schradieck No. 6 – String Crossings and Long Bows
Henry Schradieck was another classic teacher of contemporary violin technique. He wrote three books with violin technique exercises that have been used for over 100 years.
To practice string crossings and long slurs, we’ll look at exercise No. 6. This example stays entirely in the first position, which helps take some focus off the notes, and will help you focus more on your right arm and bow speed.
I find that we often focus a bit too much on what’s going on in our left hands: intonation, finding notes, and remembering the patterns. It’s extremely helpful to take time to focus on your right arm. The bow is what makes the violin sing, anyway!
Working through Schradieck No. 6 is a great way to practice moving between all four strings with your bow. Each string crossing should be smooth since each chunk of the exercise is written under one slur.
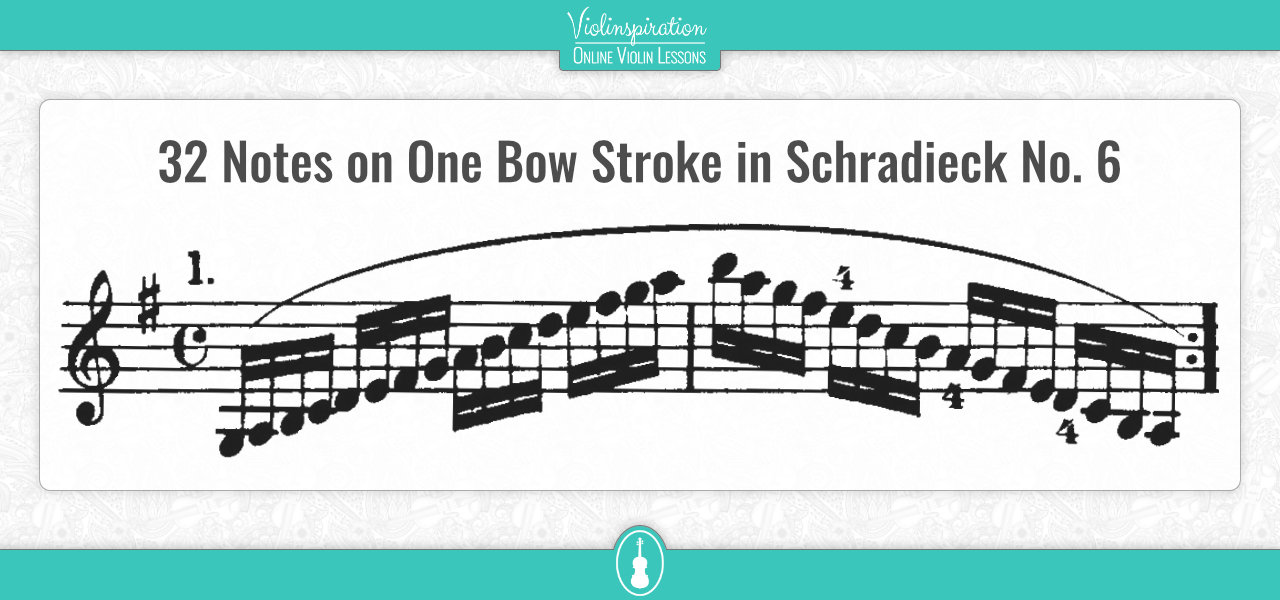
If you’re having trouble playing 32 notes in one bow direction, start by playing smaller slurs to focus on the notes and patterns. Then gradually work your way up to the slurs that are written in the music. These long slurs will help you make a consistent, beautiful tone while playing with a very slow bow speed.
4. Three-Octave Scales
It’s important to continue practicing scales, no matter how advanced of a violinist you become. You probably started with one-octave scales, then worked up to two-octave scales. Now, you’re ready for three-octave scales! These cover a lot of area on the fingerboard, and you’ll have to shift multiple times in each scale.
I recommend starting with the G Major scale since it’s the lowest. As you climb into higher and higher positions, your left hand needs to raise and the left elbow should come inwards to help your intonation that high up on the fingerboard. Starting with the lowest scale will require less of this adjusting, and will help you start to learn the three-octave pattern.
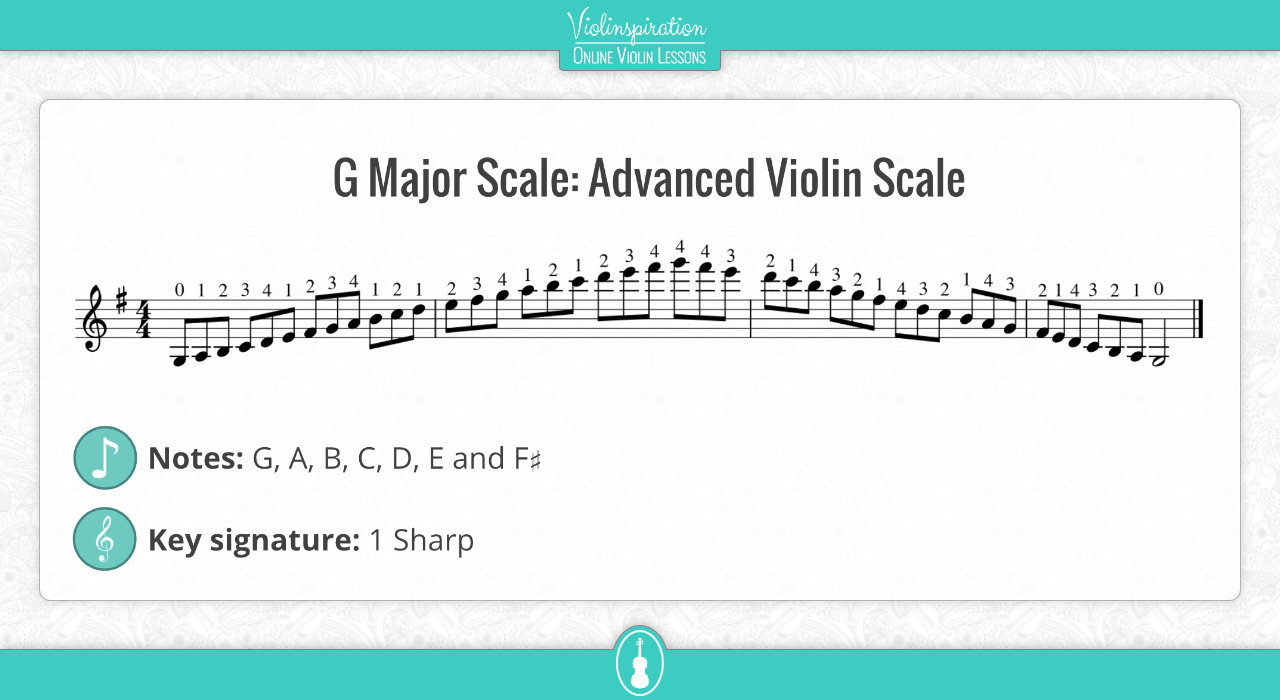
The Carl Flesch scale system is a great resource for three-octave scales, but it looks so daunting when you first open the book. There are so many notes! You can take a look at Carl Flesch: The Master of Scales to see how each key is organized.
A simpler start to three-octave scales is my booklet with the most commonly used scales for advanced violinists. You can download the booklet below for free:
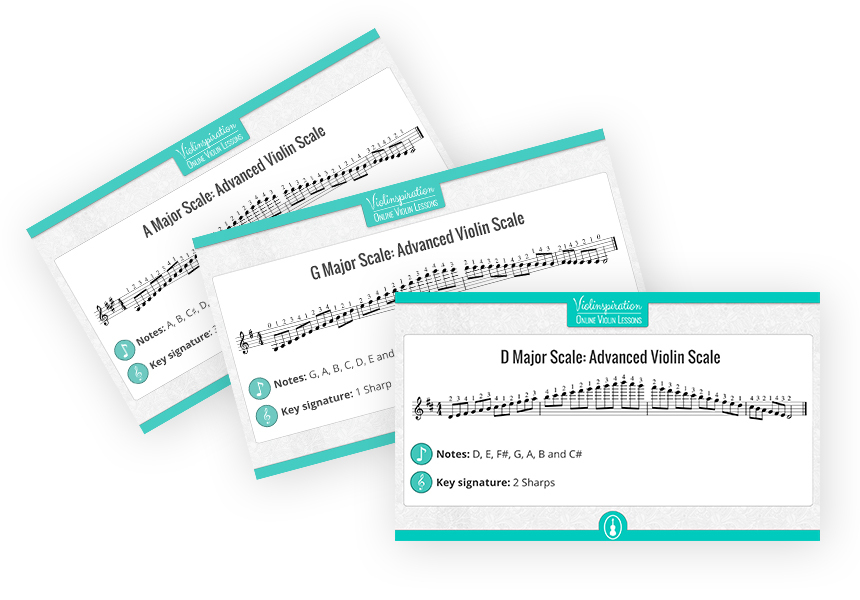
5 Most Common Violin Scales
for Advanced Player
In the G Major three-octave scale, you’ll shift up all the way to the fifth position. If you’ve never played this high, or just need a refresher, I have a guide to the fifth position that’ll be helpful for you.
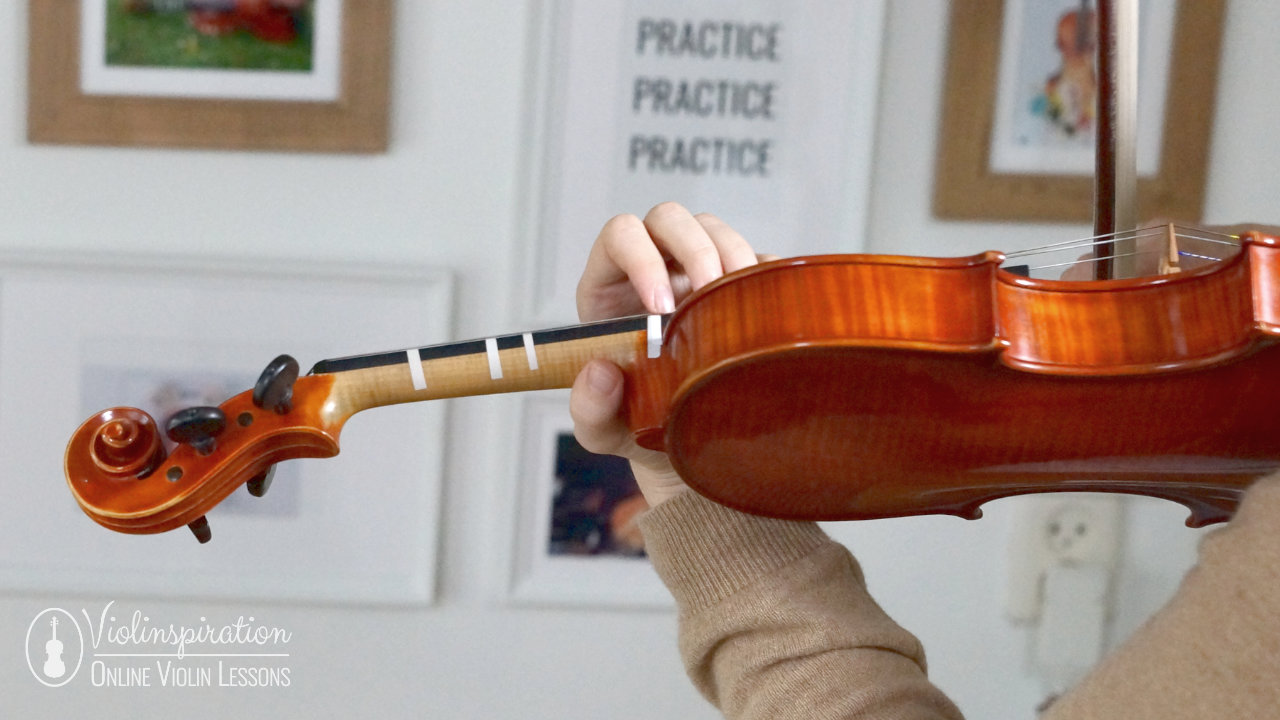
For members of Julia’s Violin Academy: if you’re unsure if your posture in higher positions is correct, feel free to submit your feedback video here.
5. Scales in One Position
Playing a scale in just one position will help you perfect your intonation in that specific position. You’ll also encounter many string crossings, which is helpful for continuing to develop smooth bowing.
A great violin resource is the book Scale-Studies for Violin by Jan Hřímalý. This book contains so many helpful scale exercises, but what you should focus on is the scale studies in just one position. You can choose any position you’d like, low or high.
Use the download button below to get the whole book with scale-studies for free and pick the scale that matches the piece you’re currently working on:
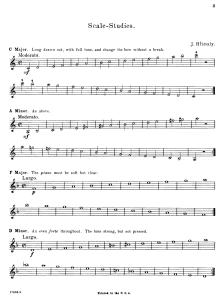
Scale-Studies for Violin by Jan Hřímalý
Free Violin Sheet Music
You might think you’d always need to start a one-position scale on the first finger, but Hřímalý wrote out different versions that start on either the second or third fingers. Here you can see an example for the A Major scale:
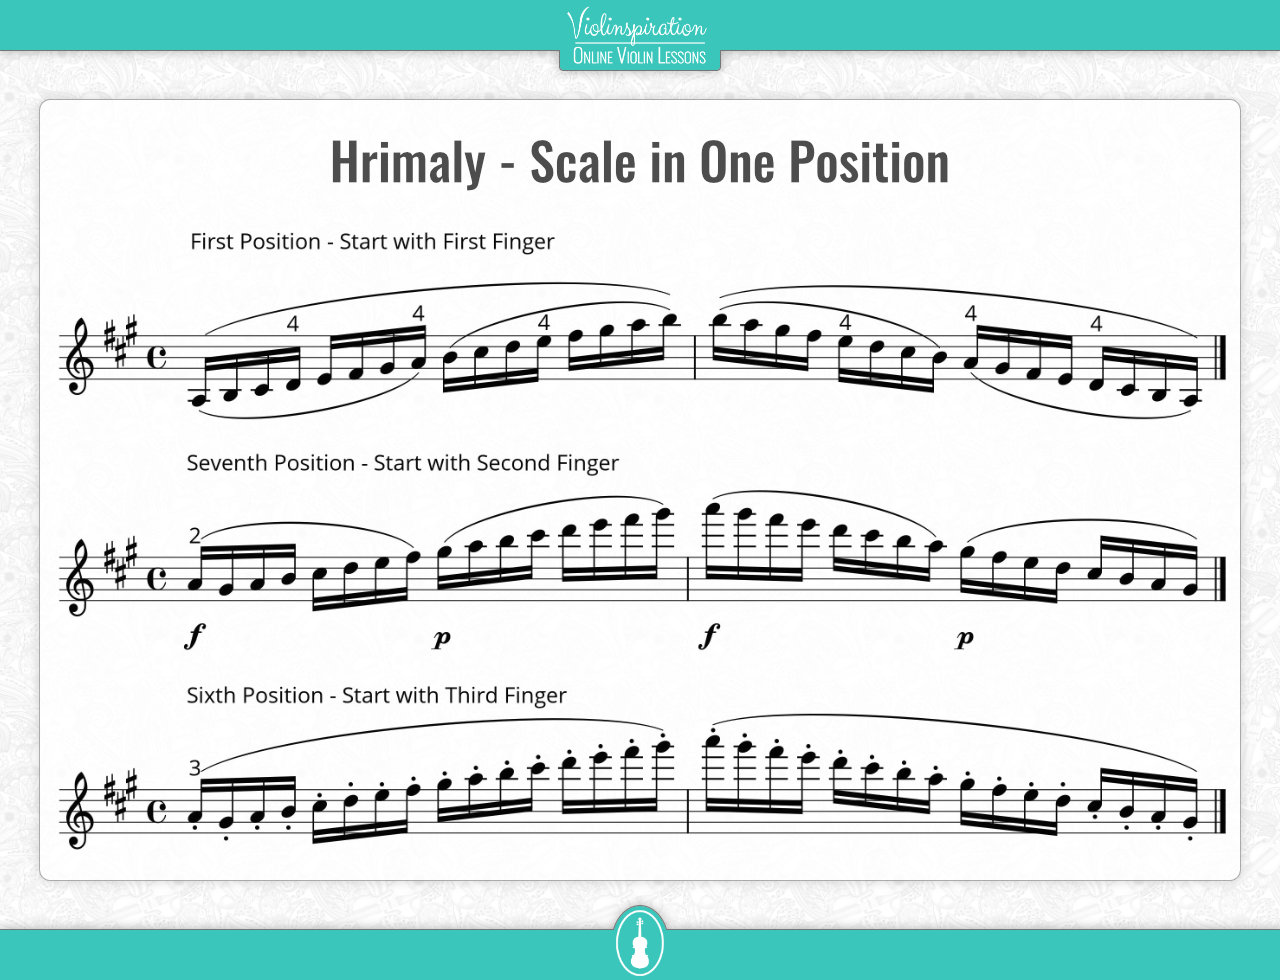
The nice thing about practicing scales is that you probably know exactly what they should sound like. You can hear whether or not you’re playing each not correctly right away, which is so helpful for developing difficult techniques, like playing in high positions on the violin.
6. Kreutzer 11 – Quick Shifting
In a lot of advanced violin repertoire, you’ll find shifts that happen fast. It’s extremely helpful to practice shifting quickly in a focused etude so it doesn’t feel quite so difficult and unnatural when you encounter it in a harder piece of music.
Kreutzer’s 11th Etude from his 42 Studies for Violin is a great exercise to practice quick shifting. There are almost always at least three shifts per measure in this etude, which really helps develop the skill quickly.
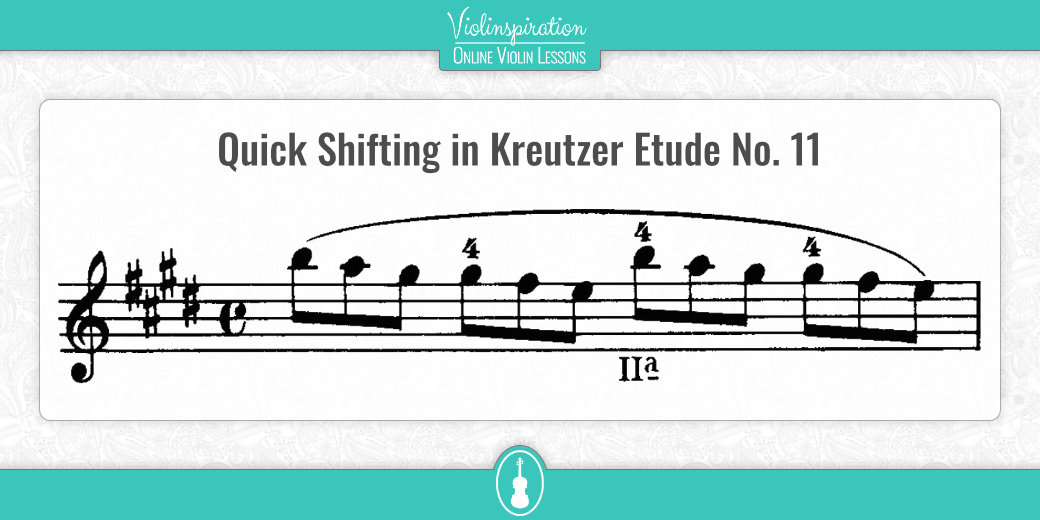
Tips for practicing Kreuzer – Etude number 11
My two biggest pieces of advice for this etude are:
- Practice slowly.
- Break up the slurs into smaller chunks while you practice slowly.
- Work on speeding it up just a bit (the tempo is marked Andante, so you don’t need to go too fast!).
- Add in the longer slurs.
Just like Schradieck No. 6, this etude will help you play very long bow strokes with a great tone. 2 in 1!
This etude usually involves us shifting to play the same exact thing we just played, but in a different position. This is for a good reason: we can easily hear whether or not the pitches match between each shift. Our goal is for each individual note to have the same intonation, no matter what position it’s played in. Matching pitches between each shift is the main goal in this etude.
If you’re struggling to remember where to play certain passages of this etude, feel free to write in finger numbers, Roman numerals for position numbers, and even note names or the name of the string you should be playing on. It’s certainly a tricky etude so feel free to add all kinds of notes that will help you learn it.
Final Note
These are some of my favorite technique exercises for intermediate violinists looking to advance further. They may be challenging, but with slow practice, these will help you achieve your violin goals.
Remember to download the advanced violin exercises for free and start practicing right away!

Advanced Violin Exercises
Download Free Sheet Music


