You just got a new violin and are excited to start playing! But wait, how do you tune a violin?
Tuning a violin may seem daunting at first, but is really not as hard as it seems!
There are many ways to tune a violin – and one really easy way is to tune your violin with an electronic violin tuner.
Most electronic tuners are called chromatic violin tuners. A chromatic tuner shows you how close the string is to being in tune!
The further away the arrow is from the middle of the tuner, the more out of tune the violin is.
You do not necessarily need an electronic tuner to follow this step-by-step guide. Online violin tuners and tuning apps work just the same.
Let’s get started tuning your violin right away.
The Notes of the 4 Strings on the Violin
Before you start tuning your instrument, you need to know what notes to tune your instrument to!
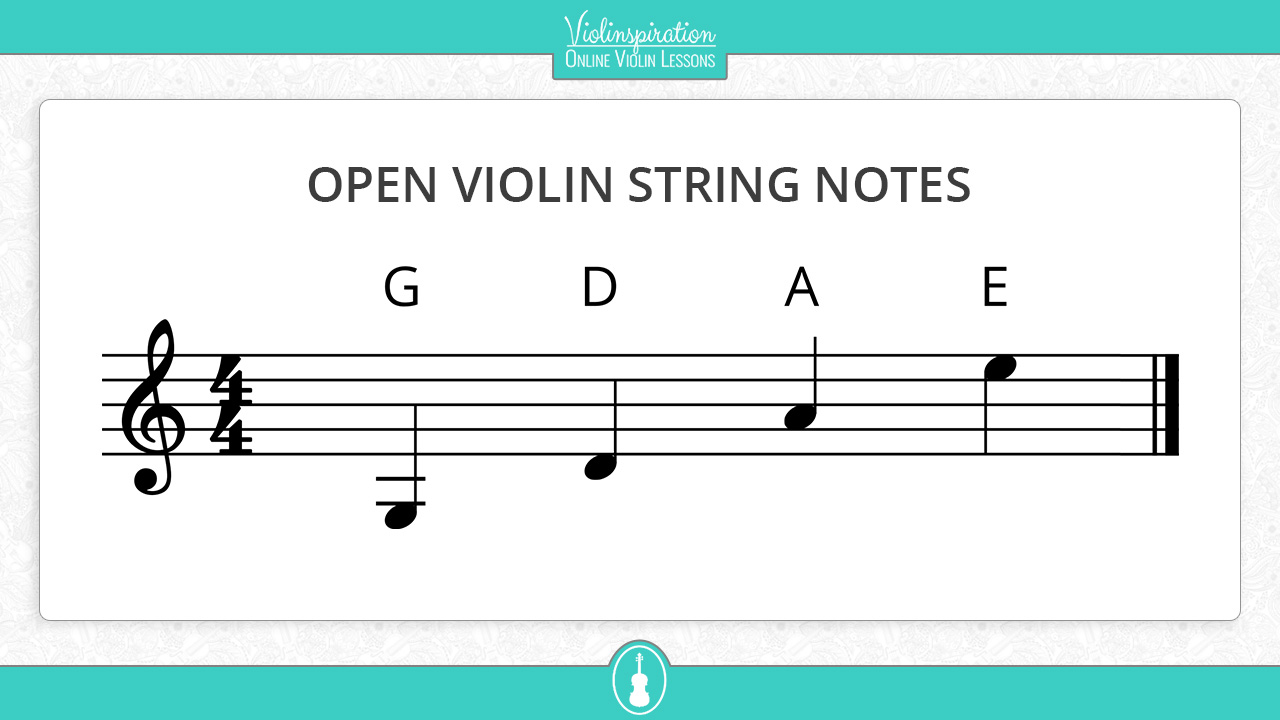
The four strings of the violin should be tuned to the following notes:
- E5, the thinnest string
- A4
- D4
- G3, the thickest string
The E string is the highest note, the G string is the lowest note.
Here you can see the tuning notes in sheet music:
Please listen carefully to the video below where I play an example of every one of these notes. This is what your violin is supposed to sound like after tuning.
Understanding How to Tune a Violin
Now you know what the notes are, the next step is to understand how to tune the strings.
When tuning the violin, we are changing the pitch of the string to the correct, recommended pitches for each string.
There are two ways to change the pitch of the violin strings.
There are two places on the violin where you can adjust the intonation of the strings: the pegs and the fine tuners.
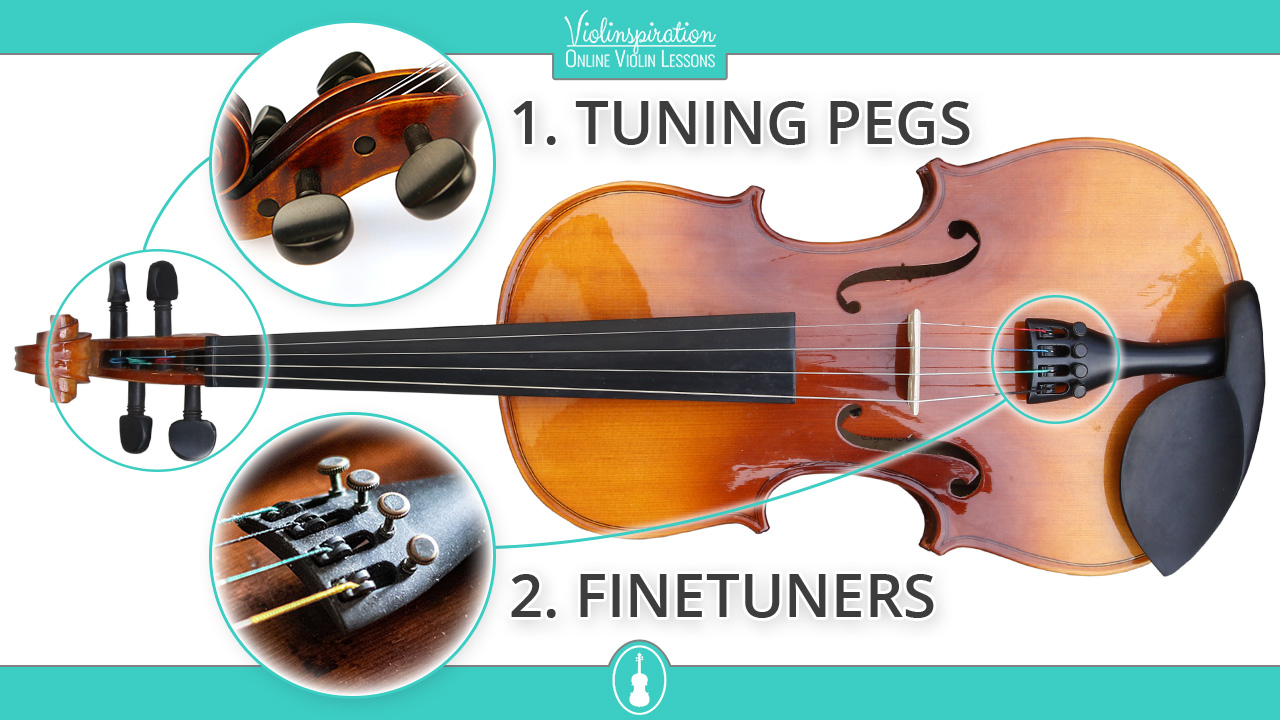
The fine tuners are located at the bottom of the strings. The pegs are located next to the scroll.
Using the Fine Tuners to Tune the Violin
The fine tuners are the easiest way to tune the violin. All you have to do is to turn the fine tuner clockwise or counterclockwise to adjust the intonation.
If you turn your fine tuners to the left, the pitch of the string will get lower.
If you turn your fine tuners to the right, the pitch of the string will get higher.
When turning the fine tuners, you only slightly change the pitch of the violin. That is why this is the safest way to tune your violin.
Using the Pegs to Tune the Violin
Sometimes, we have to change the pitch of a string drastically. For instance, if a string is loose and does not make any sound, or if the note is way too low.
In that case, we use the peg to change the pitch of the string.
We can also use the pegs when we run out of room and can not turn the fine tuners anymore. In that case we loosen the fine tuner, and re-tune the string with the peg.
You can see an example of that process in the following video:
Tuning the Violin Using an Electronic Violin Tuner
The next step is to switch on your electronic tuner.
Step 1: Switch On Your Electronic Violin Tuner or Tuning App
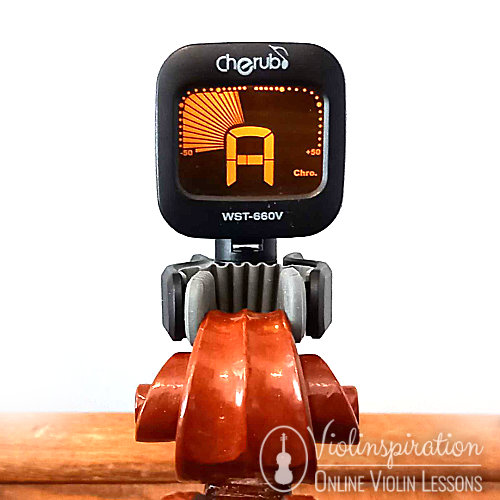
As soon as you have switched on the tuner, you can see a diagram that shows how close to the correct tuning your strings are.
Play a random string to see how it works.
The note name or string number closest to the tone being played appears in the display.
The goal is to tune the violin so that the arrow points towards the center of the tuner or the center turns green.
Normally an electronic tuner either works with a pointing arrow or with light.
Pitch Gets Flatter
Pitch Gets Sharper
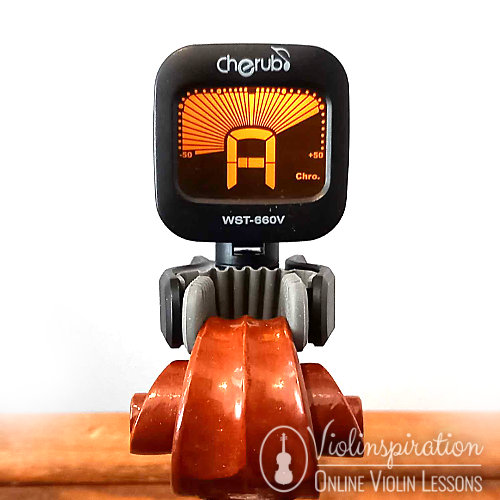
Correct Pitch

Tone closest to the Tone Being Played

Using An Online Tuner
If you use an online violin tuner, the first thing to make sure is that the browser has microphone access so the tuner picks up the sound.
The meter needle will point to the middle and the tuner will indicate “Good!” if your string is in tune.
If the string is flat, the needle will point to the left and the tuner will indicate ‘’Too Low’’. If it is sharp, the needle will point to the right and the tuner will indicate ‘’Too High’’.
Using an Electronic Tuner with a Pointing Needle
The meter needle points to the middle and the center indicator of the tuning guide is lit green if the string is in tune.
If the string is flat, the left indicator will light and the needle points to the left. If it is sharp, the right indicator will light and the needle points to the right.

Korg TM-60 Tuner and Metronome
GET IT NOW
Support us for more FREE content No extra costs for you Recommended by Violinists
Using a Electronic Clip-on Tuner with Light
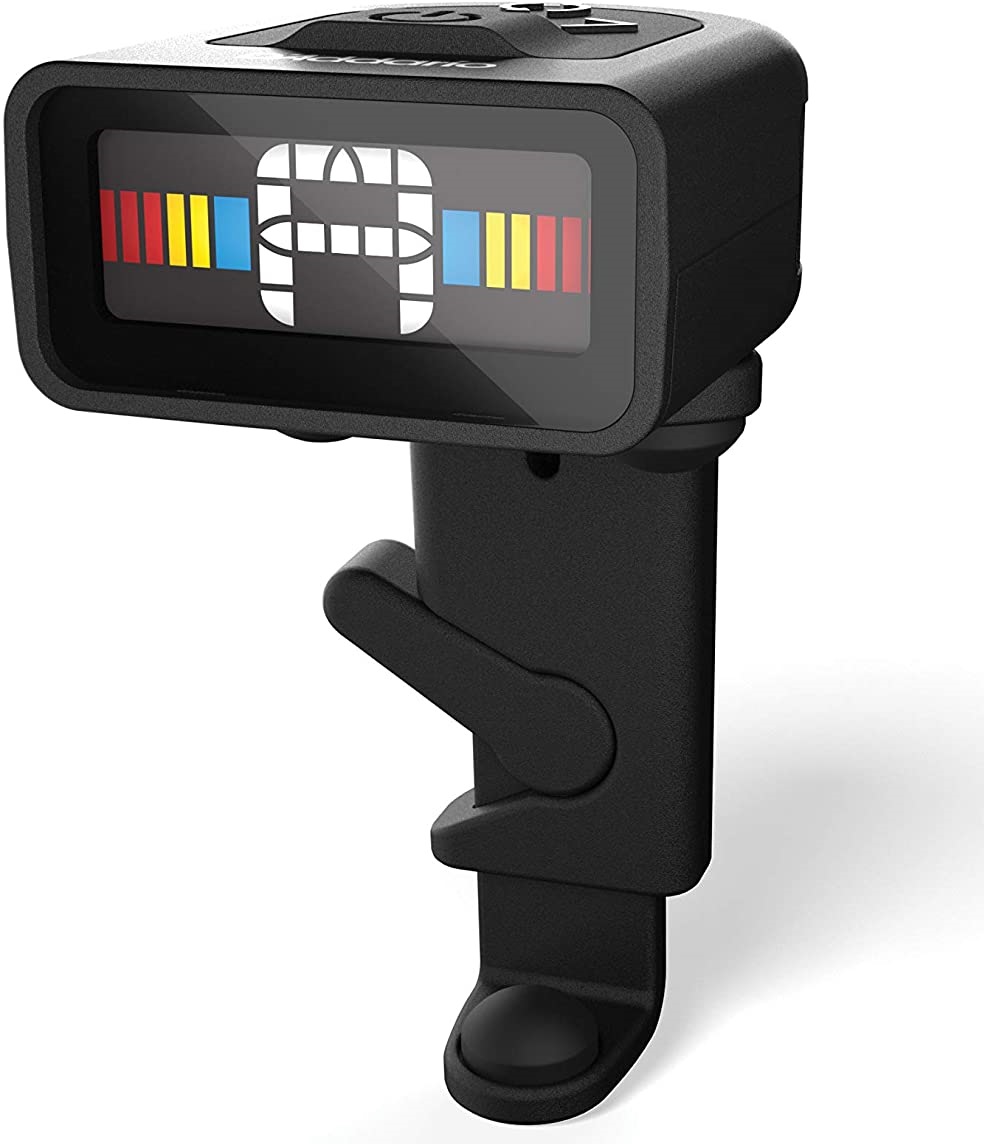
D’Addario NS Micro Violin Tuner
GET IT NOW
Support us for more FREE content No extra costs for you Recommended by Violinists
A tuner with only light works similarly to an electric tuner with a pointing needle.
The electric tuner meter will light farther toward the left as the pitch gets flatter, or farther toward the right as the pitch gets sharper.
Using a Tuning App
A tuning app normally works similar to an electronic or online tuner. Most apps work with a pointing needle or with lights.
Step 2: Tune the A string of the Violin
Now that you have your tuner ready, it’s time to start tuning your violin!
To start tuning your violin, the first step is to find the A string. The A string is the second string from the right.

Place your violin on your knee and pluck or play the A string on your violin. The name of the nearest note will appear in the display.
- If the display shows G♯ or A♭, twist the fine tuner to the right until the note A appears in the display
- If the display shows A♯ or B♭, twist the fine tuner to the left until the note A appears.
- If the display shows A, twist the tuner to the left and to the right until the needle points to the middle.
- In case the tuner does show any of the notes mentioned above, use the pegs to tune the violin until the A or any of the surrounding notes appear. (see step 6)
Here you can see a video of the process described above:
This is what the string should sound like after tuning:
Step 3: Tune the D String
Next, we have to tune the D string. The D string is the third string from the right.

The process of tuning the D string is the same as tuning the A string.
Play the D string until the correct note name (namely D) is shown in the display.
- If the display shows C♯ or D♭, twist the fine tuner to the right until the note D appears in the display
- If the display shows D♯ or E♭, twist the fine tuner to the left until the note D appears.
- If the display shows D, twist the tuner to the left and to the right until the needle points to the middle.
- If none of the notes above are shown in the display, use the pegs to tune the violin until the D or any of the surrounding notes appear. (see step 6)
This is what the string should sound like after tuning:
Step 4: Tune the G String
Now that you have tuned the A and D strings, you are getting the gist of it!
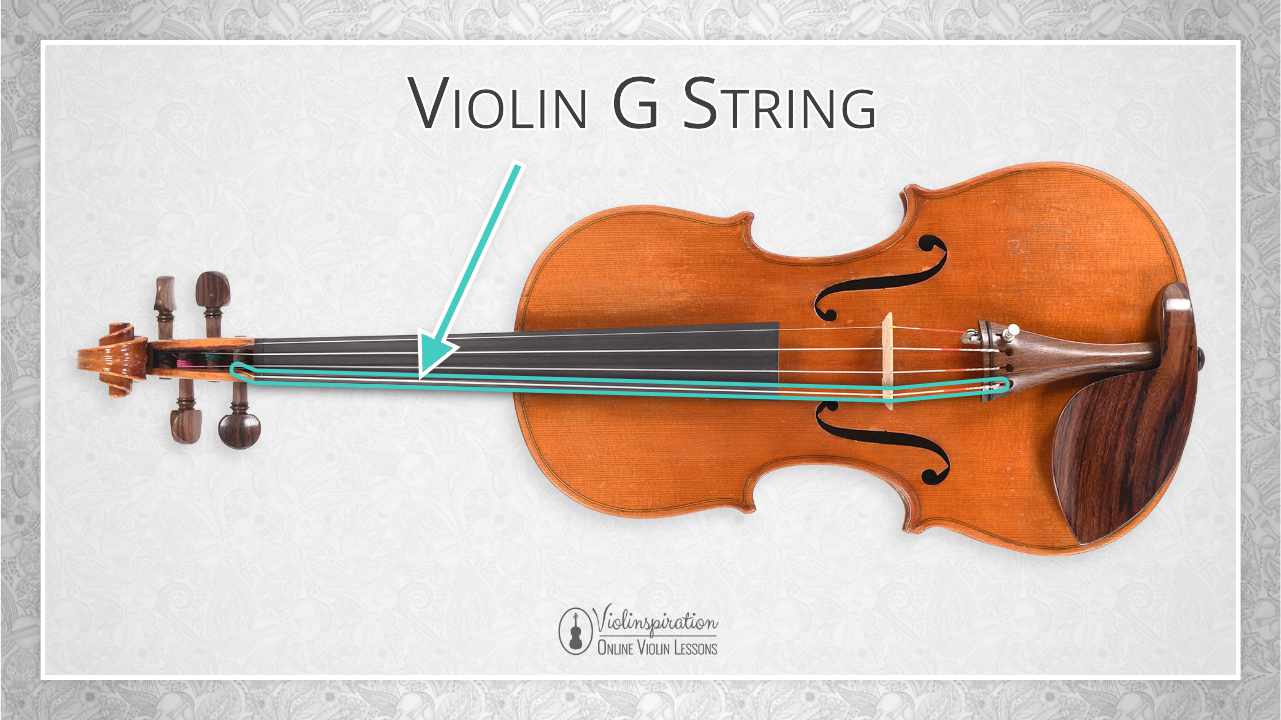
We are going to continue the same process for the G string – tuning the string until the correct note is shown in the display.
Play the G string until the correct note name (namely G) is shown in the display.
- If the display shows F♯ or G♭, twist the fine tuner to the right
- If the display shows G♯ or A♭, twist the fine tuner to the left
- If the display shows G, twist the tuner to the left and to the right until the needle points to the middle.
- If none of the notes above are shown in the display, use the pegs until the G appears in the display. (see step 6)
This is what the string should sound like after tuning:
Step 5: Tune the E String
The E string is the finest string on the violin and can most easily get out of tune. That is why we save this string for last when tuning!

Continue tuning the E string in the same way you tuned the other strings.
Here are a few tips:
- If the display shows D♯ or E♭, twist the fine tuner to the right
- If the display shows E♯ or F♭: Twist the fine tuner to the left
- If the display shows E, twist the tuner to the left and to the right until the needle points to the middle.
This is what the string should sound like after tuning:
Step 6: Tuning the Strings with The Pegs
Sometimes the string is so out of tune that the display does not show any notes close to the string. In that case, you have to use the pegs.
First of all, check which peg matches up with the string that you would like to tune.

Start by placing the violin on your knee.
If the string is already quite tight, make sure to first loosen the string by a quarter-turn.
Now slowly turn the peg away from yourself to tighten the string.
Pluck the string regularly (every quarter-turn), to check if your string came close to it’s target pitch.
After turning it a quarter turn, pluck the string. If it is too low, keep turning upwards.
If you reach a note close to the target pitch, you can continue tuning with the fine tuners.
Step 7: Double Check Your Tuning
Yay, you now tuned every single one of your strings!
Now it is time for a last checkup.
Play each one of the strings with your bow to make sure it is in tune.
If every string is in tune, congratulations! You can now start practicing your violin!
If this is your first time practicing, you might like to start out with my free song tutorial for Mary had a Little Lamb. Or sign up for my online violin school, Julia’s Violin Academy, to learn the violin with step-by-step lessons!
Troubleshooting Questions
How often do you need to tune your violin?
As a rule of thumb, 1 hour of continuous play is enough to make it necessary to tune the violin. I recommend tuning your violin once a day, before each practice session.
Why do my violin strings go out of tune?
Many factors can affect the pitch of a string such as humidity, heat, and even strong playing! This is why violin strings easily get out of tune. Sometimes, a string might even slip out of tune during a playing session, which means you’ll have to retune it!
What does 440 Hz mean?
When watching videos online, you might have noticed that some violinists mention the words 440 Hz or A 440 when tuning a violin.
440 Hz stands for the pitch of the note – meaning how high or low a note sounds. An A string is usually tuned to 440 Hz, but some orchestra’s or ensembles tune to another amount of Hz, for instance 441 or 442. In practice, that means that the A string will sound a little bit higher.
Most regular tuners are automatically set to tune your violin to 440 Hz.
What if I do not have an electronic tuner?
If you do not have an electronic tuner, don’t worry! We have a free online violin tuner on our website that works the same as an electronic tuner.
Are there any tuning apps you can recommend?
If you prefer to work with a tuning app, I personally liked using Tuner Lite before we created our own free website tuner.
Since we have created our own online violin tuner, I am using that one as an easily accessible bookmark on my phone to save storage space.
How do I know if my violin is in tune?
If you are unsure if your violin is already in tune or not, you can check the pitch of each string as described in step 7.
Should you loosen violin strings when not playing?
No! There is no need to loosen the violin strings after playing. The violin bow needs to be loosened after playing. That is why some beginner violinists assume that the strings also need to be loosened after playing. However, this is not the case.
How can I make sure that my strings don’t break?
One common problem when tuning the violin for the first time is having strings break!
Most often this happens because beginning players turn the pegs too much.
Make sure to use the fine tuners to tune your strings and only use the pegs when truly needed.
In case your strings still break, you might also have low quality strings. In that case I recommend getting a higher quality string that doesn’t break easily. I personally like Dominant strings for their strength, sound and durability.
How can I tune the string with only the pegs?
The process of tuning with the pegs alone is a little more difficult, as it is hard to make fine adjustments. Keep moving your peg back and forth until you find the correct pitch of the string.
After turning the peg, also continue adjusting the pitch by lightly pulling the strings.
I will demonstrate this in the video below:
What if I do not have any fine tuners on my violin?
In case you do not have fine tuners on your violin, you can get them in any music shop and attach them to the violin yourself!
It is also possible to tune a violin with the pegs alone, but that can be very challenging for a beginning violinist.
Fine tuners are affordable and easy to attach to your violin, as you can see in the video below:
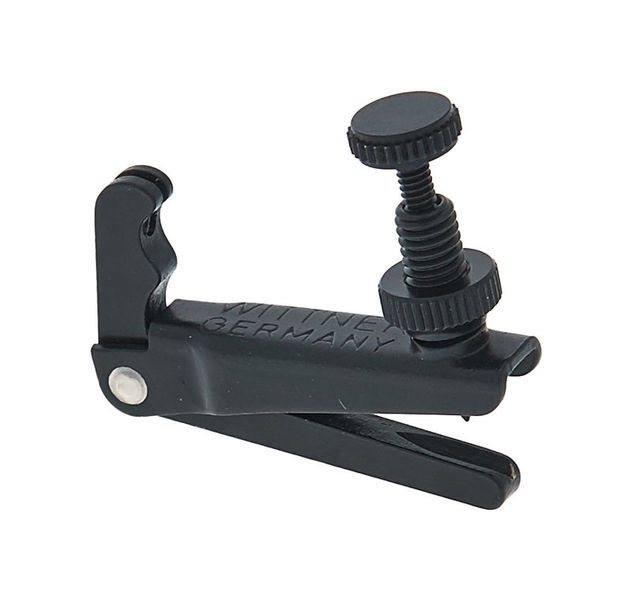
Wittner Adjuster Violin 4/4 BK
GET IT NOW
Support us for more FREE content No extra costs for you Recommended by Violinists


