Even though the violin is mostly used to perform solo pieces or to play in an orchestra, we can play chords on it. Sometimes in a higher level solo piece there are chords written in, or you may want to play chords as an accompaniment for another instrument or a singer. Depending on the context, you would play these chords differently with the bow, or you could even pluck with your fingers or your thumb like you would strum a guitar. When learning a chord first you need to learn how to place the fingers of the left hand and then what to do with the right hand, whether it is bowing or using the fingers. With the bow, you can play a chord in several different ways, from playing the individual notes, through playing double stops, to playing the whole chord in one go. I will discuss this below in the section on the bowing technique for chords. For each chord, there are different placements of the notes, and therefore different fingerings. In this post, I describe for you six simple and most commonly used chords. Here you can download an easy guide with all the most common violin chords, including those described below:
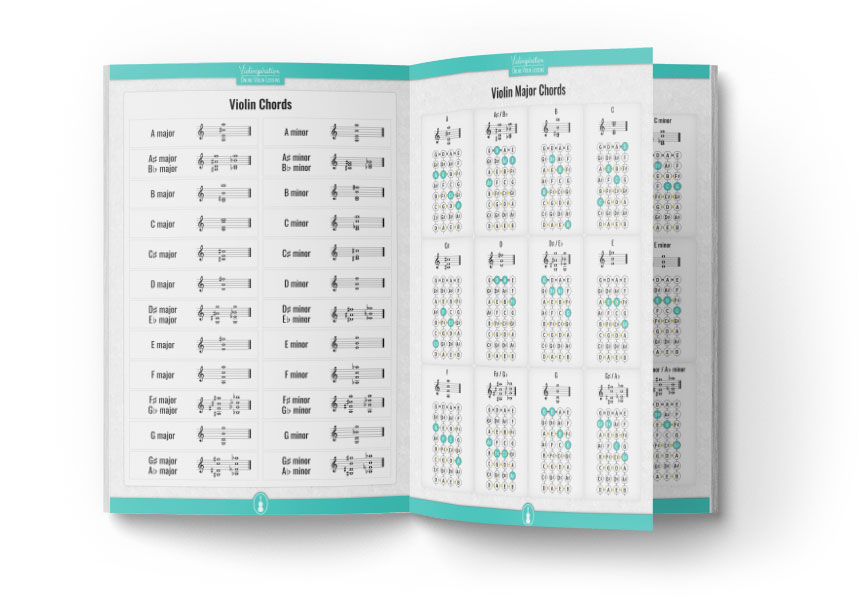
Violin Chords Guide
6 Easy Violin Chords for Beginners
D Major
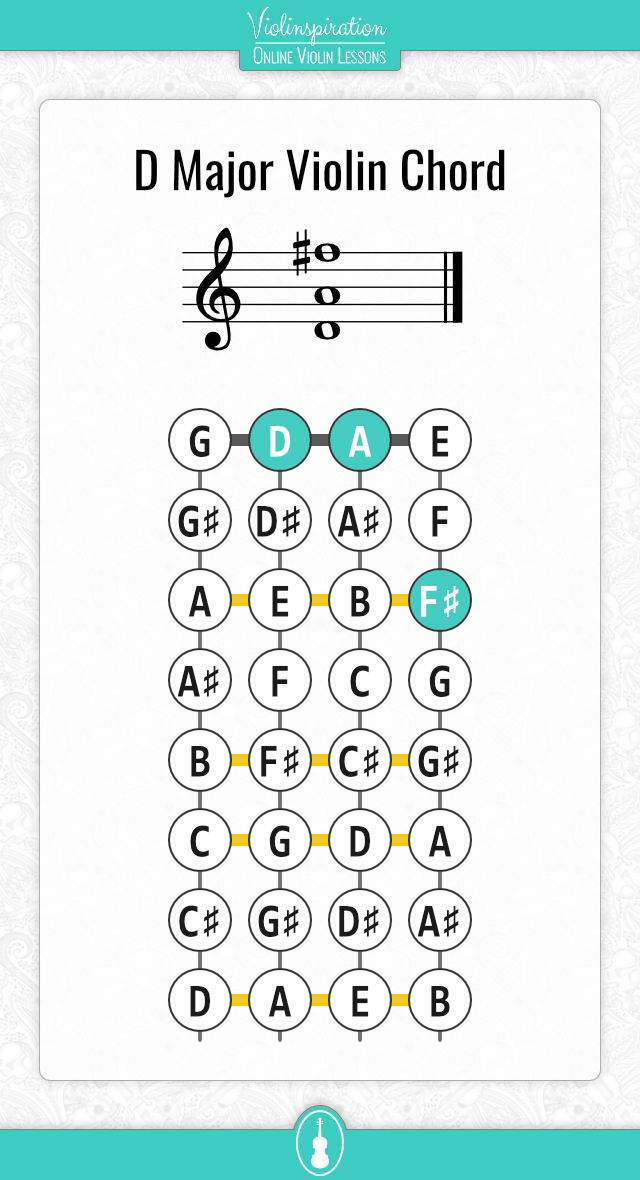
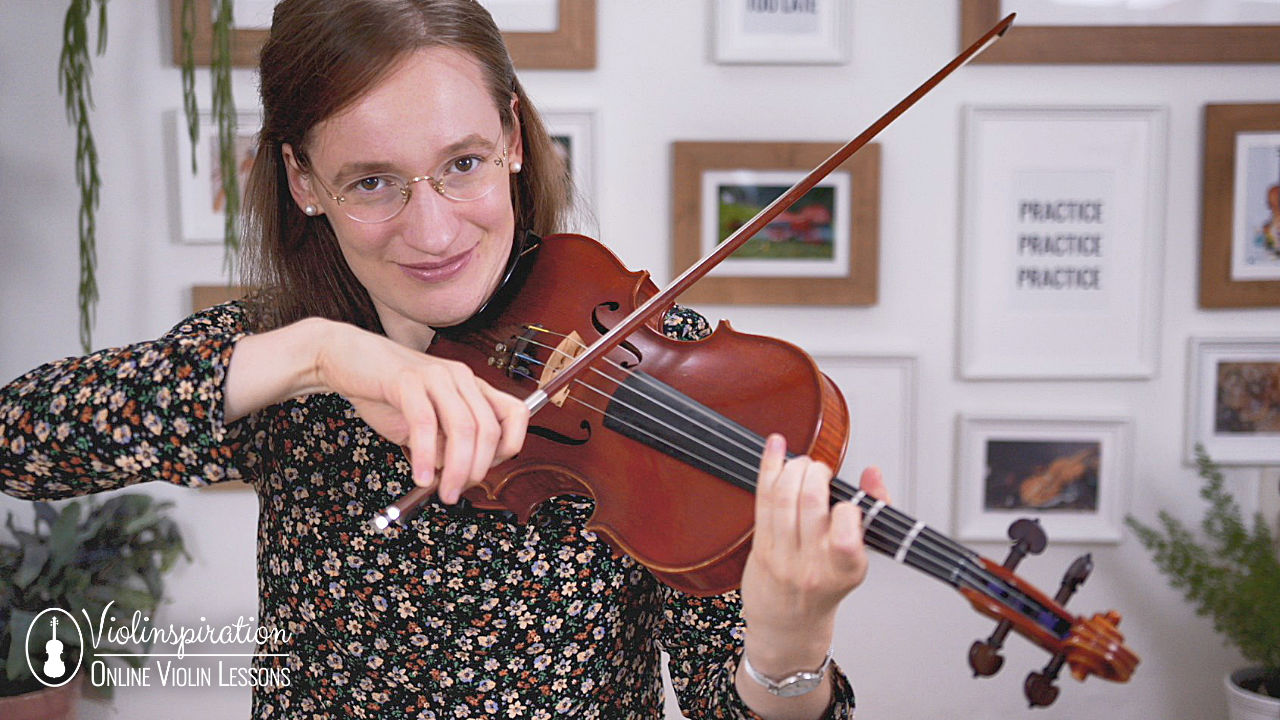
To play the D major chord, you only need to use one finger, a normal first finger on the E string. You will play this together with the open D and A strings. The chord will be sounded only on the top three strings, the G string is not included, so make sure you don’t play the G string.
D Minor
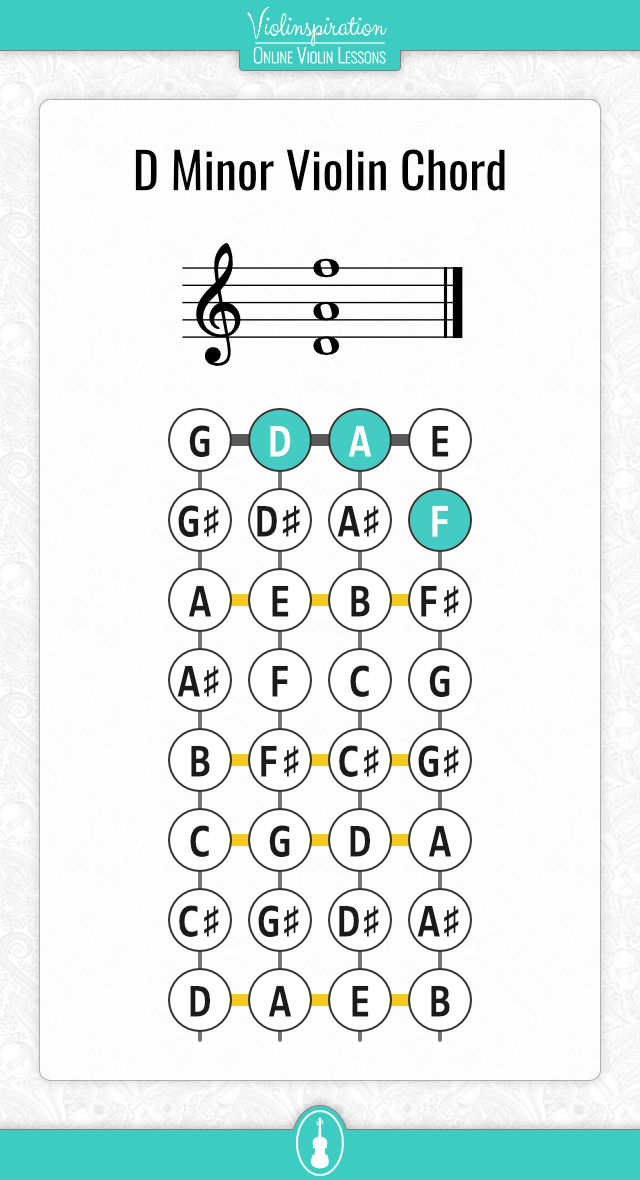
The D minor chord is almost the same as D major, only this time you play a low first finger on the E string, and the two open strings, D and A.
G Major
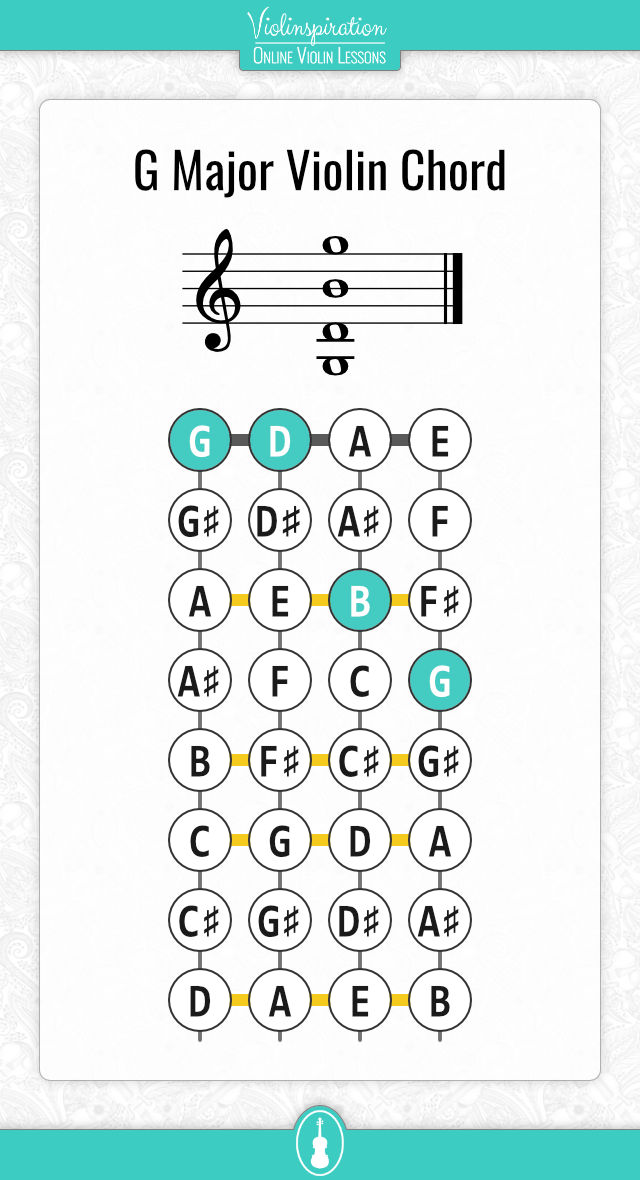
The G major chord is slightly more complex, as all four strings are involved, and you need to use a normal first finger on the A string and a low second finger on the E string. This means that the two fingers are close to each other, possibly touching. The G and D strings you play as open strings.
G Minor
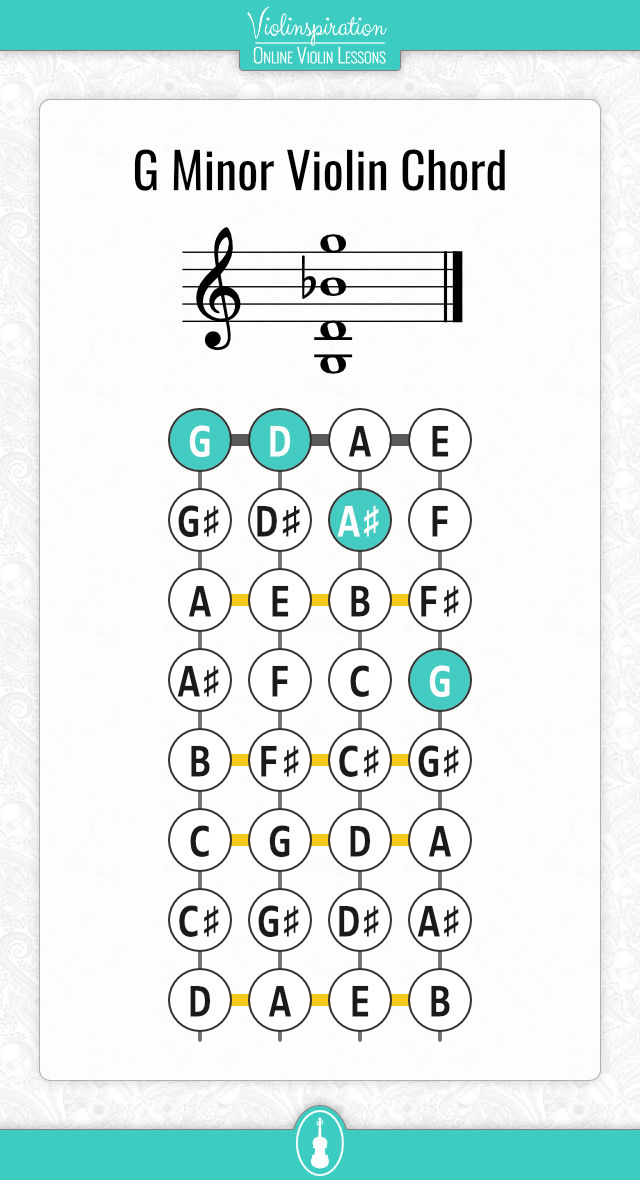
Very similar to the G major, only the first finger is now low. This means that the first finger on the A string plays the A# note, which is near the nut, and there is a gap between the first and second fingers. To find the right position, you could start off by placing the fingers as before in the G major, and moving only the first finger down a semitone, while holding the second finger in the same position it was in before. This means both fingers are a semitone lower than your regular position.
C Major
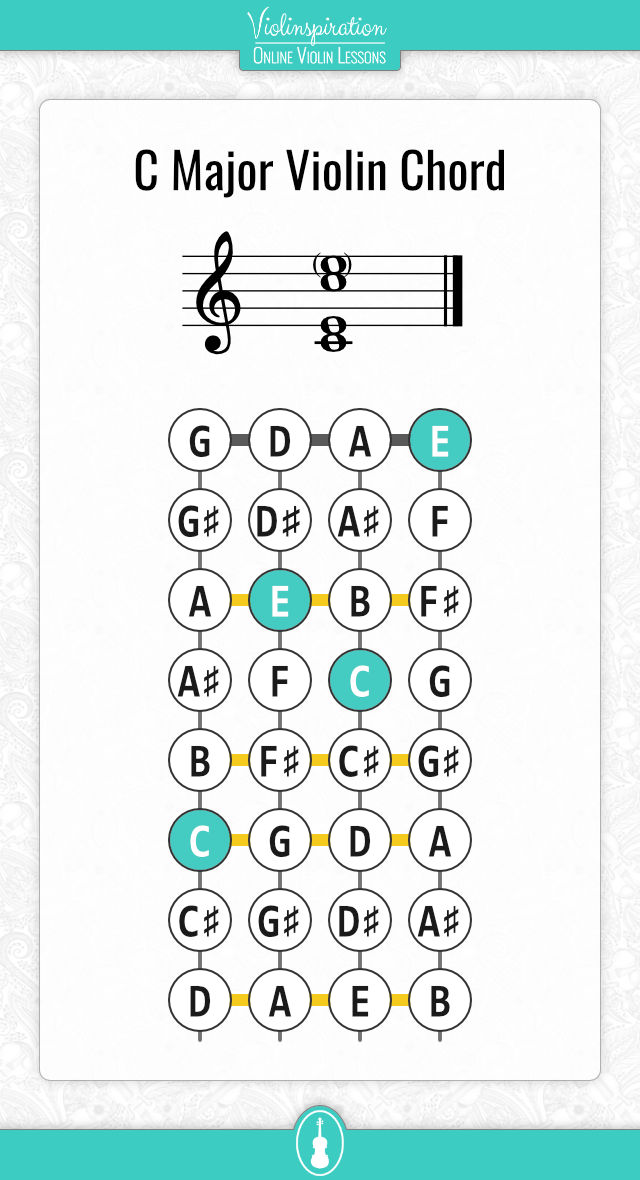
To play this violin chord, you will need to place the first finger on the D string in its regular position (E note), then place the second finger on the A string in a low position, near the first finger (C). Once you’ve done this, you move your wrist so that your third finger reaches the C on the G string. Some people will find this placing of the third finger quite hard, and sometimes the lower fingers want to move, so be gentle and don’t over-exert your hand. Let it get accustomed to this position gradually. Allow the hand to find the best angle for each finger, as this will be different depending on the relative lengths of your fingers. The E string is an open string, and the trick here is to make sure not to accidentally touch it with your left hand as you hold down the other notes because if you do that, this will muffle the sound of the E. When you have found the right position for each finger, pay attention to the shape and feel of the left hand. Ideally, you want the shape to be open and round, it shouldn’t collapse or grasp the neck of the violin. Also, you want your left hand to be as relaxed as possible under the circumstances because any gripping or over-tightness will give you pain and possibly injury in the long run. See if you can hold the notes while easing up the hand.
C Minor
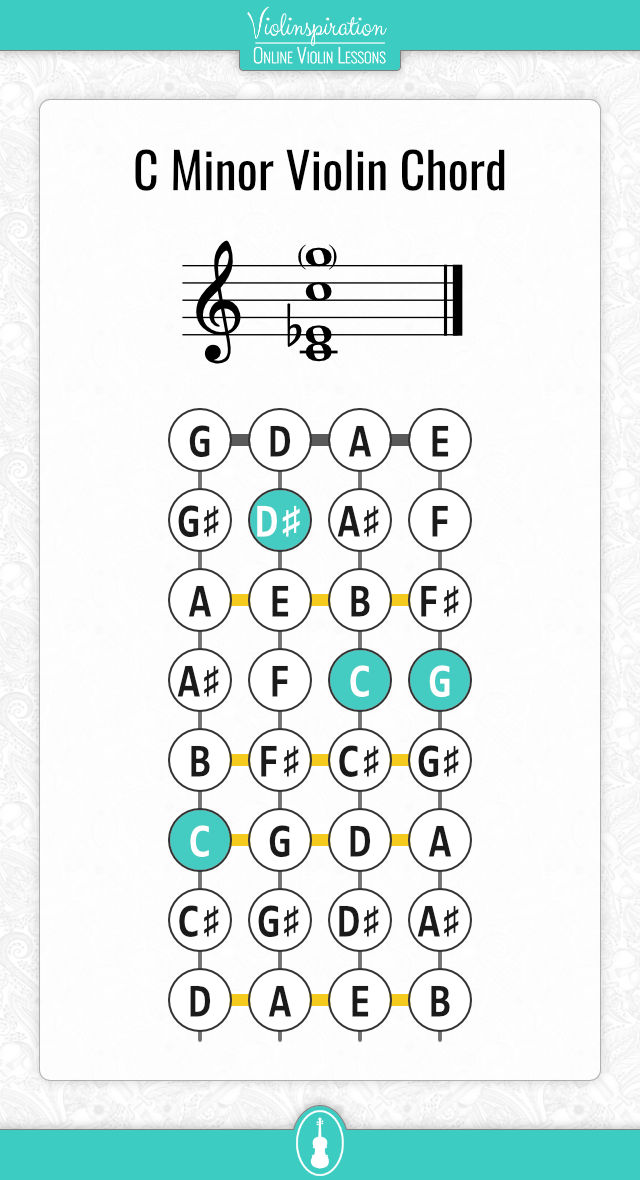
This is the hardest of the six chords here. This time you need to shift your first finger into a low position on the D string (D#). The third finger is still on the C note on the G string. The second finger stays in the low position on the A string, but now it shifts slightly to cover the E string also, in the same place. In other words, your second finger needs to stop two notes at the same time on adjacent strings – C on the A string and G on the E string. This chord is hard because the first and third fingers are stretched far from each other, while two strings need to be held down with the second finger, all at the same time. Please go easy on yourself and do not put too much stress on your hand. Do not try to get it right all immediately, but play two of the notes and then another two, and build up to playing them all. If you’d like to know what are the three steps to learning violin chords, make sure to check out my article “The Beginner’s Guide to Violin Chords.”
Bowing Technique for Playing Chords
You can use the bow to play chords in various ways. Simple methods would be to play the individual notes or divide the chord into double stops. However, there are ways of playing the entire chord as one unit.
Method 1 – Broken Chords
To play a broken chord, first you play the lower two notes as a double stop, then you play the top two notes also as a double stop. You do this in quick succession, to make it sound like all the notes belong together. To avoid a scratchy sound between the two double stops, lighten the bow as you change its position.
Method 2
Another common way to play up to four notes is by playing the lowest note first, (with a chord of four notes this would be on the G string), then the next note, and then settling on the double stop on the highest two notes. You do this all in one movement with the bow, quite fast, and it sounds as if you had played all the notes at once.
Method 3
This method works for chords of three notes only. You play the three strings all at the same time, pressing down on the middle string enough so your bow hair reaches the other two strings also. Doing this works better for chords made of lower tones, it may not sound that good with more delicate and higher-pitched chords that involve the E string. It is important that the pressure you apply to the bow is just enough for this, and if you hear scratchy sounds, you can try to speed up the bow. You always need to have enough speed for the pressure you’re using.
Final Note
Chords on the violin can add texture, complexity, and richness to your sound when played as part of a piece. You can also use your violin to accompany someone, and strum along to their singing for example. It can be fun to experiment with playing chords alongside solo pieces. Whatever you do, remember to have fun! For members of Julia’s Violin Academy only: remember to upload your video in order to get feedback with tips for improving your execution of the chords! If you didn’t download the guide with sheet music and charts of the most common violin chords yet, here it is again:

Violin Chords Guide


