If you have ever felt any tension while playing, read on and learn how to relax your left hand!
Your left hand is probably the most essential part of your body when it comes to playing the violin: it does most of the work yet the right hand is the one that produces the sound. As soon as it settles on the bow, your right hand “only” has to move the bow at the required speed and pressure, while your left hand has to deal with stopping the notes, shifting to different positions, vibrato, fourth finger extensions, etc. It is logical that your left hand or even your whole left arm might become stiff or tense after a while, and playing might seem difficult or tiring.
In this article, I’m sharing with you my best tips for relaxing your left hand, wrist, and thumb.
Why Is Relaxing the Left Hand Important?
Relaxing the left hand is very important for several reasons: a tense hand will make everything you do with your left hand much more difficult. Moreover, if you continue with a stiff hand, even after you start to feel a bit of pain, you might get injured.
So you need a relaxed left hand, otherwise:
- You might find it difficult to play in tune
- Shifting becomes increasingly difficult
- You won’t be able to do vibrato properly
- Your fingers won’t be able to extend much
- Possible injuries if you keep playing
- At the very least, playing will seem more tiring than it should be.
21 Tips for Relaxing Your Left Hand When Playing the Violin
You need your hands in perfect shape to play the violin so you should be aware of your left-hand tension at all times: before playing, while practicing, and also while you’re in the middle of a performance, as the tension might be produced at any time and be at different points, like your wrist, your first finger, or your thumb. Different circumstances need different solutions, so I’ll provide a few tips that will help you during any of those.
Before you start playing the violin
1. Warm up your hands before playing
Before even touching your violin you can start with some exercises that will make sure your hand is relaxed.
Super quick warm-up: keep both of your hands down and shake them a bit, as if you’re trying to repel the tension.
If you have a little bit of extra time, you can do my full stretching routine before and after your practice session – check out the video below!
2. Put your shoulders down
Check if both your shoulders are down while your back is straight. It’s a common mistake to raise the shoulder when positioning the violin, so be sure you’re not doing that.
3. Maintain the correct posture
Your posture is very important and it might be what helps you the most. Any tension around both your hands might be the result of bad posture, so check that before starting to play any note: keep your back straight, your shoulders down, and your arms at the correct height!
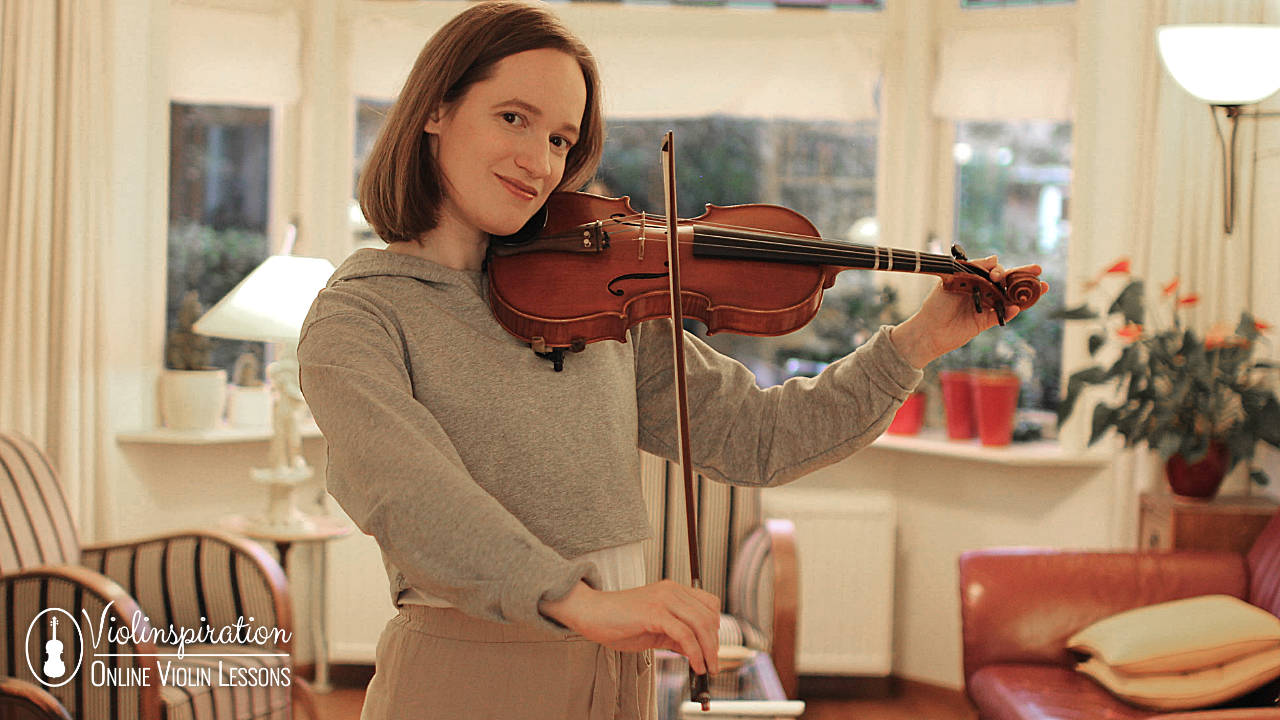
4. Doublecheck your violin hold
Related to the posture is how you hold the violin. Don’t push your head and your chin on the chinrest too much, just find the perfect spot that feels relaxed and natural. You can always experiment with the shoulder rest.
5. Learn to identify the tension
Do this exercise: without holding the violin or the bow, raise your hands at a perpendicular angle. Have them in what you perceive as total calmness and give this state a name (for example “cloud” or “cotton”). Then tighten them up as much as you can and give it another proper name (for example “iron”). Change between those two states of tightness and say the name you gave every time.
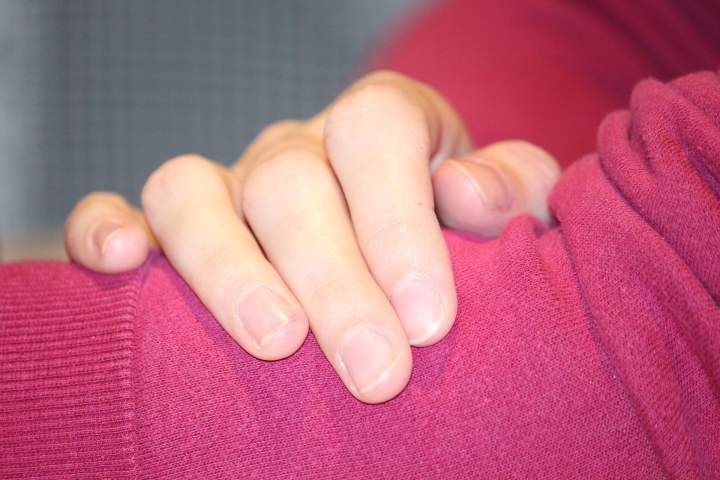
After a couple of times doing that, find something else in the middle, with medium tension. Try to add up to five states of tension. This will help you and your brain identify each time there’s unwanted tension.
While practicing
6. Start your practice session on an easy note
When you start practicing, the first thing you need to play is again a warm-up exercise. You should play something that is easy and relaxing for you.
Most commonly, violinists warm up with scales or Sevcik. The latter has a variety of exercises that will stretch your fingers so as to be ready to play. It’s much like sports, while it might seem counterproductive to get tired from playing scales, you need to warm up before something more challenging.
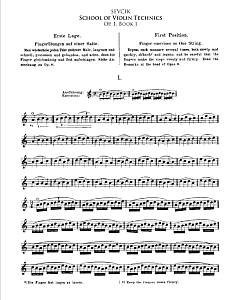
School of Violin Technics Op. 1, Book 1 by Sevcik
7. Don’t overdo your warm-up
Scales and dexterity exercises are important but don’t play too much of them to save your energy for other parts of your practice.
You can start with a 5-minute warm-up if you have a short practice session and take between 15 and 30 minutes in case of a longer session.
If you’ve never done that before, start with a very short warm-up and then extend that time. At one point, when this becomes a habit, your body will know when to stop.
8. Be aware of what you feel in the left hand
While you play, you should always be aware of your left-hand tension. The tension usually gathers around your first finger and your thumb. It’s natural since your first finger is the guide to the rest, and it always needs to be in place even if you stop a note with another finger (click here to read in detail about the left-hand position and role of each part of the hand).
So the point here is to observe what happens when you play and when you are starting to feel tension.
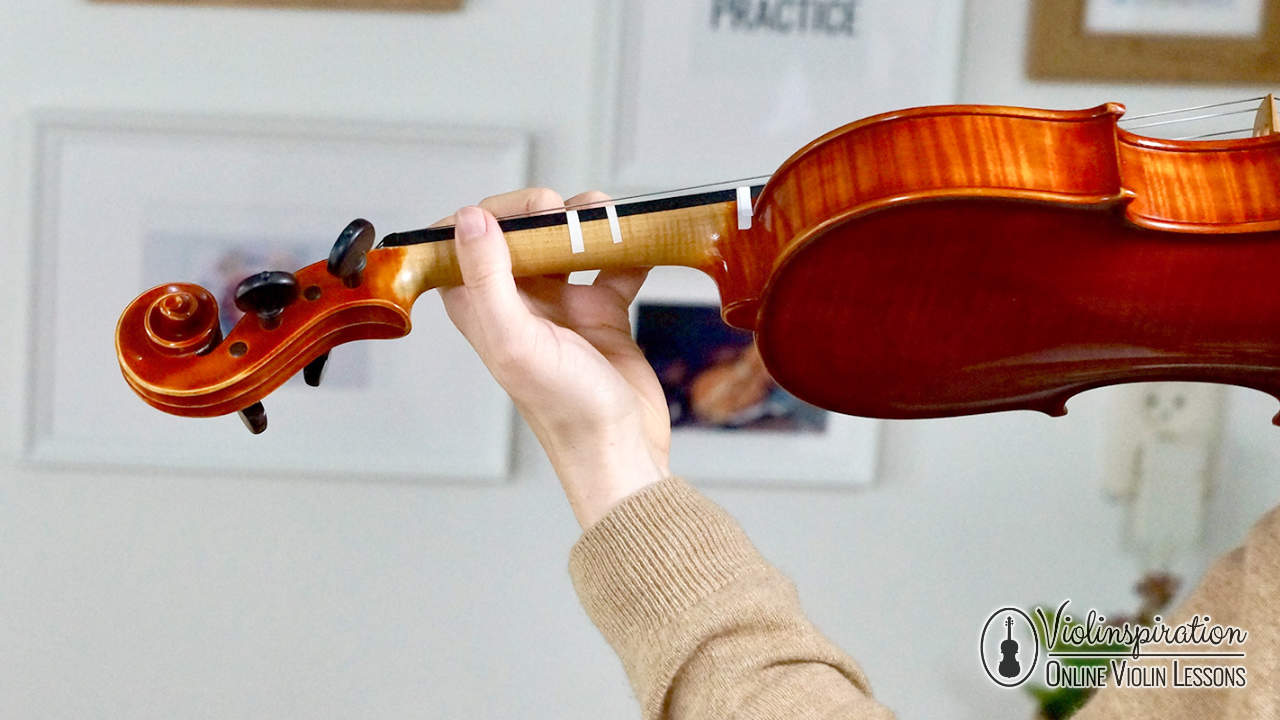
9. Make sure you don’t clutch the first finger and the thumb
There should be a space between your first finger and your thumb. If the base of your finger (at the knuckle) curves inside close to your thumb, it will definitely create unwanted tension.
10. Don’t push too hard
Don’t push your fingers too much when you stop a note. You should feel the whole weight of your arm focused on your fingertips, so come down strong, yet agile. They should feel soft and light, and not like hammers hitting on the strings of a piano.
11. Relax the first finger
Each time you bring a finger down remember to “calm” your first finger – while keeping it down, try to release the small muscles.
You can practice that by playing very slowly, focusing on the movement of your fingers, then speeding up the tempo a bit.
12. Take breaks
This might seem counterproductive, but it’s also important to take breaks.
For most people, it’s better to take small breaks every once in a while, but if you think that you lose focus this way, take a bigger break after e.g. an hour of studying.
Please remember that there’s no right way, you should find what is best for yourself, but do stop for a while sometimes. Not only your hand tension will temper, but you’ll be able to eliminate fatigue.

13. Use a mirror to correct your violin hold and posture
Use a mirror during your practice. It will help you with improving your posture and violin hold.
Alternatively, when standing in front of a mirror and playing isn’t possible, you can use e.g. a camera on your phone to record yourself and then check if your posture was correct.
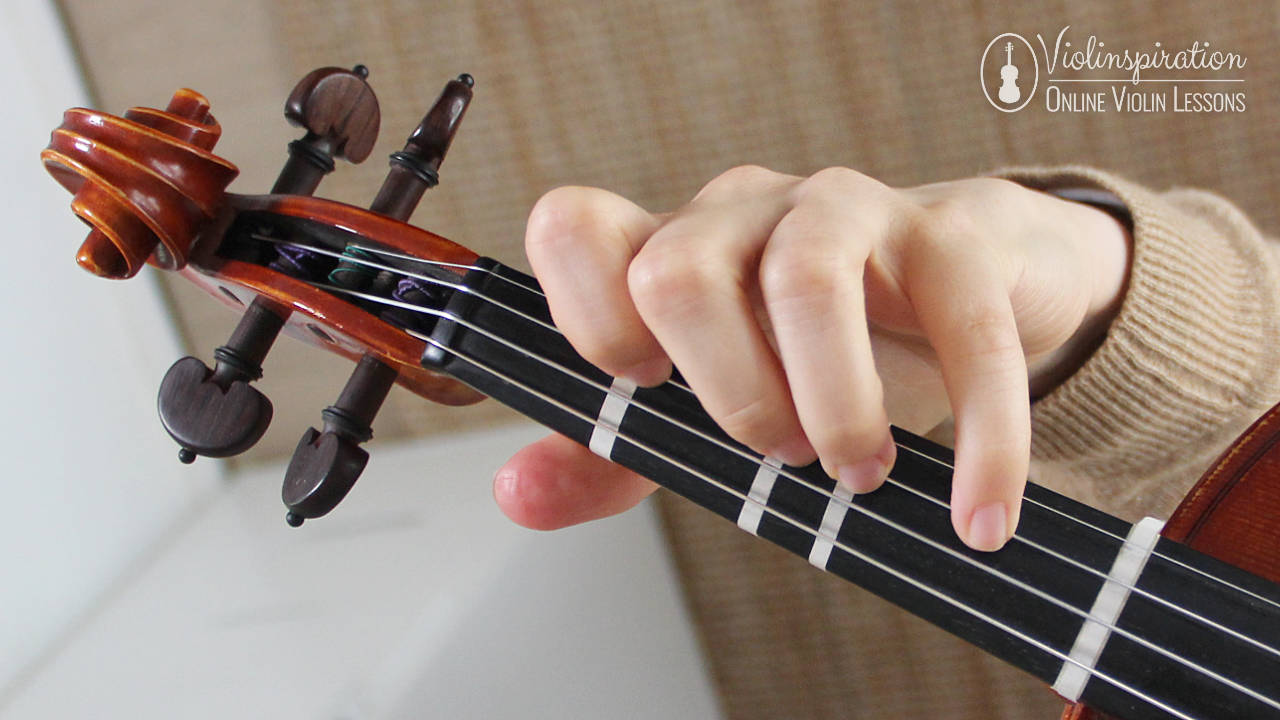
14. Choose a comfortable spot on your finger to press the string
You can always experiment a bit with the way you press strings. Check if playing less on your fingertips and a bit more on your fingerpads helps you ease the tension.
You don’t have to apply this change to all fingers equally, just to feel more comfortable but not touch other strings (when not needed).
15. Reset your position
Muscle memory can be tricky and you don’t know what old bad habit might resurface. After finishing with an exercise, reset your position and check again if everything is as it should be.
After Practicing
16. Cool down after practicing
You’ve done practicing but your job is not done yet! Do some stretching if you feel your hand hurts. You can do my stretching routine once more, this time to cool down.
17. Know when to stop
Remember to stop if your hand hurts! Don’t ignore your pain, take a break or stop for the day.
I know how it is to study a difficult passage and it still won’t sound as it should. Sometimes the best thing to do is to stop practicing, and the next day it will “magically” sound better. It’s because of fatigue, and your hands are probably tired. You don’t need to damage your hands or play with a stiff hand so it’s better to stop and start fresh the next day.
Before Performing
Whether you’re going to play in front of family, friends, take part in a monthly Member’s Recital (Julia’s Violin Academy members only), or play for the public, there are a couple of aspects that you should take into account.
18. Plan your learning in advance before a performance
This is in a way supplementary to the previous tip. Yes, you need to take breaks and stop if you’re feeling fatigued. However, check your schedule and organize your practice in a way that you have enough time.
If you’re experienced enough, you know how much time you might need to have something ready so don’t try to rush things at the last minute because it will only create more tension. And most likely you ain’t gonna do much progress.

19. Don’t get tired before the performance
A warm-up and rehearsal before performing are similar to those you’re doing when studying with an important difference: don’t overdo it! You don’t want to feel burned out by it, especially since the time you’re performing is usually less than the time you spend practicing.
20. Learn to deal with stage fright
During a performance, due to stage fright and general nervousness, your hands will become more tense than usual. Be aware of that and try to keep calm and rest your hand as much as possible.
Click here and read my best tips for combating stage fright.
21. Calm your muscles during a performance when playing easier parts
Try to find small breaks during a piece. Do you know those difficult passages that stiff your muscles? Before and especially after those there is probably some rest, and it is followed by an easier part. Use those easier parts as a resting point and try to calm your muscles during those, as it is almost inevitable that your hand is going to get stiff on the difficult part.
Of course, all other pieces of advice apply also to the performance.
How Do You Relax Your Thumb When Playing the Violin?
While probably your index finger is the one that is getting stiff, your thumb also gets a lot of tension. Keep your thumb relaxed as much as possible, and your index finger will be more relaxed too!
1. Adjust the thumb position
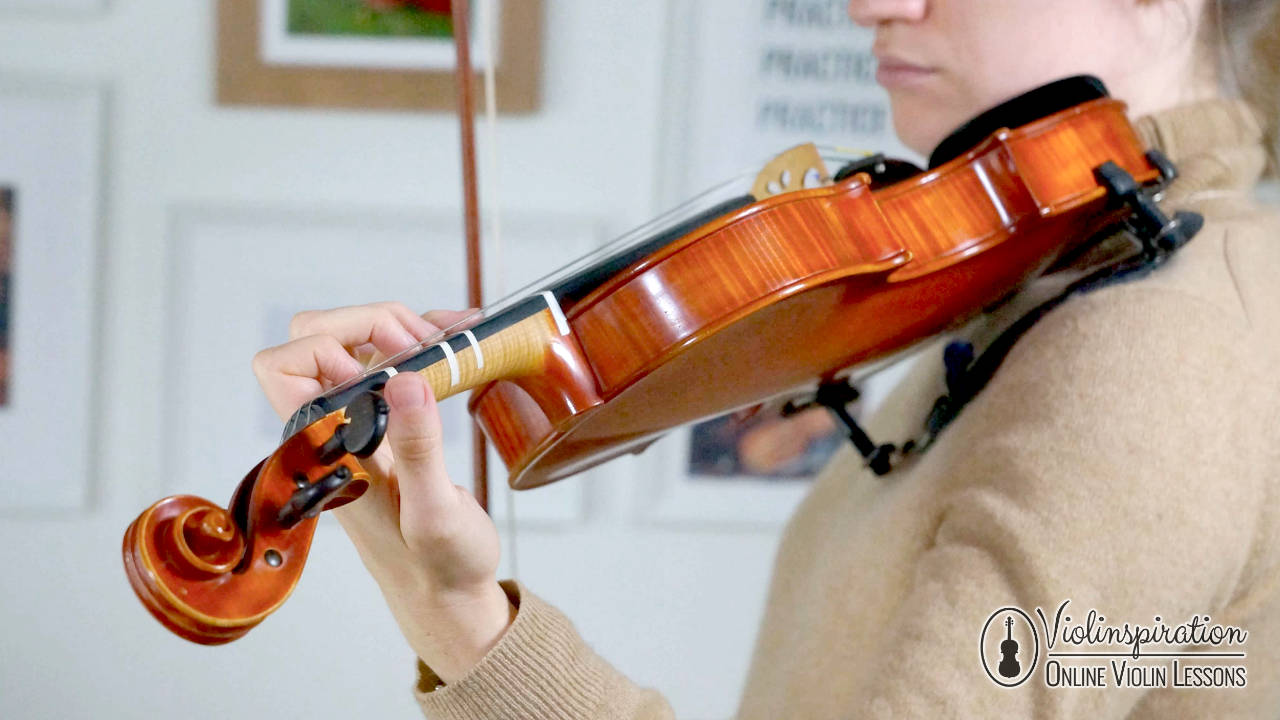
Start with your posture. Some people insist on where exactly the left thumb should be, not higher than the fingerboard, but don’t concern yourself too much with that. Of course, too high up will create problems, as well as too low. But if for some reason you feel comfortable in another position (a bit higher or lower the fingerboard), and your fingers don’t get stiff, keep it at that point.
2. Do a short thumb exercise
Of course, most of the tips for fingers can be applied to your thumb. However, you can also try to tap it (along with your other fingers) every time before starting a new exercise. Just tap the thumb on the fingerboard 3 or 4 times. This will release the pressure, as well as make you aware of the tension level.
3. Don’t hold the violin with your left hand
Keep in mind that your left-hand thumb’s work is to provide support, not to hold the violin. Try to play with your thumb away from the fingerboard. That won’t be very easy and it might create some tension by itself, but it will help you understand how you hold the violin properly.
How Do You Relax Your Wrist to Play the Violin?
While usually you should not move your wrist while playing, it should be free and relaxed. Many students in order to keep the left-hand posture, concentrate the whole tension on the wrist. However, it should be free and flexible, in case you’d like to add vibrato or shift to different positions.
1. Detect tension in your wrist
When you reset after an exercise, make some gentle round moves with your wrist. This way you should be able to notice any tension. Also, some wrist vibrato exercises might help you.
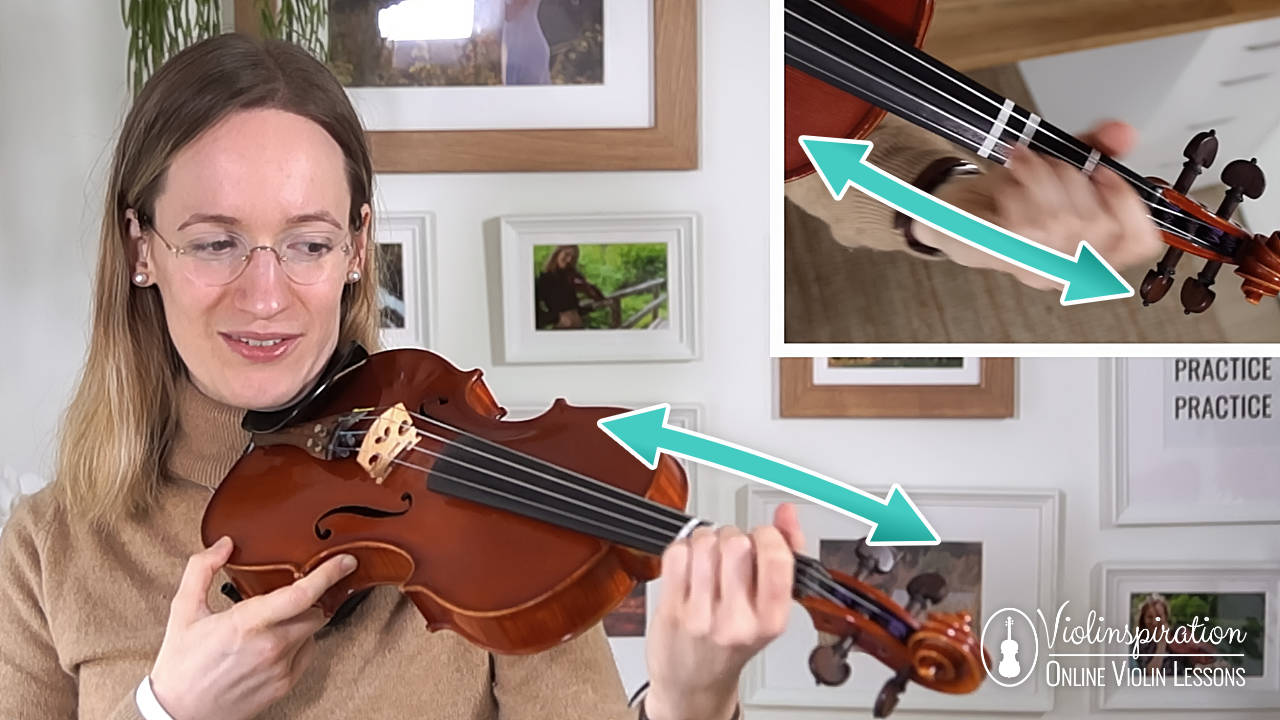
If the wrist can’t move easily, it is definitely tense enough.
2. Relax the wrist while playing
Resetting is very important, so don’t be afraid to do it between pieces or during a piece, even during a performance. If you notice that your wrist is tense while you’re playing, try to calm your hand as much as possible. Find a pause where you can remove your hand from the playing position, and you can shake it a bit.
3. Be careful with your wrist movements
Do not do any sudden moves with your wrist as this may damage it. While synovitis is not as common among violinists, as it is among pianists and guitarists, since you use your wrist a lot, there is always the possibility that you might injure it. So be careful with your moves. If your wrist ever starts to hurt, stop for a while, do some light massage and avoid abrupt moves!
4. Don’t play with pain
Most importantly, and this might be the simplest advice, don’t play the violin right after you’ve done anything that made your hands stiff, or while you feel pain! It’s never a good idea to play right after you wrote a huge essay, or played sports. Be calm first, give it a while, and then go forth!
Final Note
Keeping your hands in a good shape and out of harm is maybe the most important not strictly musical thing a violinist should do. Hand tension might affect not only your notes and the quality of the sound, but might tire you more than it should. By following these pieces of advice and your own experimentation you should be able to have a relaxed left hand that supports your violin playing.
If you’d like to study further the aspects of the left hand in violin playing, make sure to also check out my video about left-hand hold mistakes and how to fix them.


