The violin bridge is an essential part of your instrument. In fact, it’s easy to spot its presence in all instruments in the violin family: violin, viola, cello, and double bass. The bridge basically makes them all work as intended, but it might be overlooked until it causes some problems.
Above all else, the bridge is integral to the sound of your violin. Its placement and fitting will affect the tone of the music and your overall ability to play the instrument.
Let’s take a deep dive into the topic of the violin bridge. This article covers all aspects of this element, from its purpose and features to how to properly angle it to achieve the best sound.
What is a Violin Bridge?
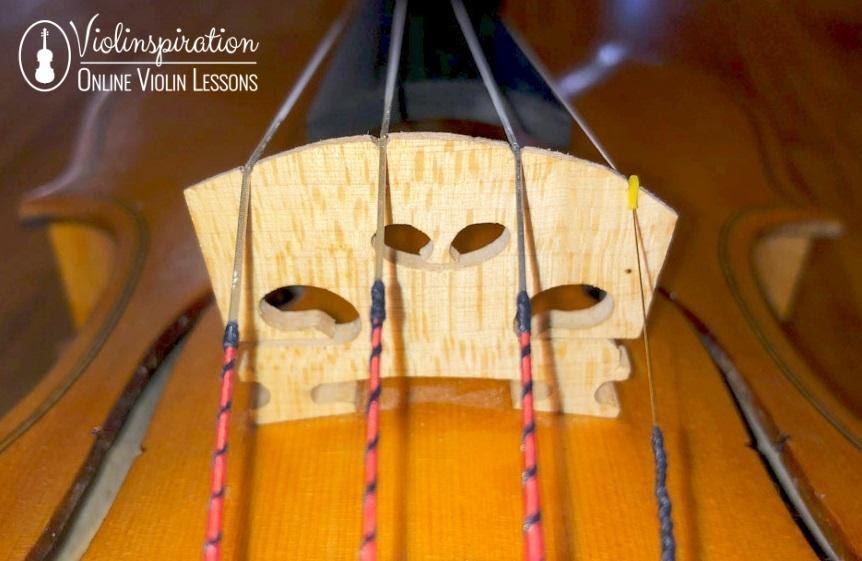
A violin bridge is a maple piece that sits atop the violin and lifts the strings above the fingerboard in a way that allows you to play both single notes and double stops. It transmits the string vibrations to the soundbox (body of the violin).
More specifically, the bridge is situated on the top plate so that the bass foot of the bridge (on the G string side) is directly above the violin’s bass bar. The bridge’s E-string side sits near the violin’s soundpost. The top of the bridge — also called the bridge’s crown — should have the same curvature as the violin’s fingerboard. The shape and setup of the bridge can change the sound of your violin almost as much as the soundbox can.
What is a Good Bridge for a Violin?
The best violin bridge is always straight with a dense wood grain. The wood should come from a maple tree that stands between 5 and 15 meters high and is around 200 years old. Additionally, the wood should be seasoned (dried in proper conditions) for at least 5 years.
On a beginner violin, the bridge usually has a chunky cut that is often too thick to produce the vibrations needed to yield a clear sound. Ironically, this can in fact make a beginner violin more difficult to play.
A good violin bridge is thin, providing the ability to transmit vibrations most effectively. Some bridges are carved out of wood that has been seasoned for 10 years or more.
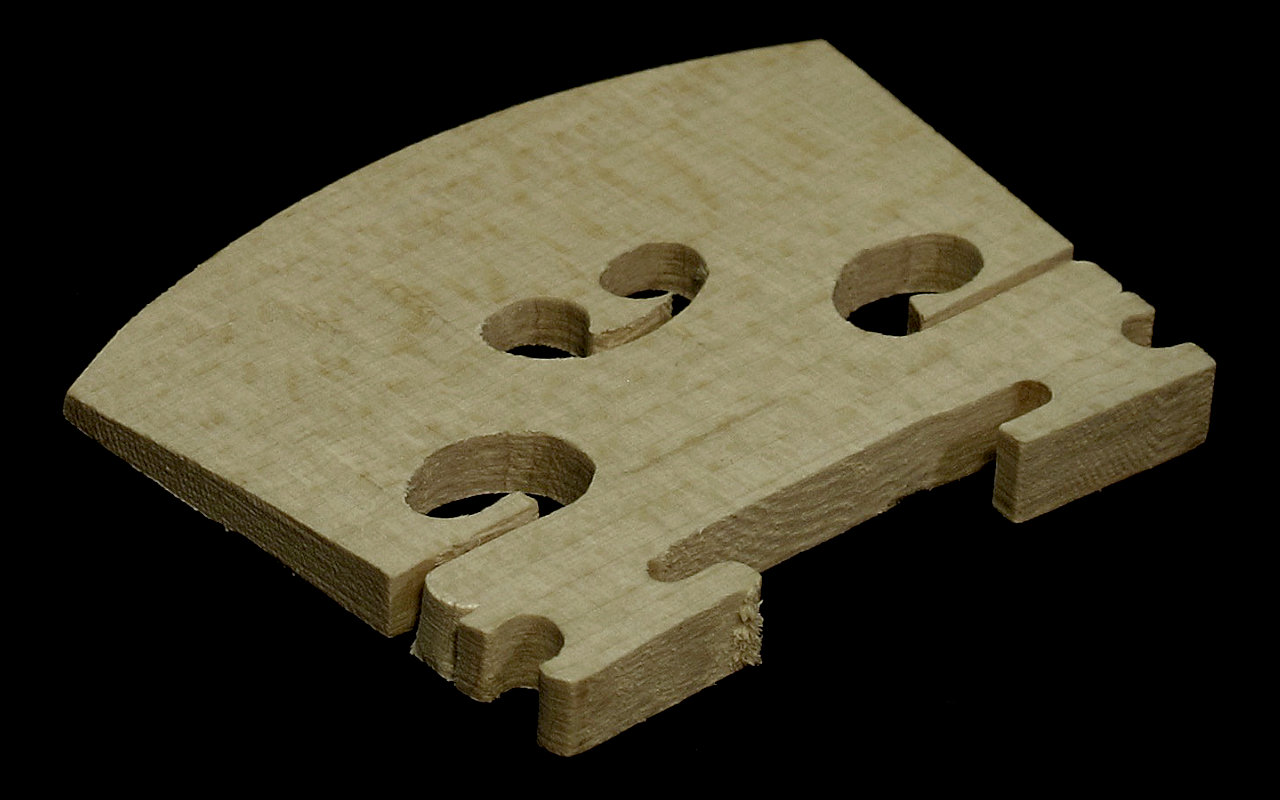
The bridge is born out of an unshaped, blank design. As violins come in all shapes and sizes, you’ll find that bridge size varies accordingly: with a “standard” version usually 41.5 millimeters wide. Different sized violins will each need their own unique bridge.
Violin Bridge Fitting
Bridge height, shape, thickness, and placement are essential to maximize the sound quality of your violin.
When looking at the instrument, you’ll see that the bridge occupies the center and is located a few centimeters below the end of the fingerboard — holding the strings above it and guiding them to the tailpiece.
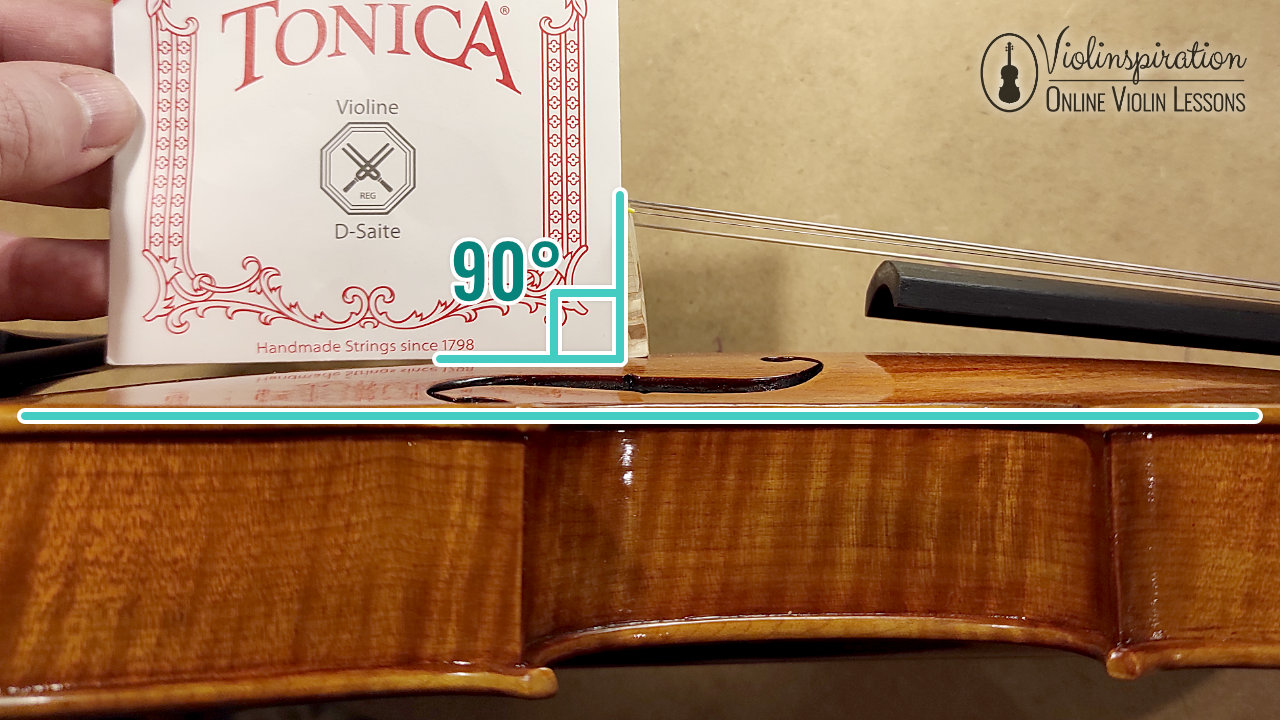
Your violin bridge should be well-fitted to suit your instrument. It should stand at an exact 90-degree angle between the top plate of the violin and the side of the bridge that faces the tailpiece. The bridge feet should adhere to the top plate of the instrument to transmit vibrations most efficiently.
Tension created by the strings holds the bridge in place, meaning that no glue is involved. The correct fit should keep contact between the feet of the bridge tight against the belly of the violin.
In the event that the bridge moves back or forth, it will change the sound produced accordingly. If you experience this, you may notice that the sound becomes muted. I include helpful tips on how to fix this problem later on in the article.
In general, it’s always a good practice to take your violin to a luthier to ensure that the bridge is properly shaped and fitted, as no two violins are exactly the same.
Location of the bridge feet
The feet of the bridge are centered on the violin’s f-hole notches. This placement helps maintain the tension of the strings, keeping their height consistent.
When placing the feet of the bridge, they should sit flush against the body of the violin. A mark on the varnish will usually indicate where they were placed previously. If you’re fitting the bridge yourself, you’ll want to return it to the location of the footprints on the varnish of the violin’s belly.
On an older violin, varied marks on the varnish will show the history of bridge placement — making it more difficult to find the best spot to place the bridge feet. In that case, it’s worth visiting the luthier at your local shop to get some help.
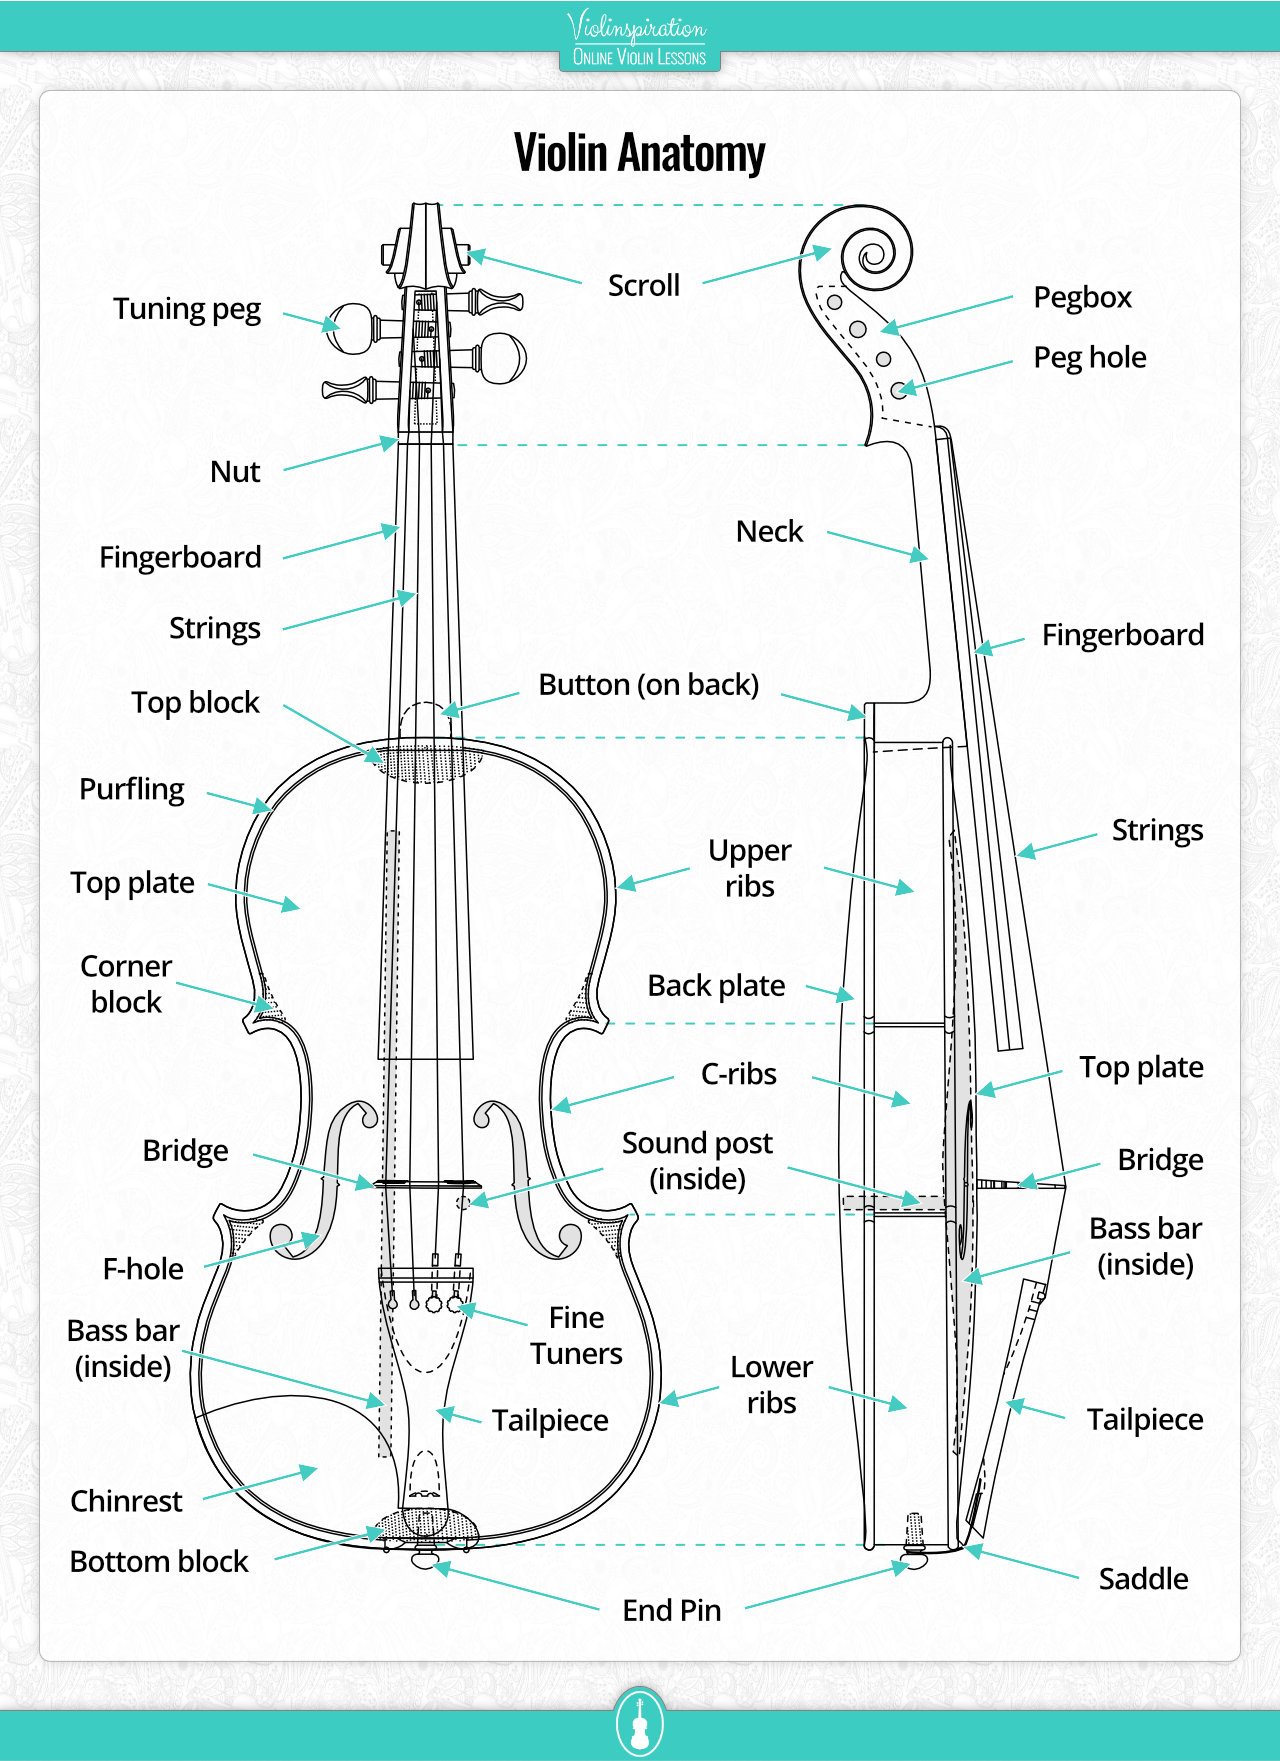
Violin Anatomy
Set of 3 Posters
4 Tips on How to Fix a Bridge
As a violinist, chances are that you’ll have to repair the bridge at some point, and common problems will most certainly pop up with everyday use. Ensuring your bridge remains in good condition involves keeping an eye on the f-holes, top plate, and fingerboard.
Most importantly, if you need to but are unsure of how to repair your bridge, it’s worth seeking the help of a trained luthier.
In some cases, you can fix the problem yourself. The bridge may have fallen over or perhaps moved if your violin knocked into something. Therefore, let’s take a look at four tips that will help you fix the bridge on your own.
Re-fitting the bridge
Start by lightly loosening the strings to add more space between them and the top plate. Gently place the bridge in the proper location between the notches in the f-holes. Then, slowly tighten the strings one by one, ensuring that the bridge is in the correct spot and remains perpendicular to the top plate.

Straighten the bridge
Tightening the strings while tuning the instrument will cause the bridge to move towards the fingerboard. This can lead to the bridge becoming warped over time or the entire bridge slightly leaning forward: in which case the feet may not sit flush against the top plate while remaining in the same location. You can fix this by pushing the entire bridge towards the tailpiece in a slow, gentle manner. Once the bridge is straight and sits at 90-degree angle, repeat the tuning process.
Don’t change the strings all at once
Believe me: you don’t want to change your strings all at the same time. This process is a fine art, and you should swap them out one at a time — always keeping a close eye on the position of the bridge.
As you tune each of the strings, make sure the bridge doesn’t start to pull forward. If you’re not careful, it can bend or even break, while the soundpost might fall — causing additional problems.
Know when to seek professional help
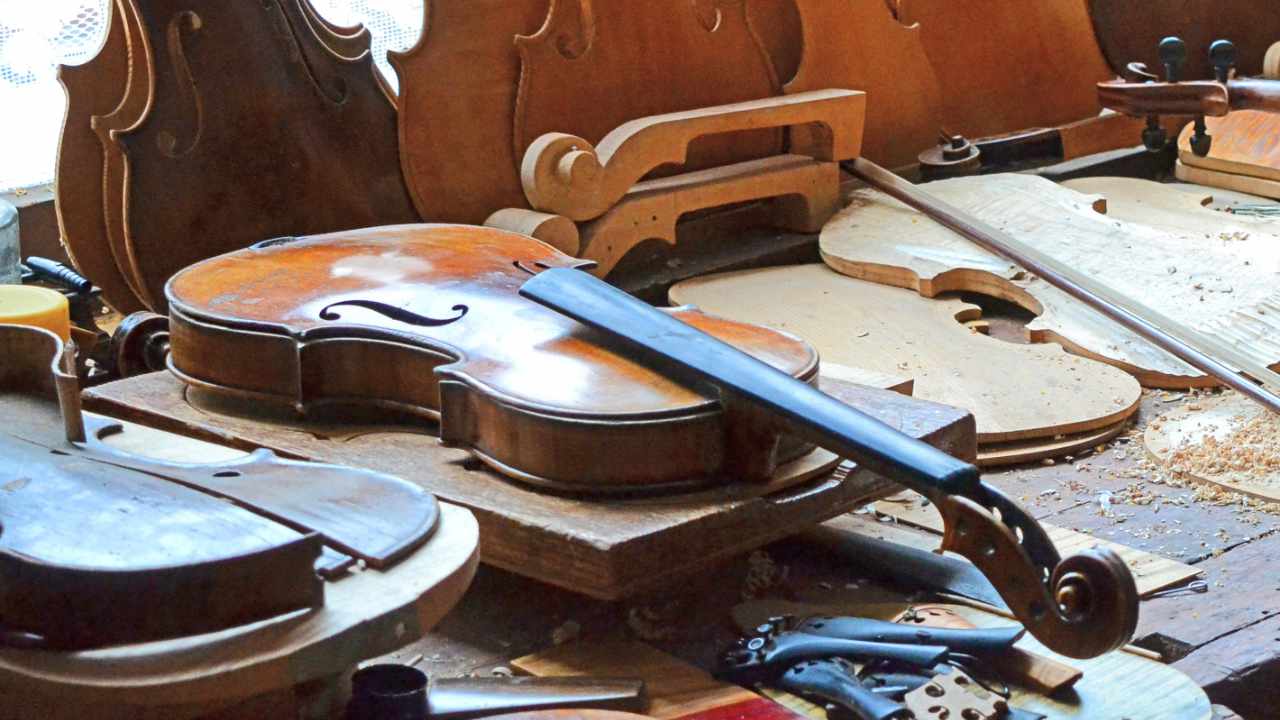
If you lack experience in tinkering or have a higher-quality violin, it’s worth asking a luthier to perform any adjustments. While moving the bridge might seem like a simple task, it’s just as easy to break or damage it.
If you buy your violin online or from a second-hand source, the first thing you should do is bring your new instrument to a luthier. He or she will ensure that the bridge — as well as the soundpost — are in the best position for your instrument to produce beautiful music.
When in doubt about adjusting the bridge on your own or enlisting the help of a luthier, seeking professional assistance is always your best bet. You don’t want to risk making an expensive mistake or even damaging your violin by shaping or adjusting your bridge incorrectly (unless you yourself are a luthier). Most violin shops boast an in-house luthier who will help you do this.
Professional Violin Bridge Repairs
While you can DIY and repair some bridge issues yourself, other circumstances will require professional help. In that case, you can contact customer service at the shop where you purchased your violin, and they will often happily recommend the best professional bridge repair service for your needs. Conditions requiring this include:
- A warped bridge
It must be replaced to avoid completely breaking your violin. - Strings that have worn into the bridge’s crown
The standard rule is that 75% of the violin string should reside above the top of the bridge (rather than inside the notch). If the string sits further into the bridge, it creates a muffled sound. - A bridge that has fallen down
It may result in the soundpost rolling inside your instrument. The soundpost is necessary to support the pressure of the strings on the top plate via the bridge.
Frequently Asked Questions
When it comes to string instruments, the bridge is a feature most people overlook or don’t fully grasp the importance of. Proper maintenance of this piece can save you the cost of an expensive repair.
Here are some FAQs about violin bridges, the answers to which every violinist should know.
Does a violin bridge really make a difference?
Yes, various aspects of the violin bridge really do matter: its thickness, shape, fit, and wood used to make it (as well as how long the wood was seasoned). These features affect how vibrations are transmitted and in turn impact the sound produced.
Moreover, if the bridge is out of place or the curvature of the bridge’s crown is flawed, it can be difficult to move your bow across the strings or play a single note rather than a double stop or chord.
What does the violin bridge do?
The bridge lifts the strings above the fingerboard, guiding them to the tailpiece and carrying the vibration of the strings to the soundbox — or the violin body — where they are amplified. This process transforms vibrations into the sounds we ultimately hear.
How much does it cost to replace a violin bridge?
The price depends on the condition of the bridge. The piece itself will usually cost anywhere from $10 – 80, and you can expect to pay around $25 to refit or fix a warped bridge. However, a larger investment may be required if the quality and condition of your violin are below average.
As with anything, you can expect a higher price tag for a high-quality bridge.
How long does a violin bridge last?
Bridges can last a lifetime with proper care. If you thoughtfully look after your bridge, its lifespan can mirror that of your instrument. In fact, you’ll often find vintage violins that have a perfect bridge.
Bridges can naturally become warped over time. As soon as you notice that your bridge is no longer at a 90-degree angle, it’s time for a repair or replacement. Keep an eye on the line in the varnish that shows where the bridge typically sits. If you see signs of movement, readjust the bridge accordingly.
Can a violin play without a bridge?
No, a violin cannot play without a bridge. It is is impossible because the bridge is needed to lift the strings up above the fingerboard and transmit the vibrations to the belly of the instrument. A violin without a bridge is merely a dull soundbox.
Conclusion
While a violin bridge is a simple part made of maple wood, it has a fundamental impact on the sound of your violin. Yet, it’s so easy to overlook this crucial feature.
As a violinist, you want to keep an eye on the placement of your bridge. If it shifts from its proper 90-degree angle, it’s time for a repair. While you may be able to adjust the bridge yourself, remember to do so carefully — as applying too much force can bend or break the bridge.
Also, remember that anything from the humidity in the air to changing your strings can affect the violin bridge. As you remove your violin from its case, take the time to closely examine the condition of the bridge.
Maintaining this vital part of your instrument is key to ensuring the lifespan of your violin and the quality of sound produced. As such, relying on professionals to expertly fit your bridge is worth every penny.

Violin Anatomy
Set of 3 Posters


