In this article, I would like to tell you everything about octaves on the violin, as well as share with you exercises that will help you master them.
This is a bit more difficult topic than what I usually explain. I recommend learning to play octaves for intermediate players and students who are familiar with double stops and shifting through positions to gradually feel comfortable playing them.
Here are exercises that will help you, and below I highlight all the difficulties you might encounter. Read on and find examples of famous pieces that use this technique that every violinist wants to perform!
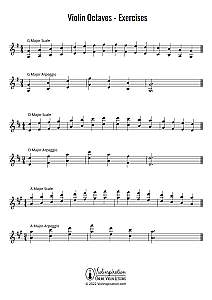
Violin Octaves Exercises
What is an Octave?
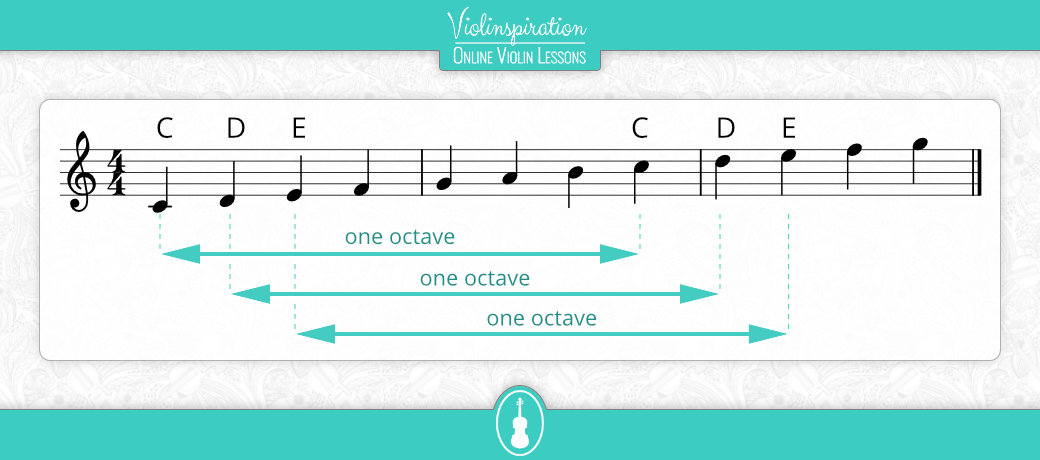
An octave is an interval between a note and the same one seven notes above or below it. In physics, you could say that the second note has double the original’s frequency. Counting from the root it includes eight consecutive tones, hence the name which derives from the Greek οκτώ (októ) which means eight.
To put it simply, if you play C on the G string and then C on the A string, that’s an octave. In music theory, this is called a perfect eight, but augmented and diminished eighths can be found, though rarely.
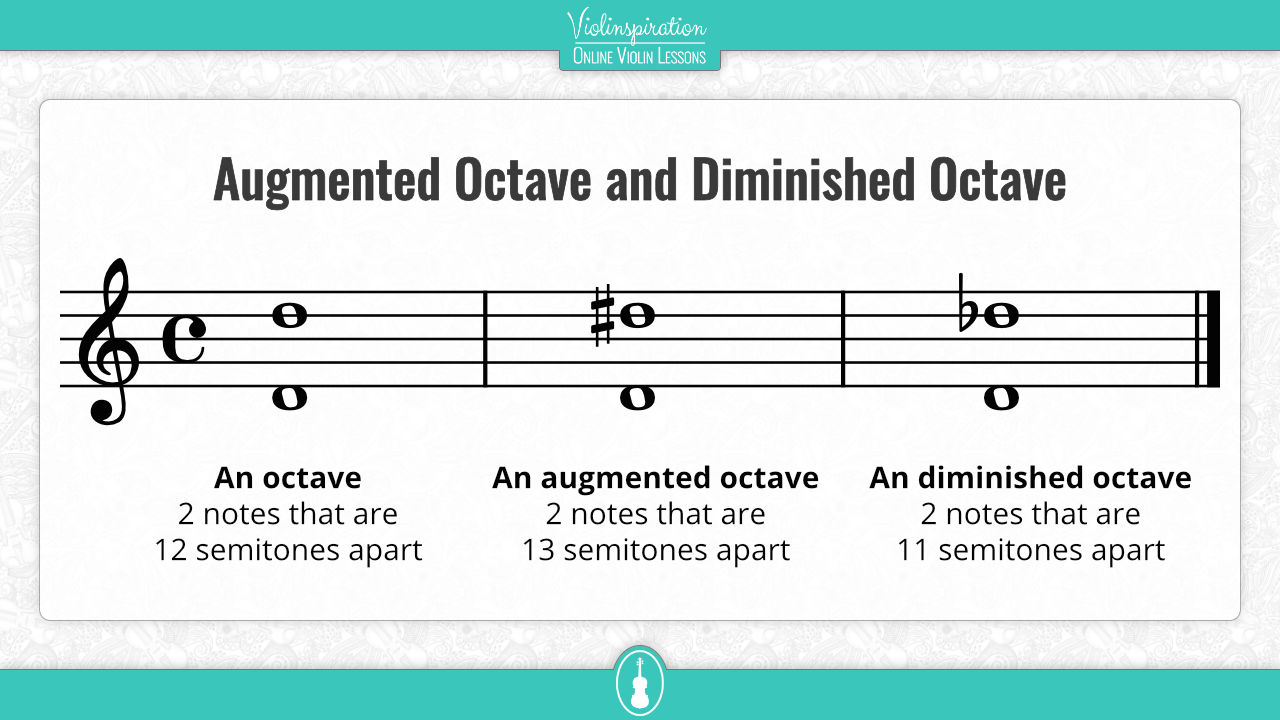
One octave consists of twelve semitones or half-steps. An augmented octave is when there are thirteen semitones (e.g. between C3 and C#4). A Diminished octave will have only 11 semitones (e.g. between C#3 and C4).
Can a Violin Play Octaves?
When talking about playing octaves on any instrument, we usually mean playing two notes that are one octave apart simultaneously. It’s a technique also known as double stops which you get familiar with after learning all the beginner skills and gaining a bit of experience in playing.
Double-stopped octaves can be played on a violin by stopping two strings usually with your first and fourth fingers. You can also use the open string on the lower string and the third finger on the upper string.
Sometimes you might need to use your first and third fingers (instead of the fourth), and then your second finger and your fourth if the octaves are in succession and in higher positions.
The open string and third finger octave (or first finger, if you are in the third position) is very common and can be used by beginners too – it’s helpful for finding the good intonation of the third finger. It’s very easy, as you just have to figure out the position of one finger in relation to the sound of the open string. Sometimes advanced students neglect to use it, and while there might be a reason not to do so (open strings sound different and might disrupt the flow of a phrase), it’s not a mistake to sometimes check if your intonation is correct.
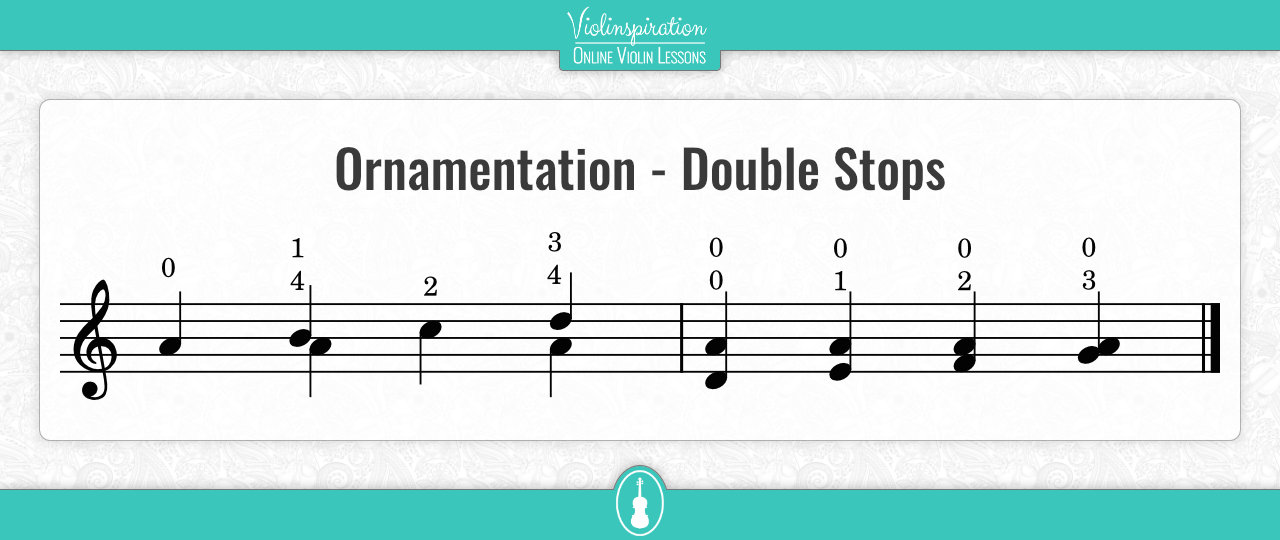
Moreover, octaves can be used as an ornament in fiddle music! Have a look here to learn more about it.

How many octaves does a violin have?
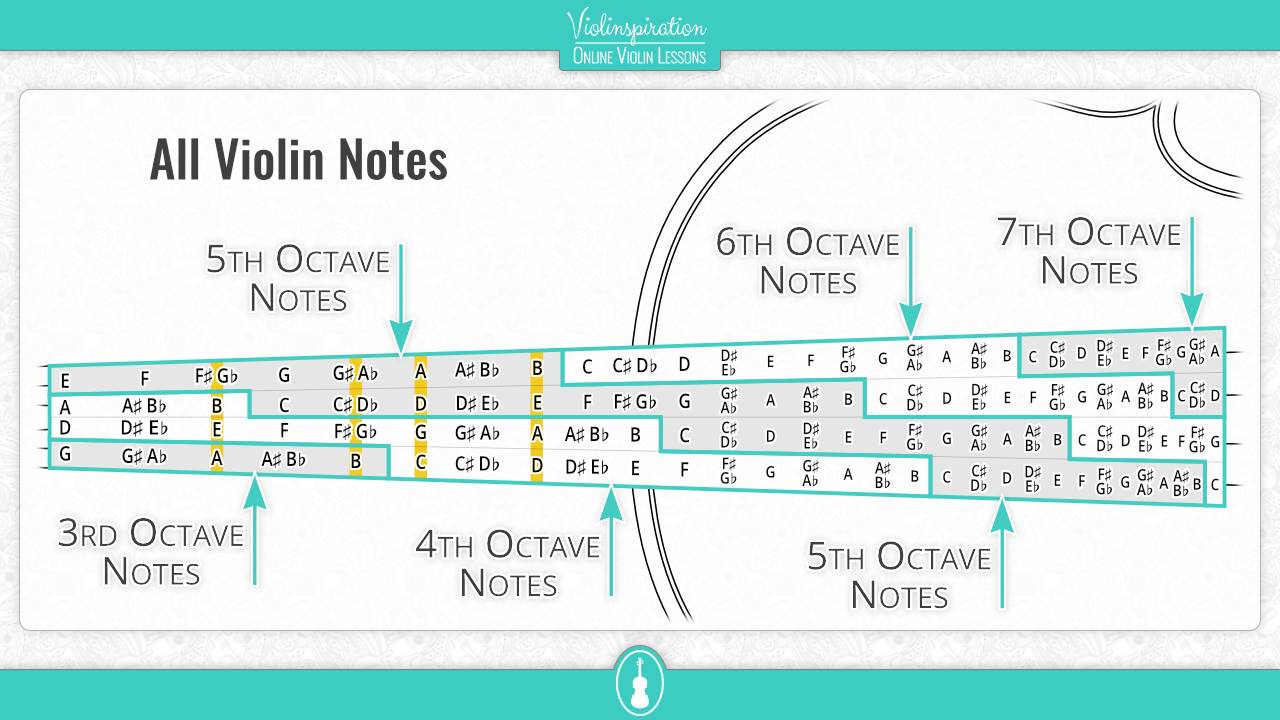
The number of octaves that an instrument has refers to the range between the lowest and the highest note that can be played.
Moreover, the pitch of every note has a label. Usually, we start from C0 (16.35 Hz) up to B10 (31 608.53 Hz), although frequencies below C0 have also been specified. All notes that go after C0 will also get a “0” – D0, E0, F0, G0, A0, B0 – and together they are called the zero octave. Then comes the next C note, this time it is called C1 (32.7 Hz), and all notes follow the same naming pattern: D1, E1, etc. This time they are called the first octave. This labeling system is known as scientific pitch notation, international pitch notation, or American standard pitch notation.
Violin has four octaves and 2 notes, starting from G3, the open G string in the third musical octave, to A7 on the E string. Though A7 is rarely used and only in the advanced repertoire, it’s possible to reach even higher.
If you’re curious about it and want to know more about the violin range, make sure to read this article.
Examples of Violin Octaves in Pieces
Now, let’s listen to some examples of double-stopped octaves in classical music.
Max Bruch – Concerto No. 1 in G minor, Op. 26
This piece is among the most well-known concertos in the violin’s repertoire. While Bruch was considered a conservative composer, in this concerto he omits the introductory orchestral exposition, a mainstay of the classical period.
While this piece has several double stops throughout its runtime, the first instance starts at 02:32, and there’s another example at 02:43.
Bruch – Violin Concerto No. 1
Free Violin Sheet Music
Niccolò Paganini – 24 Caprices for Solo Violins
The 24 Caprices are the crown jewel of the violin repertoire, as basically every violinist wants to perform them, at the very least one of them. They are considered some of the most virtuosic pieces for the instrument and are some of the most celebrated.
It has several instances of the octave technique but I would like to focus on No. 17, as I really enjoy it! As you can see in the sheet music, at 01:37 there are rapid successions of octaves, which are all in high positions. It is suggested, assuming you have long fingers, to play them with 1st – 3rd, 2nd – 4th fingers.
Other prominent instances of using the technique are Caprices Nos. 3, 7, the intro of 8, 15, the intro for 19, and 24 variation 3.
24 Caprices by Paganini
Free Violin Sheet Music
How to Play Octaves on a Violin?
Here are my best tips for you on learning how to play octaves on a violin!
Explanation
1. Get familiar with playing double stops
If you’ve never played double stops on your violin, the first step is to learn to play on two strings simultaneously. You can use the following resources:
- How to Play Double Stops on Violin – Beginner’s Guide
- Free Violin Double Stops Chart [PDF]
- Improver level 4 – Julia’s Violin Academy members only
- Improver level 5 – Julia’s Violin Academy members only
2. Choose the fingering
Usually, the fingering will be in your sheet music. If for some reason it wasn’t added, have a closer look at the notes and pick the fingering that feels to you most suitable:
- open string and third finger (alternative: first finger in the third position)
- open string and fourth finger
- first and third finger
- first and fourth finger
- second and fourth finger.
3. Practice!
Playing octave is not an easy task so pick exercises and pieces that look doable for you and also, give yourself a lot of time to practice.
If you’re unsure what exercises will help you, read on to find out what are my recommendations!
Daily Violin Octave Exercises
Here are some exercises that will greatly help you master playing octaves:
Learn where are the higher notes on the violin
When learning to play octaves, you need to reach notes that are located higher on the fingerboard. To get you started, learn the most common advanced scales that span over three octaves. While playing these scales you’ll get familiar with the notes’ location and sound.
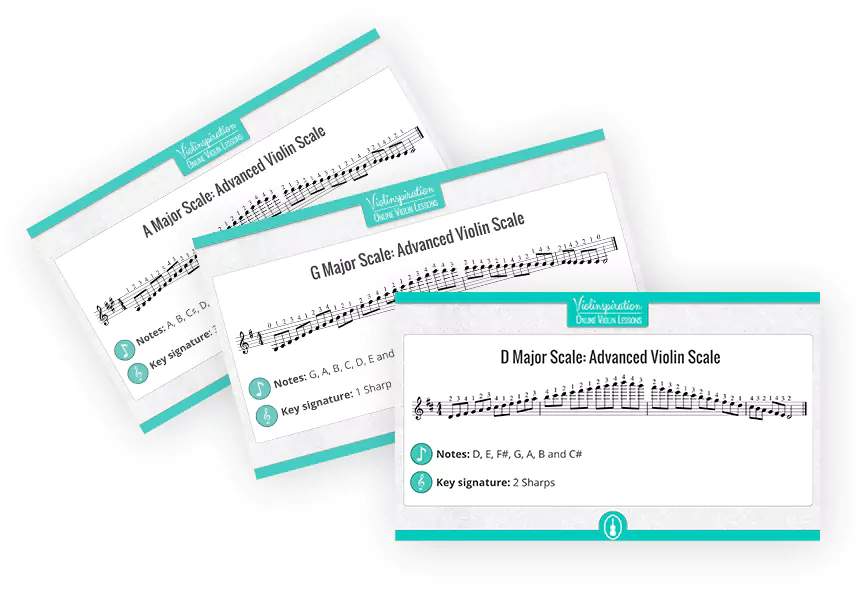
5 Most Common 3-Octave Scales
Start easy
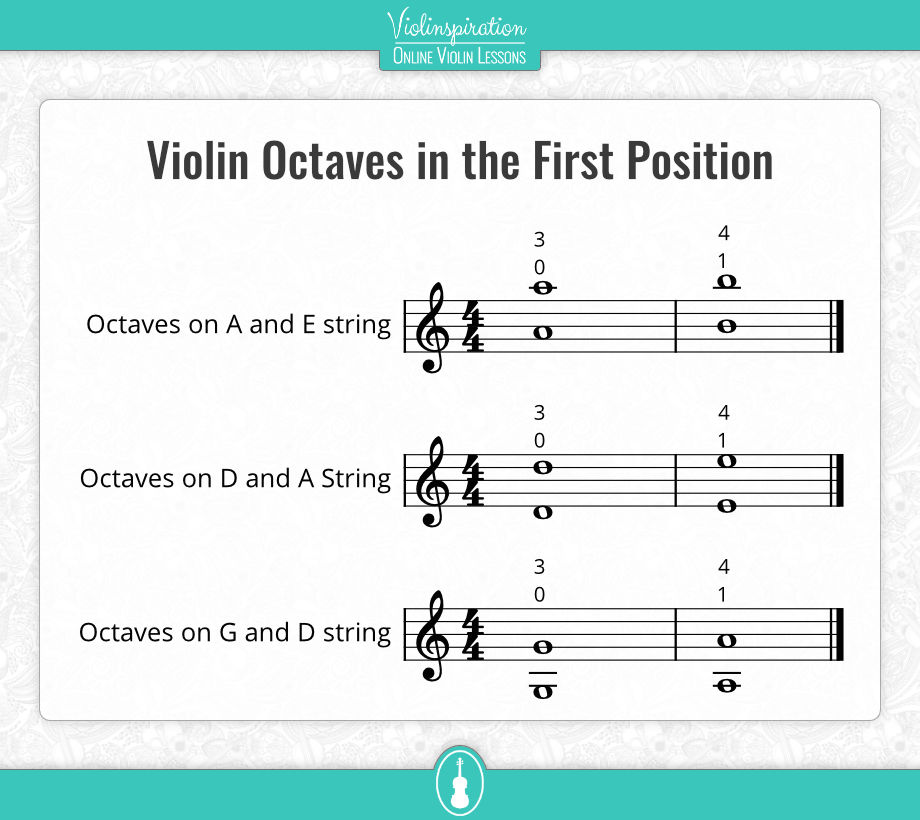
First, focus on playing correctly octaves in the first position before trying more difficult ones.
Try all the octaves that start with the open string and the first finger in the first position. You can go from open string + third finger to 1st + 4th fingers.
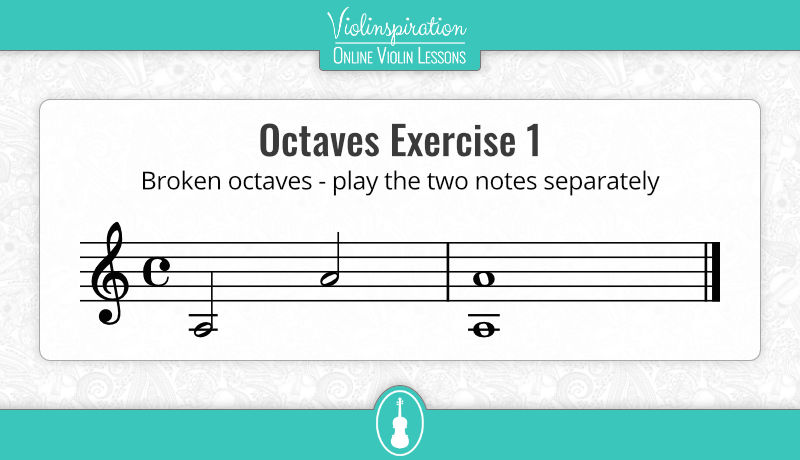
Broken octaves – play the two notes separately
When you try playing octaves, you should do that by first playing the two notes separately. Ensure that the lower note is correct, then try the upper note. Doing “broken octaves” is always very helpful for your intonation.
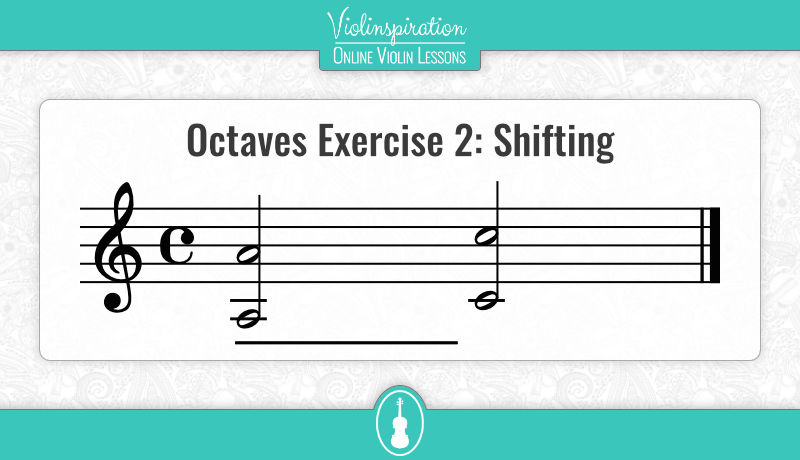
Practice shifting
You’ll constantly need to change positions, as you move with your 1st finger to a new note that is higher on the fingerboard. A good exercise you can practice is to shift from the first position to the third. For example, play the A octave on the G and D string, then shift to C with the slur. Of course, practice them separately (first the 1st finger and then the 4th). The slur will make it easier for you to hear the transition from one note to the other.
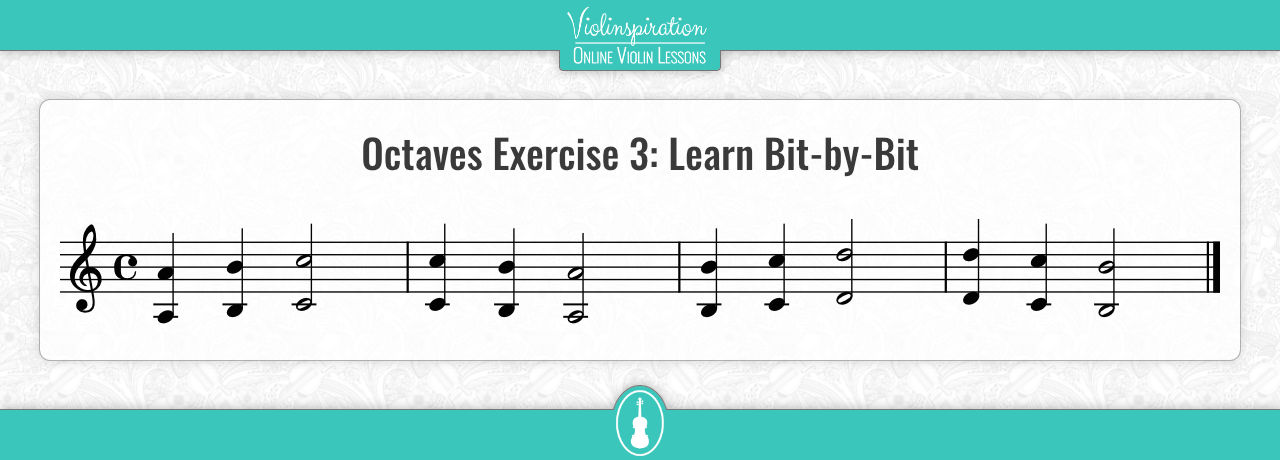
Learn bit-by-bit
Start with an easy progression, like three notes up, three down. When it sounds good, proceed to the next three. So if you started from the G string with A – B – C and back, then go to B – C – D. Practice that on all strings.
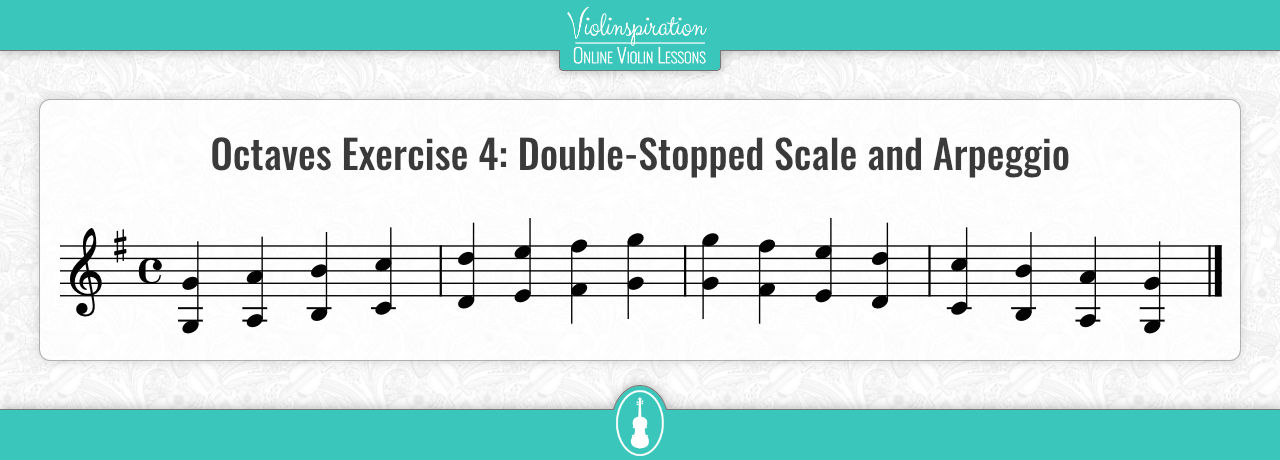
One octave double-stopped scale and arpeggio
After practicing in small bits, you should try a one-octave scale. Starting with those you can take advantage of open strings and the lower positions such as G, D, A, and E. Even if you’re feeling comfortable keep playing the “broken octaves” before trying normally. Of course, try arpeggios too.
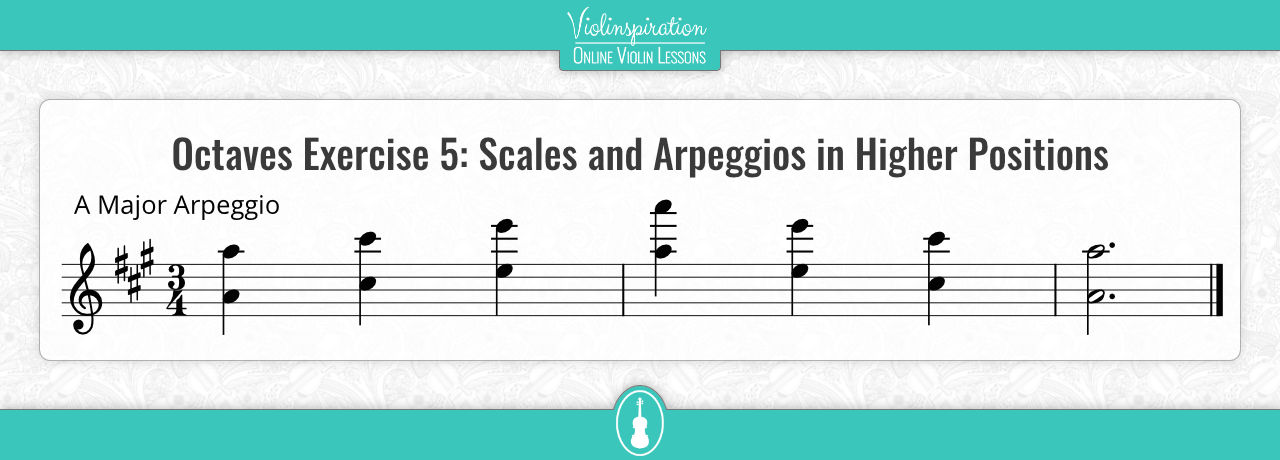
Scales in higher positions and arpeggios
After you’ve done all that, you should be able to try scales on higher positions and arpeggios.
Book Recommendations | Etudes for Studying Violin Octaves
Above were some introductory exercises to get a handle on the technique. They should help you understand how octaves work based on simple exercises. If you want more exercises, and some difficult ones to test your skills, here are some books that you’ll like. Usually, octaves are covered in the double-stop chapter.
Carl Flesch – Das Skalensystem
If you want to study scales, look no further than Carl Flesch’s Scale System. Every classical violinist has studied it and it is as full as possible. The book dedicates 5 pages to each scale so there are a lot of different variations, including octaves!
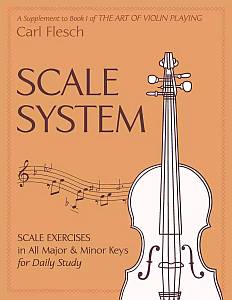
Scale System: Scale Exercises
in All Major and Minor Keys for Daily Study
Support us for more FREE content No extra costs for you Recommended by Violinists
Otakar Ševčík – Preparatory Exercises in Double Stopping, Op. 9
Sevcik’s books are very valuable to any violinist, although somewhat irritating. They cover pretty much all techniques thus you can find an exercise for everything you might need. Though a bit irritating, after studying them you would feel like you’ve leveled up! Opus 9 has several octave exercises that you’ll find helpful in learning violin octaves.
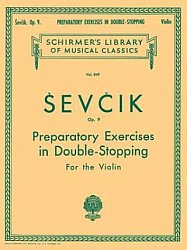
Sevcik – Op. 9 Preparatory Exercises
in Double-Stopping
4 Tips for Smooth Playing Violin Octaves
Last, but not least, a few general tips for practicing octaves:
1. Keep all fingers down
It’s important to keep your other fingers on the strings and not leave them hanging. You might want to use them afterward so keep them prepared. Also, it helps with relaxing the tension in your left hand.
2. Practice without vibrato
As with everything else, don’t use vibrato at first, as you need to hear the notes clearly. You can use it when you know exactly what you have to perform and you’re sure about the intonation. Octaves don’t need a lot of vibrato, as it may tamper with the intonation.
3. Pay special attention to the intonation of the lower note
The intonation of the lower or root note is more important so try to keep it perfect before playing the 4th finger. The 1st finger is more stable and you can rely on it more, so if the pitch is perfect, the 4th will be easier to fix.
Also, when you’re in the higher positions, or as you go towards them, remember that the intervals between the fingers get smaller so you’ll have to readjust them with every step.
4. Control the bow pressure
Finally, as with a regular double stop, don’t apply too much pressure on the bow on one string as it will distort the pitch. Keep it as equal as possible at all times. This will also keep your sound quality good.
Conclusion
Playing double-stopped octaves is a powerful tool in your belt. It provides a lot of volume, as the melody is played in two lines, and it is an impressive technique that shows the level of your virtuosity on the instrument.
Don’t get discouraged if you’re not satisfied after the first try. In fact, many violinists find them difficult. I hope that if you follow my guide, it will be easier for you to learn the octaves! And if you’d like to get feedback on playing octaves from a professional violin teacher, make sure to submit your video here (Julia’s Violin Academy members only).

Violin Octaves Exercises
