These violin exercises will help you improve on a day-to-day basis!
If you want to develop as a violinist, there are some essential violin exercises that you should practice. As you grow, at all levels you will need to do more than just learn pieces. In addition to scales and arpeggios, there are books of exercises that help you focus on each part of the violin technique in turn. These books are dedicated to each aspect of the left hand or the right hand, for example, shifting positions, finger dexterity, finger positions, vibrato, for the left hand, and string crossings, different bowing styles, such as legato, staccato, martelé, spiccato, for the right. And each of these has many separate, different exercises because playing the violin is a complex skill. In this post, I will list some resources for beginners I have used and found helpful over the years.
The exercises below are all about technical proficiency, which is really only half the picture of being a violinist. The other half is about being a musician, which means playing with musicality, interpreting the music, and enjoying your playing. These exercises are simple, but not always easy. And even more advanced players could do well using them.
4 Best Violin Exercises to Improve your Technique
1. Slow Tones
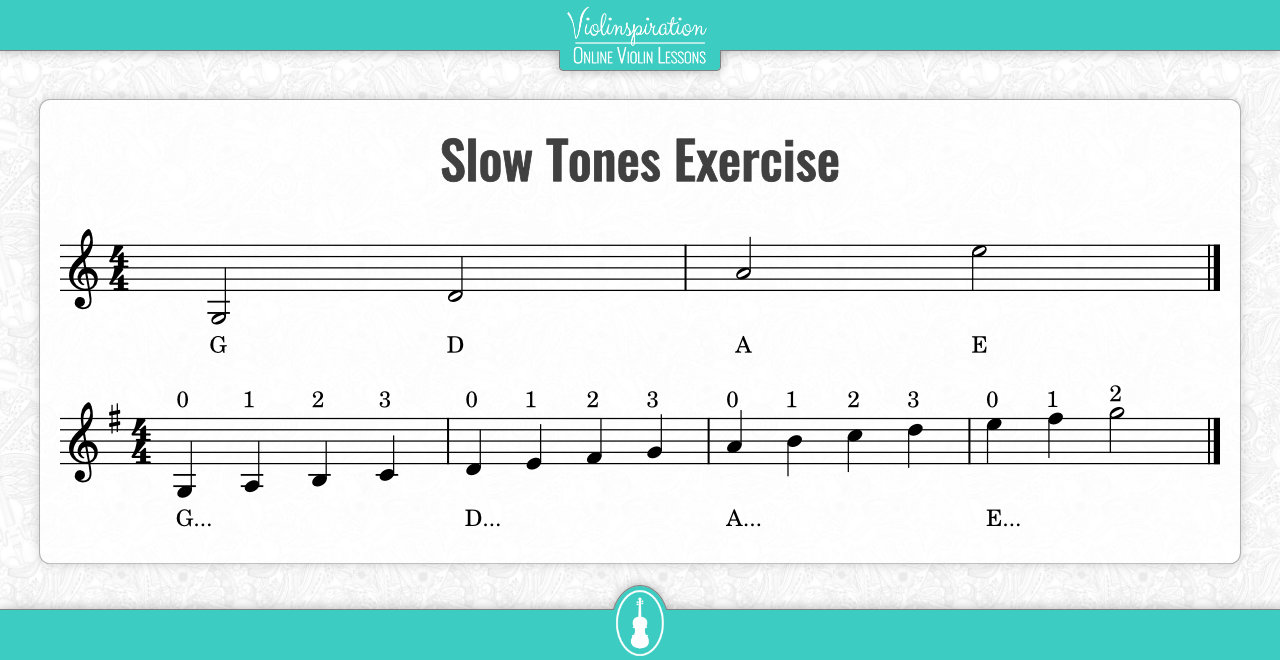
Practicing slow tones will help you develop good intonation and consistency in your sound on the one hand and the ability to feel your bow arm on the other.
The ability to feel your bow and bow arm gives you information such as where your bow is positioned and whether your bowing is straight. This awareness will help with string crossings, playing without looking at what you’re doing, and general bow control.
The other part of this exercise is listening. Listening to the quality of the sound you’re making helps you develop the skill of hearing subtle changes in the sound. What at first appears to be just one note, will become a complex sound of many facets as you listen more. Listen also to the pitch, and if you can, play with a tuner, so you learn when to adjust the finger position. Once your ears are sensitive enough, you can do this without the tuner.
To practice slow tones you can start on open strings, then progress to using scales, making sure each note is really long and consistently slow. You can keep the right tempo by using a metronome set at 60 bpm, for example, and make each note last 4, 6, or 8 beats. It is OK to play only one or two bars at a time, but if you feel up to it, you can play the whole scale like this. Having several beats for one bow stroke helps with pacing. If you have four beats on one bow stroke, then during each of those beats you will move your bow a quarter of the way along.
5 Most Common Violin Scales for Beginners
2. String Crossings
To be able to cross strings is essential so we can play music cleanly, with no extra sounds, keeping the mechanics of our playing hidden from the listener.
Practicing string crossings will also free your left hand, allowing you to be more comfortable moving around the fingerboard, knowing that the right hand can follow it. This will result in cleaner, more enjoyable music.
To practice string crossings, at the beginning hold your bow so that it lies comfortably on the open A-string. Play a few slow notes on the A-string, making sure not to hit any other strings. Feel the position of your right arm, and how it and the bow together are positioned. Then stop and without moving the bow along, rotate your whole arm with the bow until you rest on the D string. Make sure this new position feels comfortable. Play a few slow notes on the D-string and check that you’re not hitting any other strings. Note the position of the arm. Repeat this for all strings.
Once you have a good sense of the position of your arm for each string, you can connect playing a couple of notes on the A-string to playing a couple of notes on the D-string or any other string. In the beginning, stop before you rotate to the new string, then continue playing. After a while you can reduce the stopping time, and eventually, you will play smoothly across all the strings. Any time you hear a noise while crossing strings, you can practice again with stopping.
In this video I share with you three easy tips for a cleaner string crossing:
3. Slurs
Slurs are notated in the sheet music with a curved line over a few notes which means to play them on one bow stroke.
Practicing slurs will help your playing become smoother, your left hand fingers will become more fluent at playing, more nimble, and you will improve your listening and intonation.
The practices in Ševčík Violin Studies Opus 1 Book 1 are excellent for this. They also help with intonation, playing evenly and consistently, and developing clean left-hand movements.
To practice slurs, let’s use the exercises from Ševčík’s Violin Studies. Start with the first bar and play each note slowly, keeping down the finger and then placing the next finger after it. So in this bar, you would play the open string first, then put down finger one, keep it down, put down finger two, now you have two fingers down, and finally lift up finger two to expose finger one. You finish with having only the first finger down.
In the music, this is indicated by the horizontal line at the bottom, with the “1” at the front. The first finger stays on the string during the last three notes.
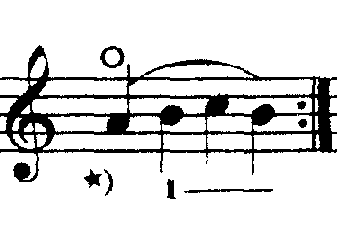
For the second bar, you are in a great place to begin, as you already have your first finger down. As the line shows, you will never lift this finger during this bar. You place down the second finger and keep this one down for the rest of the bar also. Then you place down finger 3 and finally lift off finger 3.
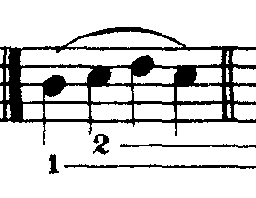
This particular study is written in C-major, but if you have only learned to play a high second finger – as in A Major scale on the A-string, then it is fine to play in A Major instead, as long as you know you are doing this deliberately.
You can repeat each bar as many times as you want, but each time pay attention to your left hand becoming more and more relaxed. Sometimes holding down the fingers of the left hand results in grasping of the hand, but that is not necessary. Try to play each repetition with more ease.
4. Fourth Finger Practice
For almost all beginners the fourth finger is weaker than the rest. This is normal, as in other areas of life we don’t use our pinky much. So we need to gently start exercising it so it can become stronger. Strengthening the fourth finger will help you with playing those notes that can either only be played this way, or using this finger gives you a better fingering for the piece.
To practice the fourth finger, you can play your scales using the fourth finger instead of an open string every time you play scales. You can also take time to do dedicated exercises for the fourth finger.
The exercise I would recommend is placing your fingers on the notes below, up to the third finger and then tapping the fourth finger and then lifting it, repeating this movement a few times to the beat of the metronome. Make sure you don’t overdo it, the pinky can tire easily! Do a few rounds then move on to a different exercise. If you do a little of this every day, that will go a long way.
From the video below you will learn another fourth-finger exercise:
What Can I Practice to Get Better at Violin?
To get better at violin you can practice the following exercises:
- Long notes
- Slurs
- String crossings
- Fourth finger exercises
- Scales
- Arpeggios
- Etudes
- Violin Studies
Below is a list of books you can use for systematic practice. There are studies for the left hand, the right hand, scales, and etudes that can cover all these.
Books with the Essential Violin Exercises
Below are the best resources I can recommend to you. You can download them for free and start practicing right away!
5 Most Common Violin Scales
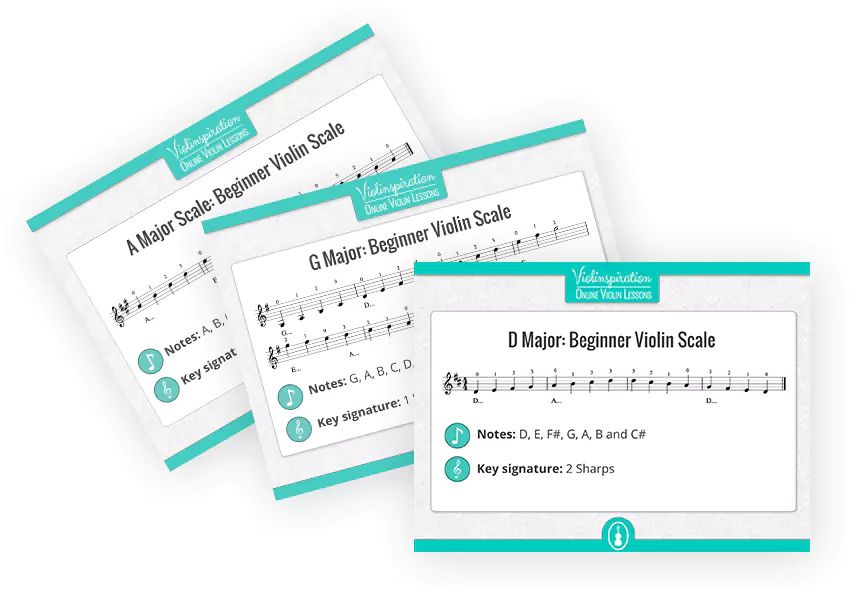
This short booklet contains five most commonly played scales for a beginner player. Practicing them will help you prepare for playing many beginner-level songs!

5 Most Common Violin Scales for Beginners
Otakar Ševčík – Violin Studies
This is a series of studies over many books covering everything you can learn in terms of violin technique.
The great thing about these books is that while they appear deceptively simple – at least in the beginning – they require focus and attention to detail and can be used for increasing subtlety and precision. Don’t be tempted to rush through them thinking they are too easy. Find the place where you are learning from it.
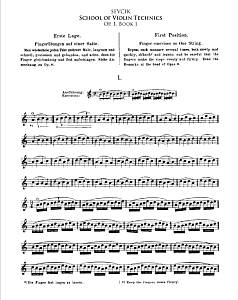
Here you can download the Op. 1, Book 1 for free:
School of Violin Technics Op. 1, Book 1 by Sevcik
Wohlfahrt op. 45 Sixty Studies for the Violin
All the studies in Book 1 are in the first position and the ones in the second book include a mixture of first and third positions. Not everything in this book is for violin newbies, some are better suited for a bit later on in your progress.

Op. 45: Sixty Studies for the Violin
Book 1 by Wohlfahrt
Support us for more FREE content No extra costs for you Recommended by Violinists
How Do You Increase Finger Speed on the Violin?
You can increase the finger speed on the violin by starting with slow practice. You should take a bar or two bars from the piece or study you’re learning. Play it very slowly, with a metronome. Each time you play it very comfortably at a given speed, increase the metronome speed by 5 or 10 bmp and practice again.
At first, you should play it so slowly that you are able to play each note clearly, in tune, and with the right bowing and you can prepare for any string crossings.
Prepare by getting your left-hand finger ready, moving your arm into position, and also moving your right arm and the bow at the right time and smoothly. How slow this is in beats per minute (bpm) will depend on the difficulty of the piece and your level of playing. Don’t go faster than where you are still just comfortable.
Practice each new speed for a few days before advancing to the next one. Do not rush or jump ahead. If you are diligent and follow this instruction, speeding up will happen quite smoothly, without ever feeling like you’re out of your depth or you’ve taken on too much.


