
In this article, I’m sharing with you essential violin shifting exercises that will help you learn and master the shifting technique.
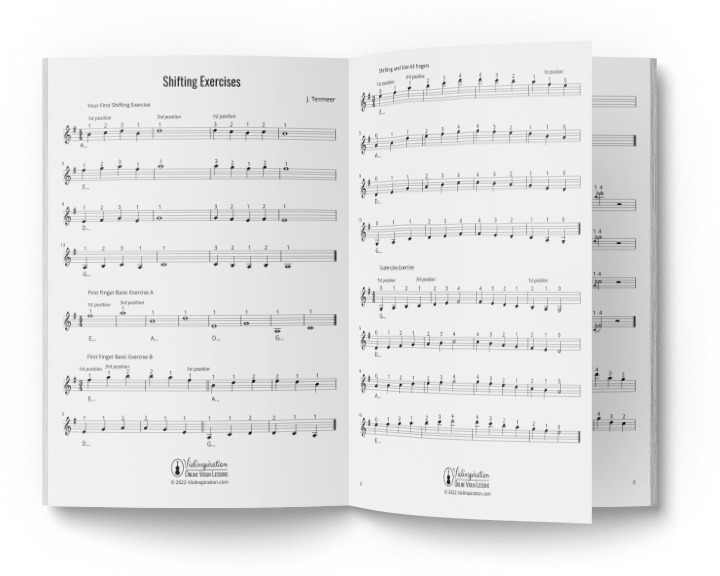
Here you can download a free booklet with shifting exercises and below, you will find a detailed explanation of each exercise:
FREE Shifting Exercises
Improve Your Shifting Technique
Remember that as with anything, mastering shifting needs dedication and practice. If it seems difficult in the beginning, don’t be discouraged – it only means you need to practice a bit more. 🙂
7 Violin Shifting Exercises
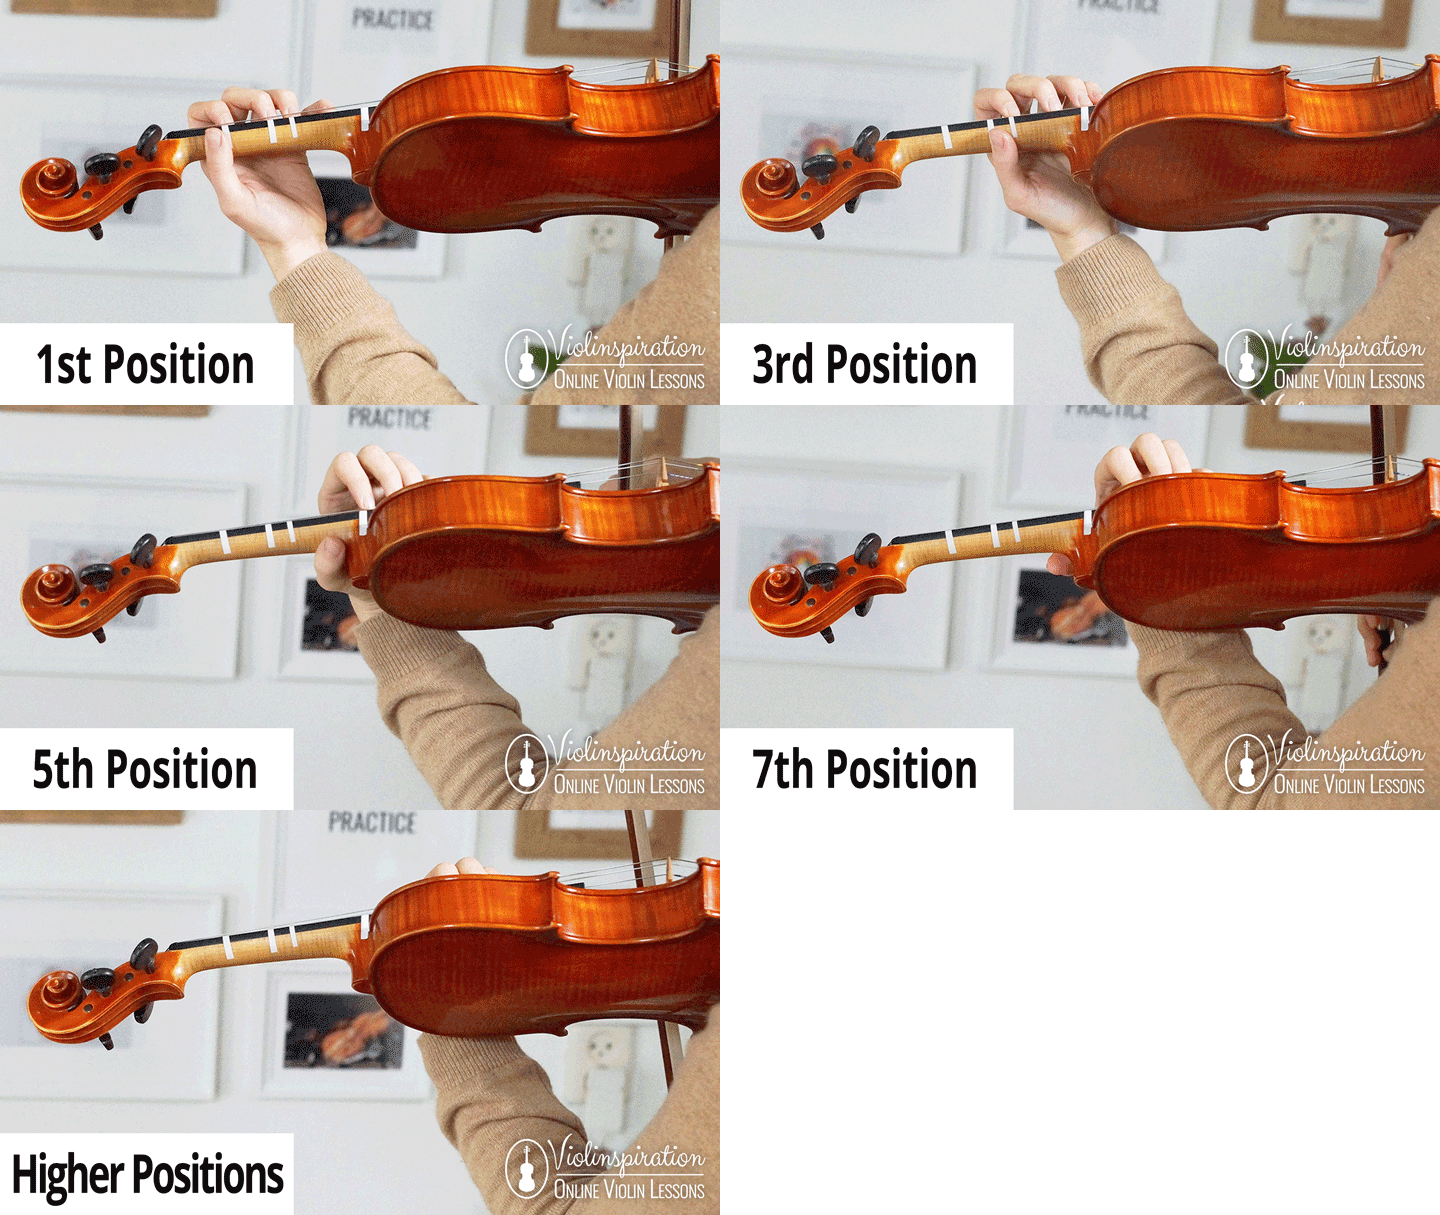
Below are violin shifting exercises listed from the easiest to the most difficult. Most of them require shifting between first and third position, as these are the most frequently used. The same patterns can be used later for learning other violin positions.
Your First Violin Shifting Exercise
The simplest exercise you can do to understand how shifting works is by playing with the first three fingers in the first position, then going back to the first finger and shifting to the third position. For extra difficulty, try to go back again to the first position.
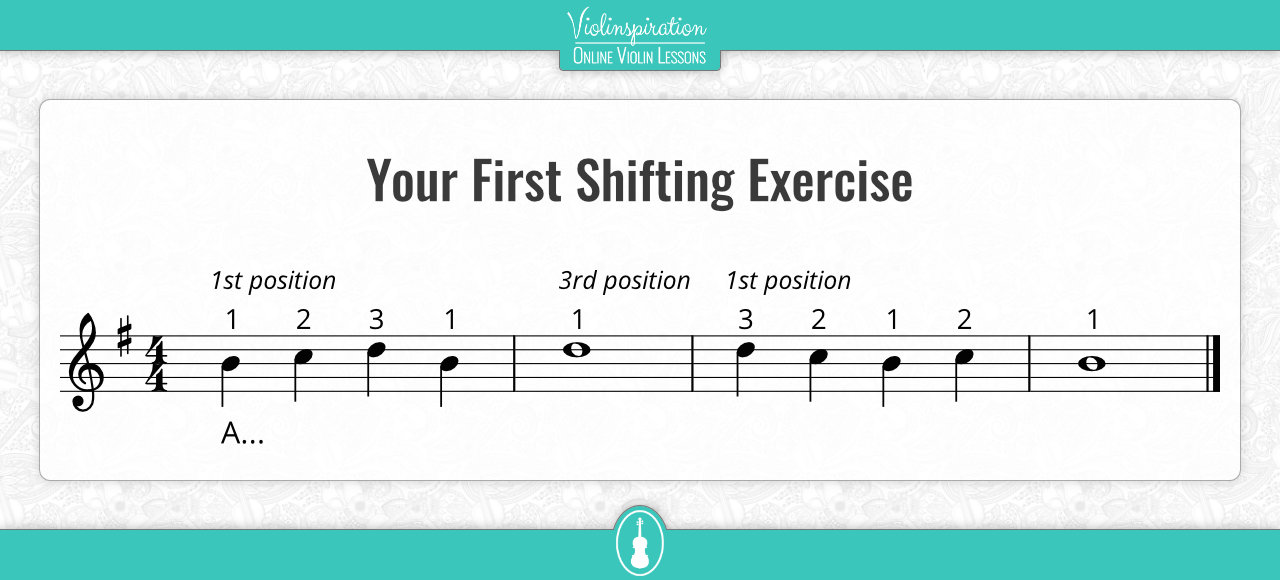
By playing these notes step by step and then doing the shifting motion, you will hear the desired note so you know where you have to land. This is a good tool for improving your ear.
First Finger Basic Exercises
After repeating the previous exercise on all strings, you can try going directly from the first finger in the first position to the first finger in the third position.
After you’ve learned where your first finger should be placed, you should try to add another finger.
For example, let’s begin on the A string. Play B and then shift to the third position playing D, and then E with your second finger. You can also do this backward, starting from E in the third position. Of course, repeat this pattern on all strings.
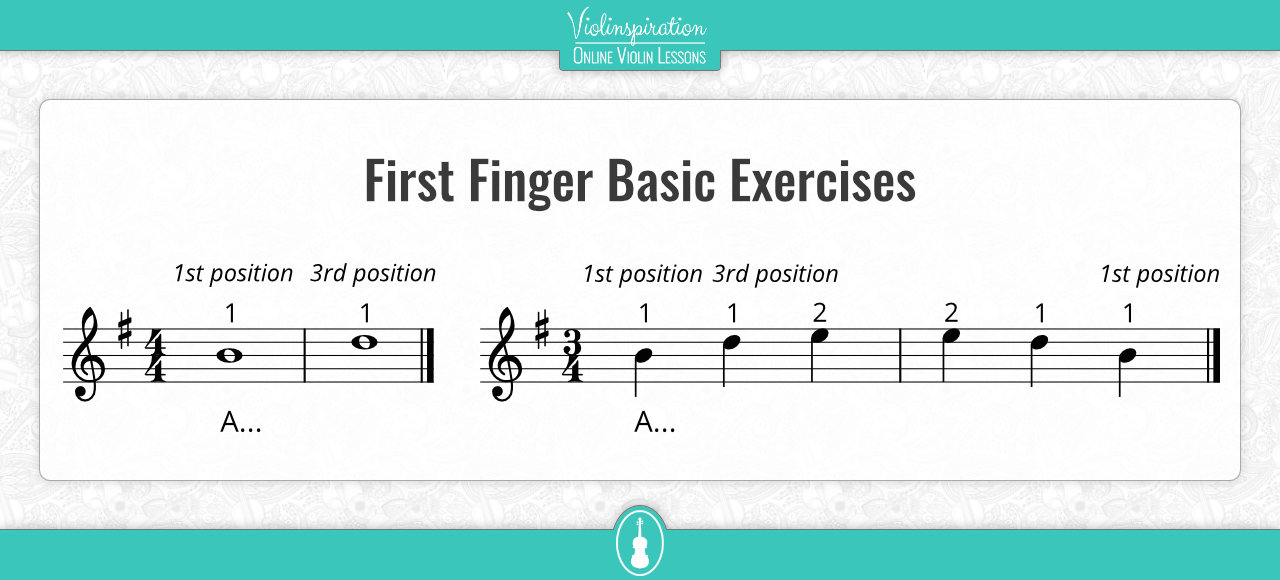
This exercise will help you remember the spacing between each finger in the new position, which, as we go higher on the fingerboard, becomes smaller. This is your first step to playing two notes, instead of just jumping to a new position and back.
Shift and Add More Fingers
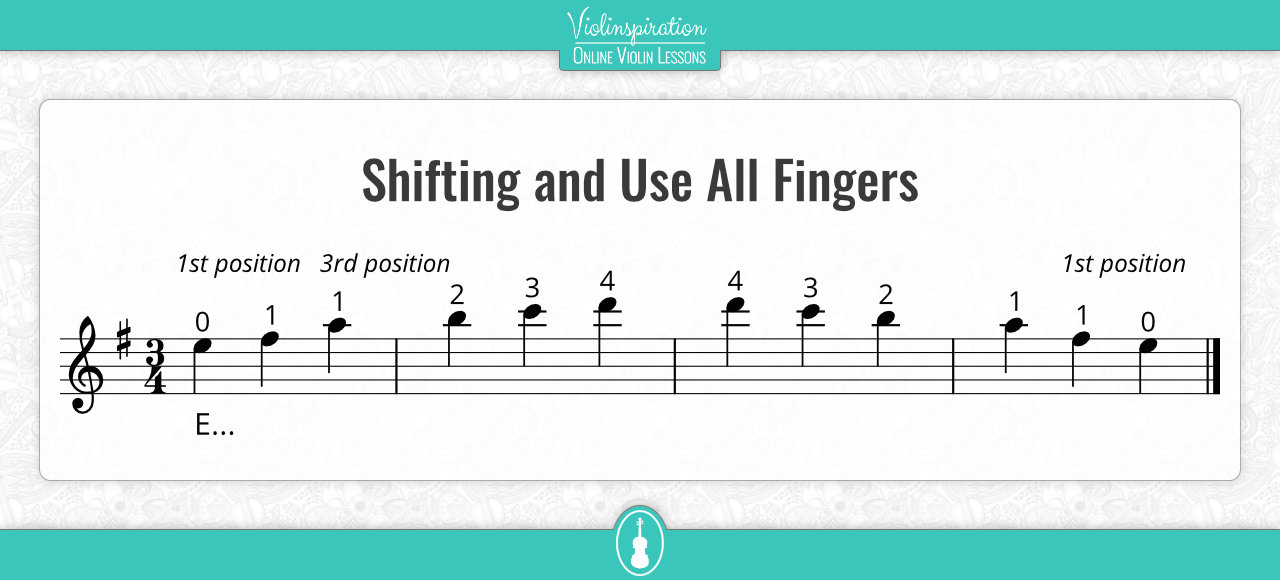
Similar to the previous one, but you play more notes! Start on the E string playing E, F#, and go to A in the third position. Then, continue and play B, C, and D with your fourth finger. Then go backward and shift back to F#.
Scale-Like Exercise
If you’ve reached this point, it will be fairly easy to play all the notes back-to-back, starting from the first position. Start with the open string, play the first and second finger, then shift smoothly with your first finger while you lift your second finger, and continue likewise, then go backward.
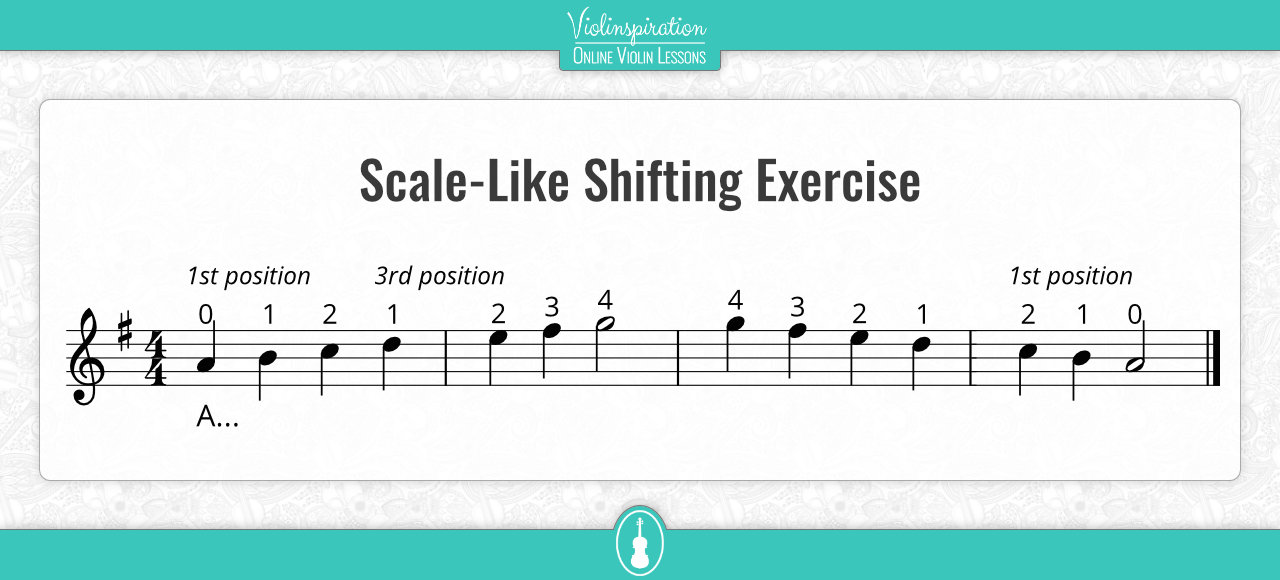
In this exercise, you can try playing whole bow notes so there won’t be any audible sliding on the string.
If you try slur a few notes and play them legato, the shift might happen in the middle of the bow. In that case, try to slow it down, or stop if you’re a beginner, shift and then resume with normal bow speed. You can apply that up to the moment when you can shift with no sliding sound.
This exercise and the following one can be easily applied to higher positions but be very aware of the pressure you apply to the bow – adjust it to get a nice, resonant sound.
Shift With Skipping Fingers
If you’ve practiced all the above exercises diligently, you can now try to shift by skipping one finger, starting with the first. In this exercise, you should play the first two fingers in the first position, then shift with your first finger (use it as an anchor) but land on your second finger.
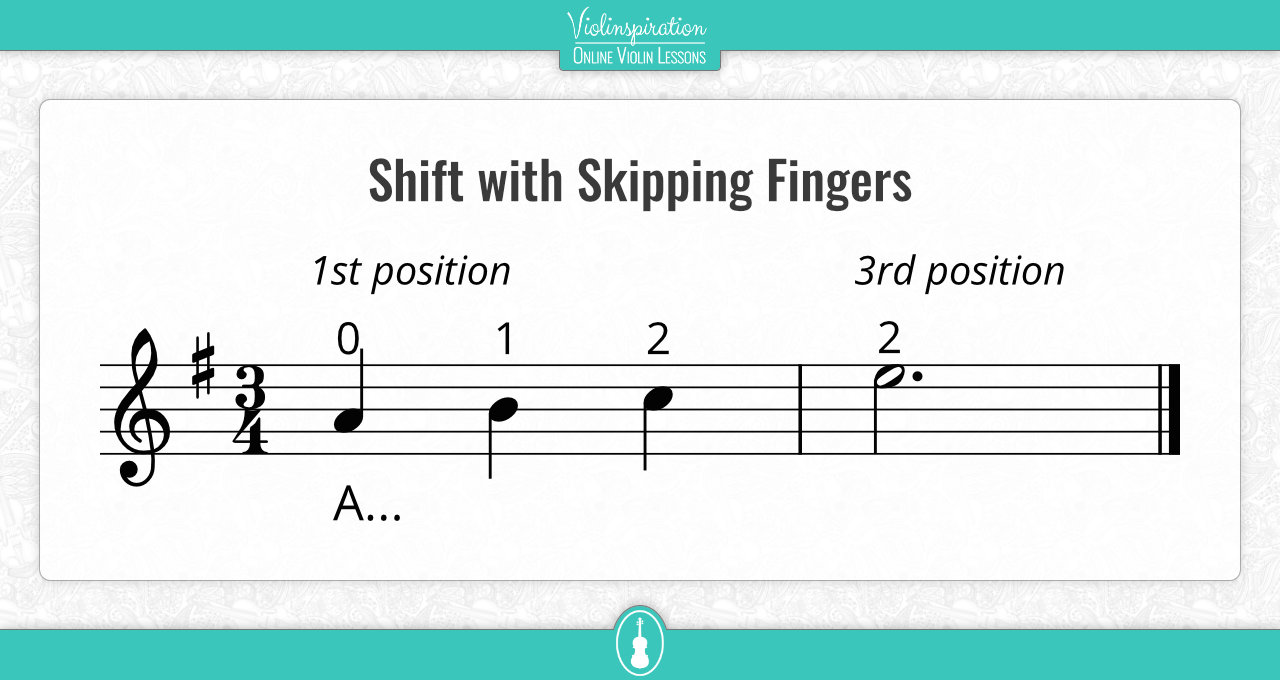
If this is difficult at first, try this: while on the A string, play B, C, then shift and play D as an appoggiatura to E. By doing that it will be easier to find the new note, as you’ll hear the one before.
A variation will be to land on your third finger or even the fourth.
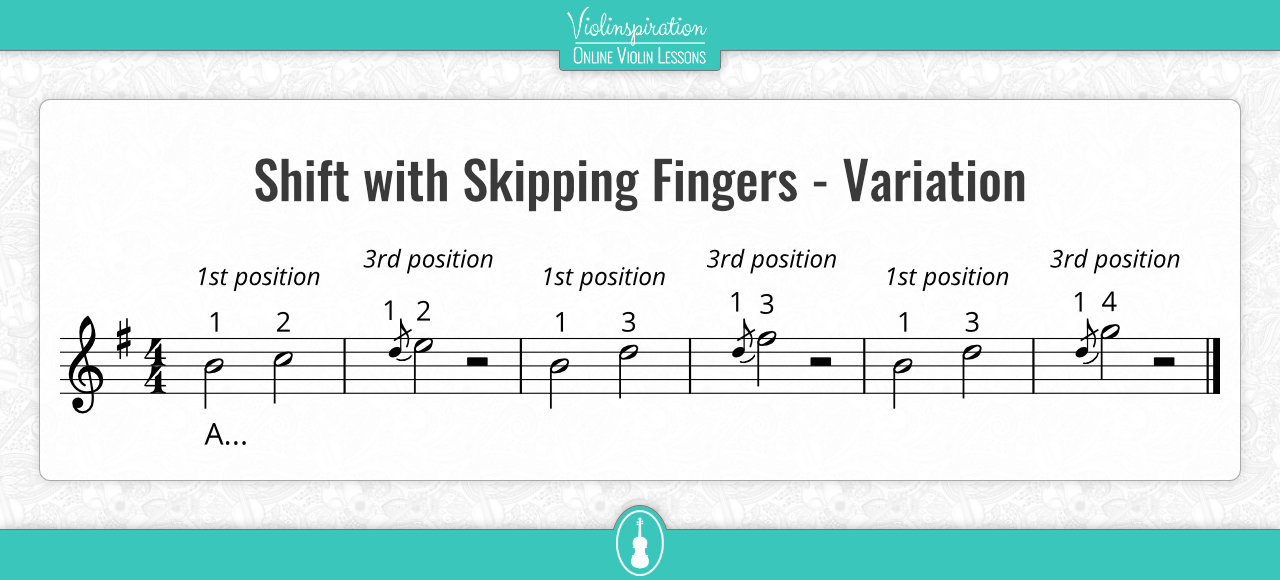
Since you are skipping the shifting finger, be extra careful of your left thumb gripping, as it can easily be placed incorrectly.
Skip Fingers in the First Position
A similar exercise will be to skip the second finger in the first position and play it in the third position.
Similarly, you can go straight to your third finger or fourth finger, and as always, you can go backward too.
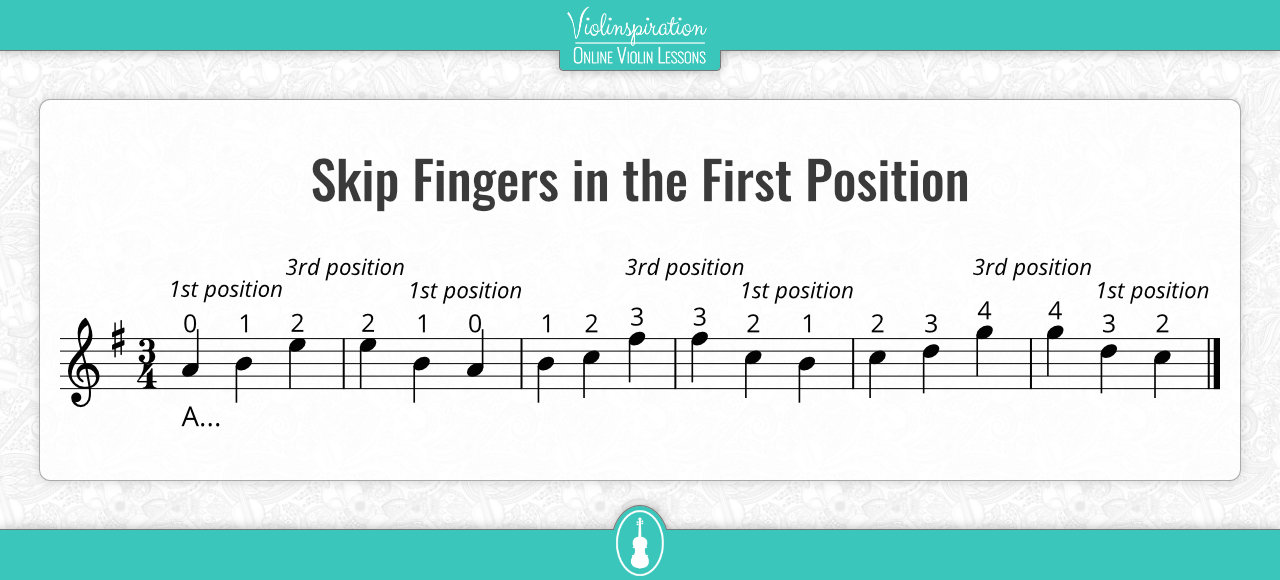
For extra points, try to play the remaining notes in the new position.
Scales and Arpeggios for Learning to Shift
Scales can be your best friend! They can help you develop your left hand technique, play in tune, and familiarize you with the notes on the fingerboard. As such, they can also be used for developing your shifting skills!
Depending on how experienced you are at violin playing, you can either try to play a scale through multiple positions or just two. Keep in mind that you should first master shifting properly to one position before you start practicing shifting to multiple ones.
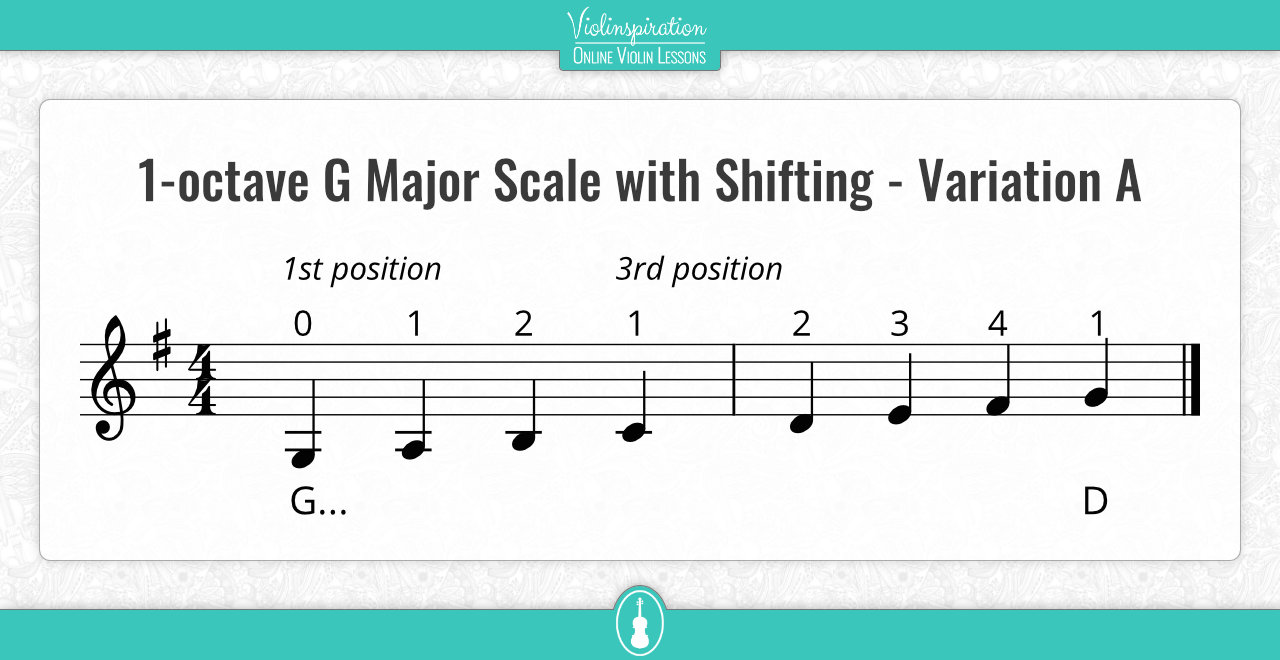
There are several ways you can practice shifting with scales. Let’s use for this example the G major. Play the open G string and the first two notes in the first position, then instead of continuing with your third finger, shift to the third position. When you reach F#, go to the D string to play G.
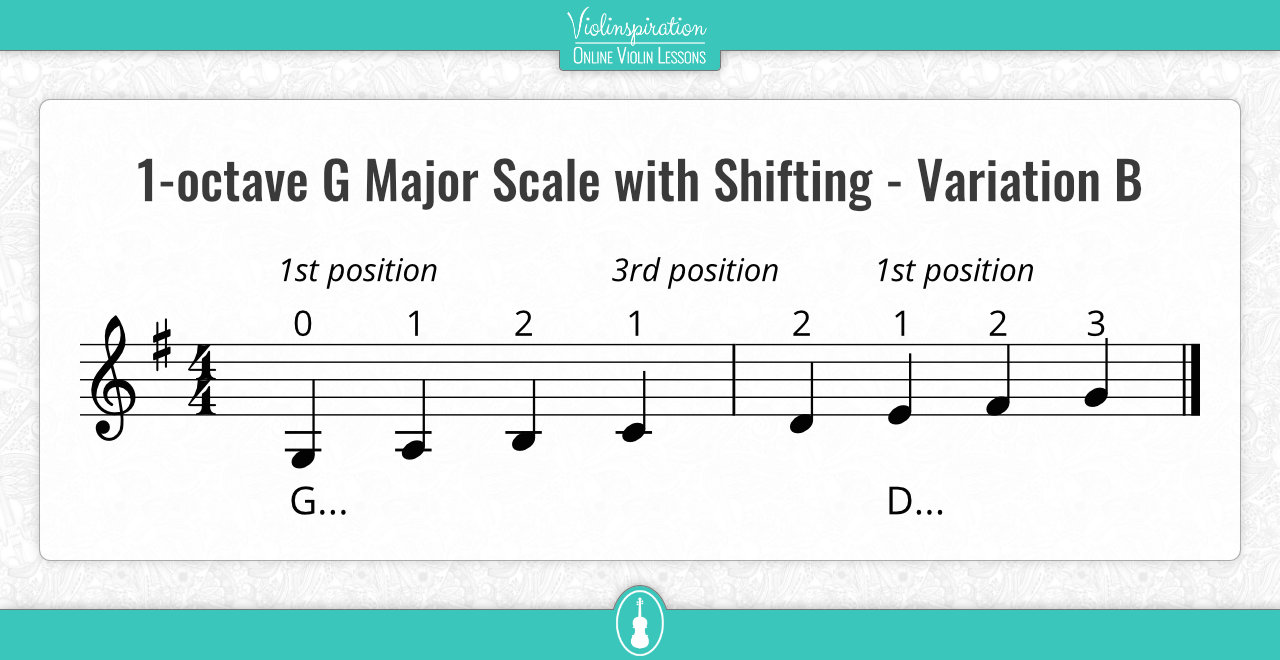
Here’s a more challenging variation that includes shifting up and down: do the same as previously but when you play D on the G string, instead of continuing in that position, shift back to the first position on the D string and play the remaining notes with your first three fingers.
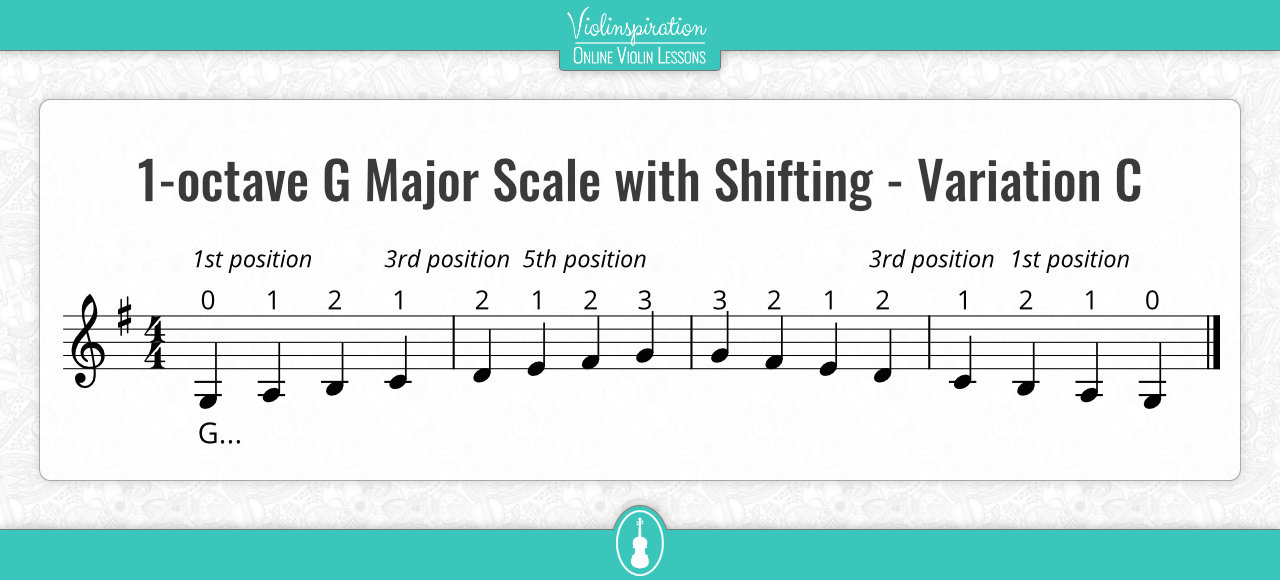
If you’re familiar with more positions, you can try shifting through multiple positions and even more than one octave. Try to play a one-octave G major scale on one string. You can also play the same scale using pretty much the whole note range of the instrument, or at least the vast majority of it.
As for arpeggios, the logic is pretty similar, though you can apply different variations.
Play the G string, B in the first position, then shift to the fourth position for D and G, then go backward. You can help yourself by playing the arpeggio in first position before trying anything else.
For some extra shifting practice, after playing B and D on the second position, shift with your first finger to the seventh position by playing the octave G.
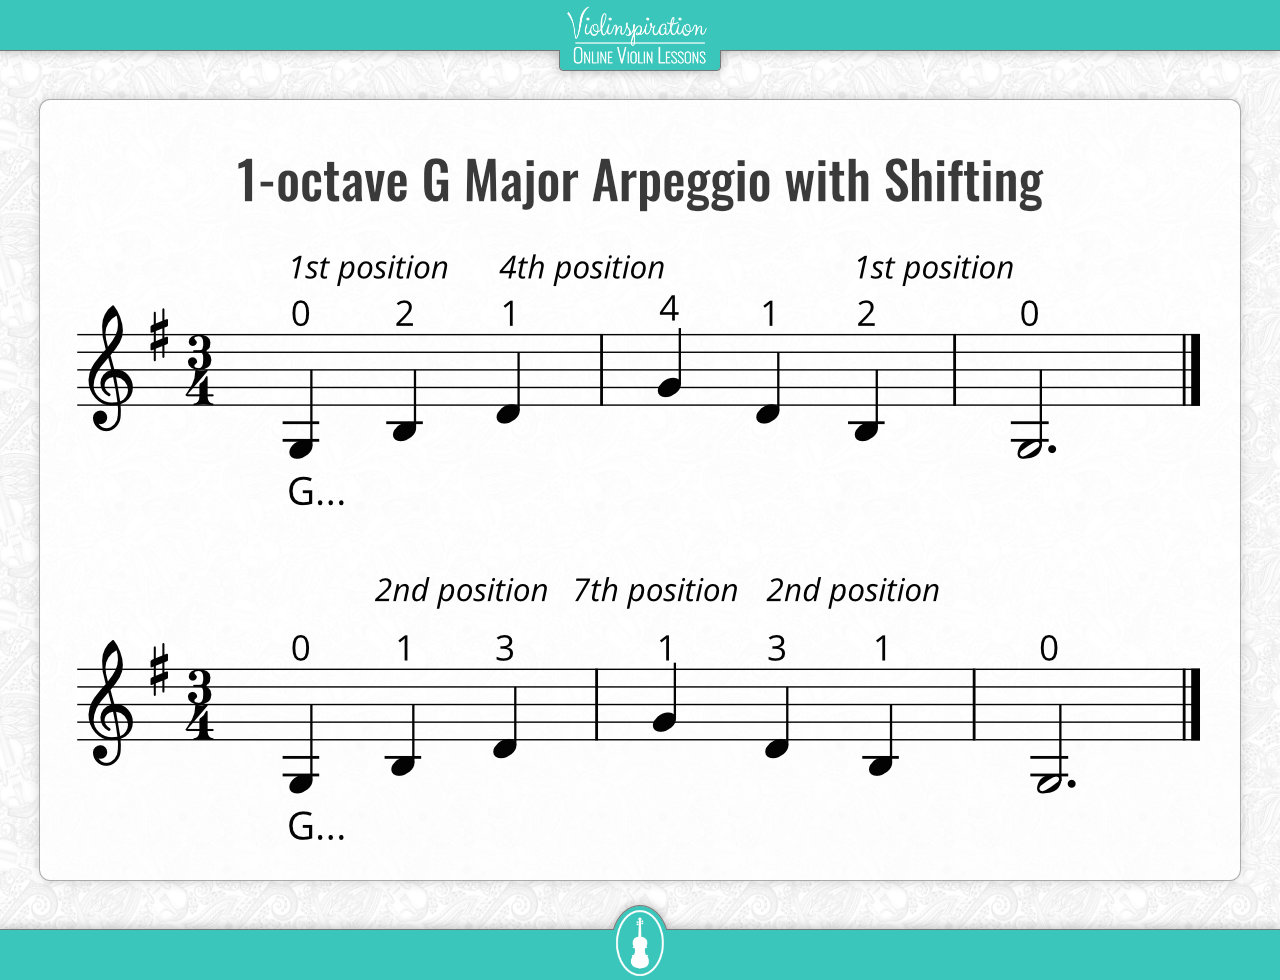
Same as the scales, if you’re advanced enough, you can try the arpeggios in several positions and all octaves. Even advanced students can benefit from going back to study shifting exercises!
I hope my booklet of three-octave scales will help you:
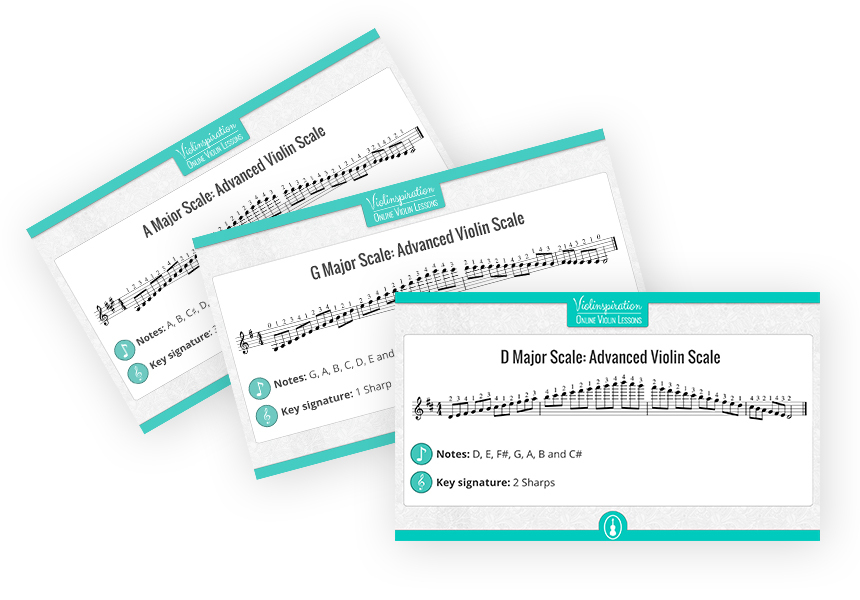
5 Most Common 3-Octave Scales
Free Download
Violin Studies With Shifting Exercises
If you want to delve more into shifting and play more challenging exercises, or you just want them all collected in one place, the best recommendation in my opinion is “Introducing the Positions for Violin” by Harvey S. Whistler. It has several exercises and variations, and the different volumes cover all positions.
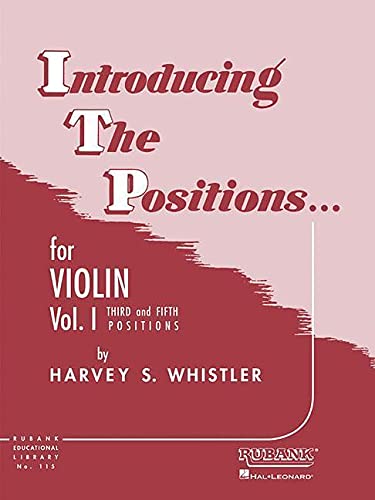
Introducing the Positions for Violin
by Harvey S. Whistler
Support us for more FREE content No extra costs for you Recommended by Violinists
A more advanced book is Otakar Ševčík’s “Changes of Position and Preparatory Scale Studies, Op. 8.” You might not fall in love with Ševčík’s exercises but they are some of the best for helping you develop your violin technique.
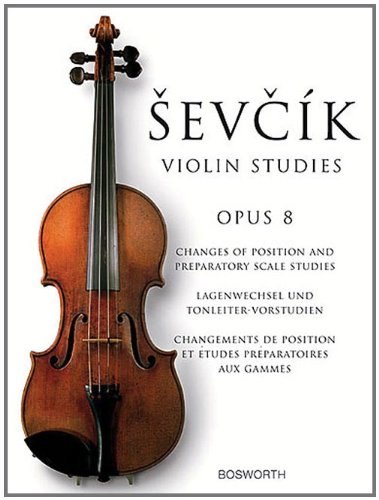
Otakar Ševčík – Violin Studies – Op. 8
Changes of Position and Preparatory Scale Studies
Free Download
Final Note
Shifting is fundamental for playing in the various violin positions, so study it carefully and you’ll be ready for the next stage in your violin journey. To conclude this post, a few final reminders for you:
- Be aware of your left hand and the moves it has to make.
- Don’t produce any sliding noises, unless it is needed in a certain piece or passage.
- Always pay attention to your intonation accuracy.

FREE Shifting Exercises
Improve Your Shifting Technique
Practice shifting a bit every day and with patience, and you’ll master it in no time!
If you’d like to receive feedback on your shifting from a professional violin teacher, make sure to upload your feedback video here (Julia’s Violin Academy members only).


