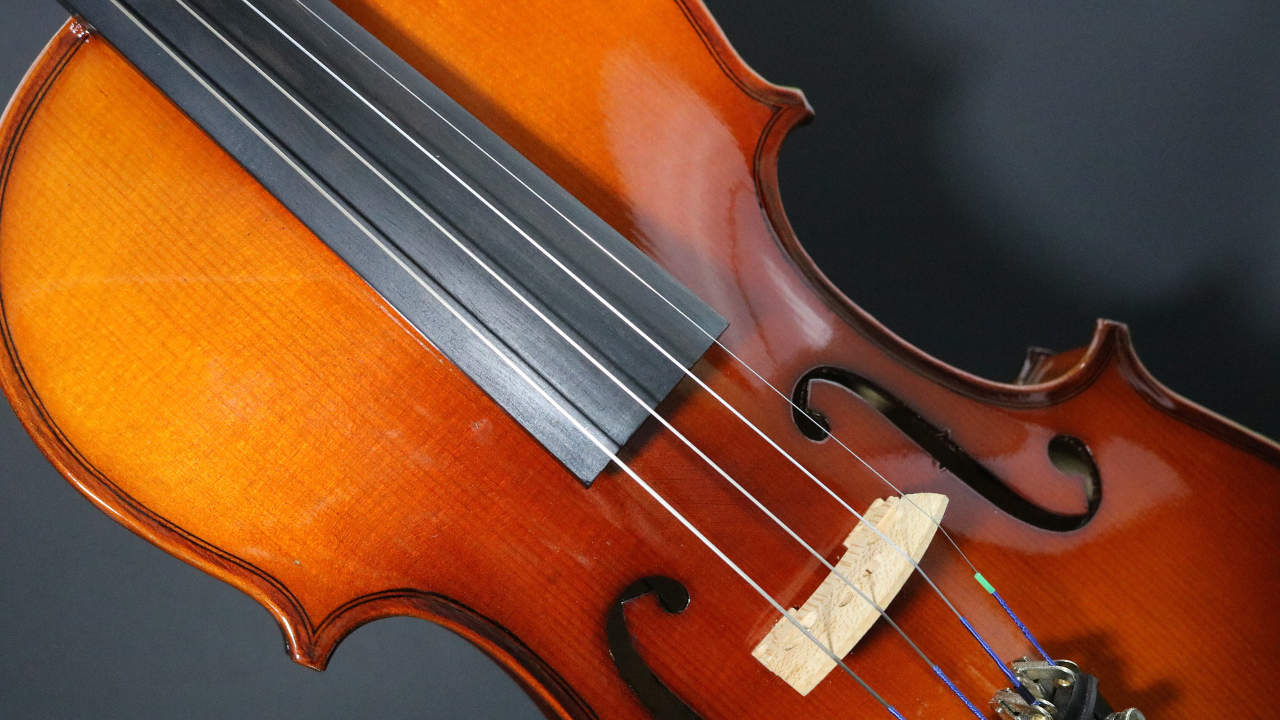
Looking at a violin, you’ve probably noticed that long, black stretch that the strings sit on top of – that’s called the fingerboard! Adhering to both the neck and the nut, it stretches over the body of the instrument and ends just a few inches before the bridge. The strings float over the fingerboard, until our fingers press down to fret notes. Fingerboards allow violinists to create a range of notes beyond just the open strings.
Fingerboard, as one of the violin parts, has changed significantly over the last few centuries. From much shorter lengths to different woods, fingerboards have modernized a lot.
Over time, finger pressure and natural oils wear down the wood, requiring maintenance. This will cause grooves in your fingerboard, which can cause buzzing or difficulties shifting. However, grooves can be smoothed out through a process called “planing” if you take your instrument to a luthier.
If you want to know more about the construction, how to fret notes on the fingerboard, and take care of the wood, keep reading below.
What Is a Violin Fingerboard?
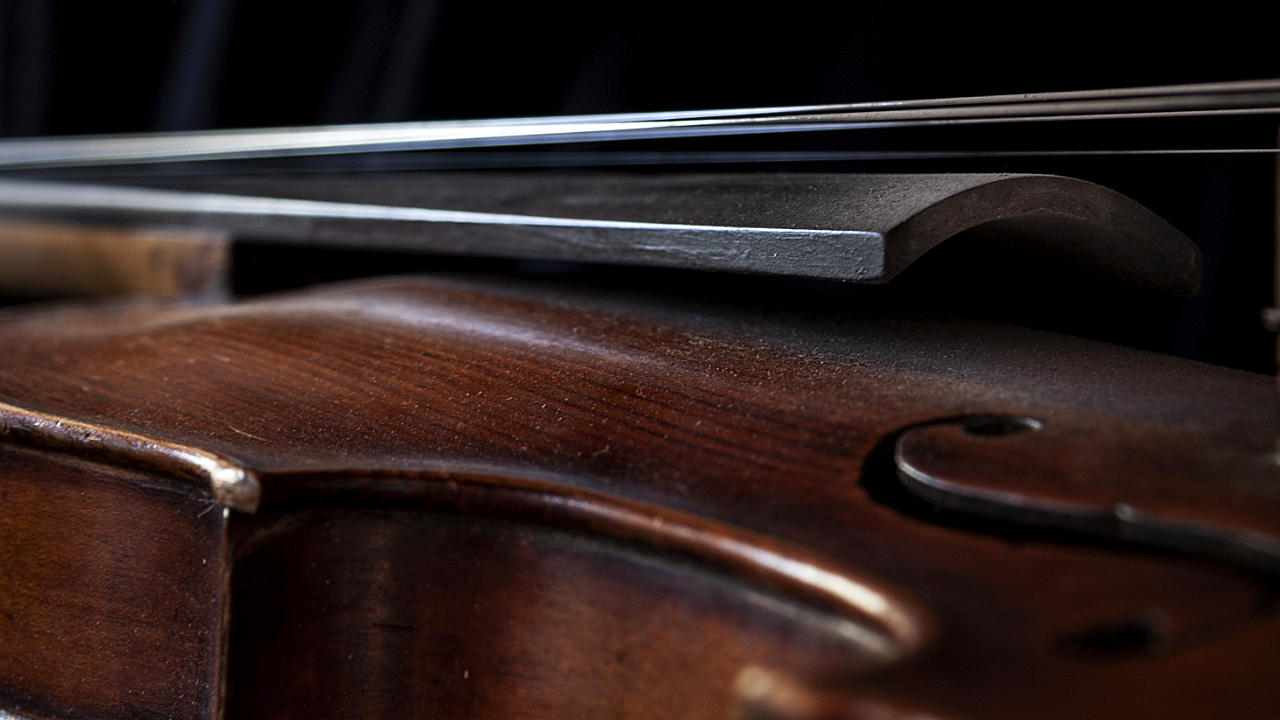
A violin fingerboard is an ebony piece stretching from nut (below the pegbox) all the way to the middle part of the violin sound box. It adheres from the top to the neck of the violin.
The strings run on top of the fingerboard, hovering until a violinist presses the strings down to change the string length to create a note.
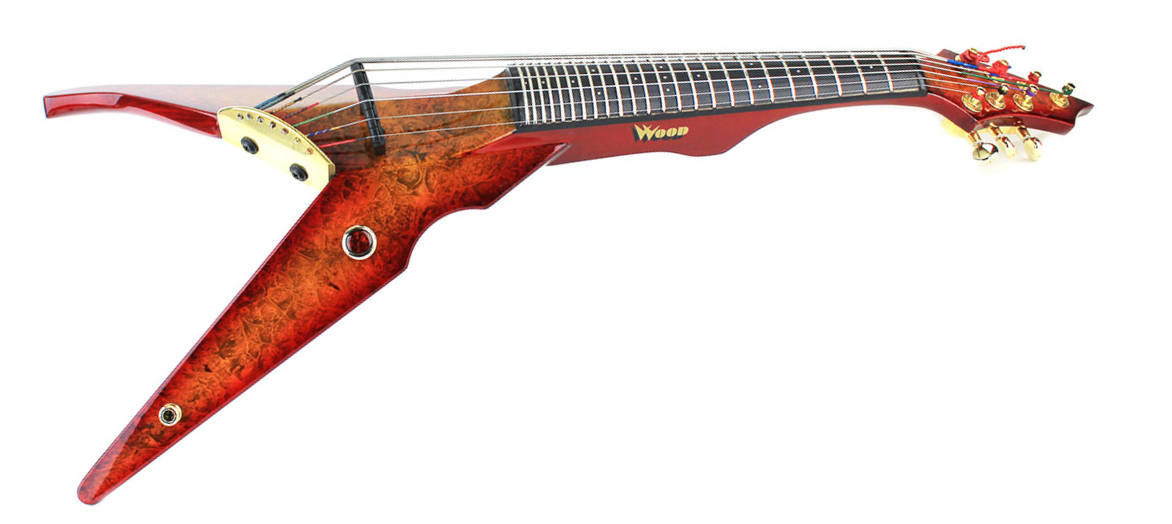
Unlike guitars or other fretted instruments, the standard acoustic violin does not have a fretted fingerboard and instead it is just a long, sleek piece of wood. However, there are violins, usually electric, with a fretted fingerboard.
The fingerboard is curved, in contrast to flat fingerboards on instruments such as a guitar. The curvature allows you to play one string at a time – if the fingerboard was completely flat, you would pull all four strings at once all the time.
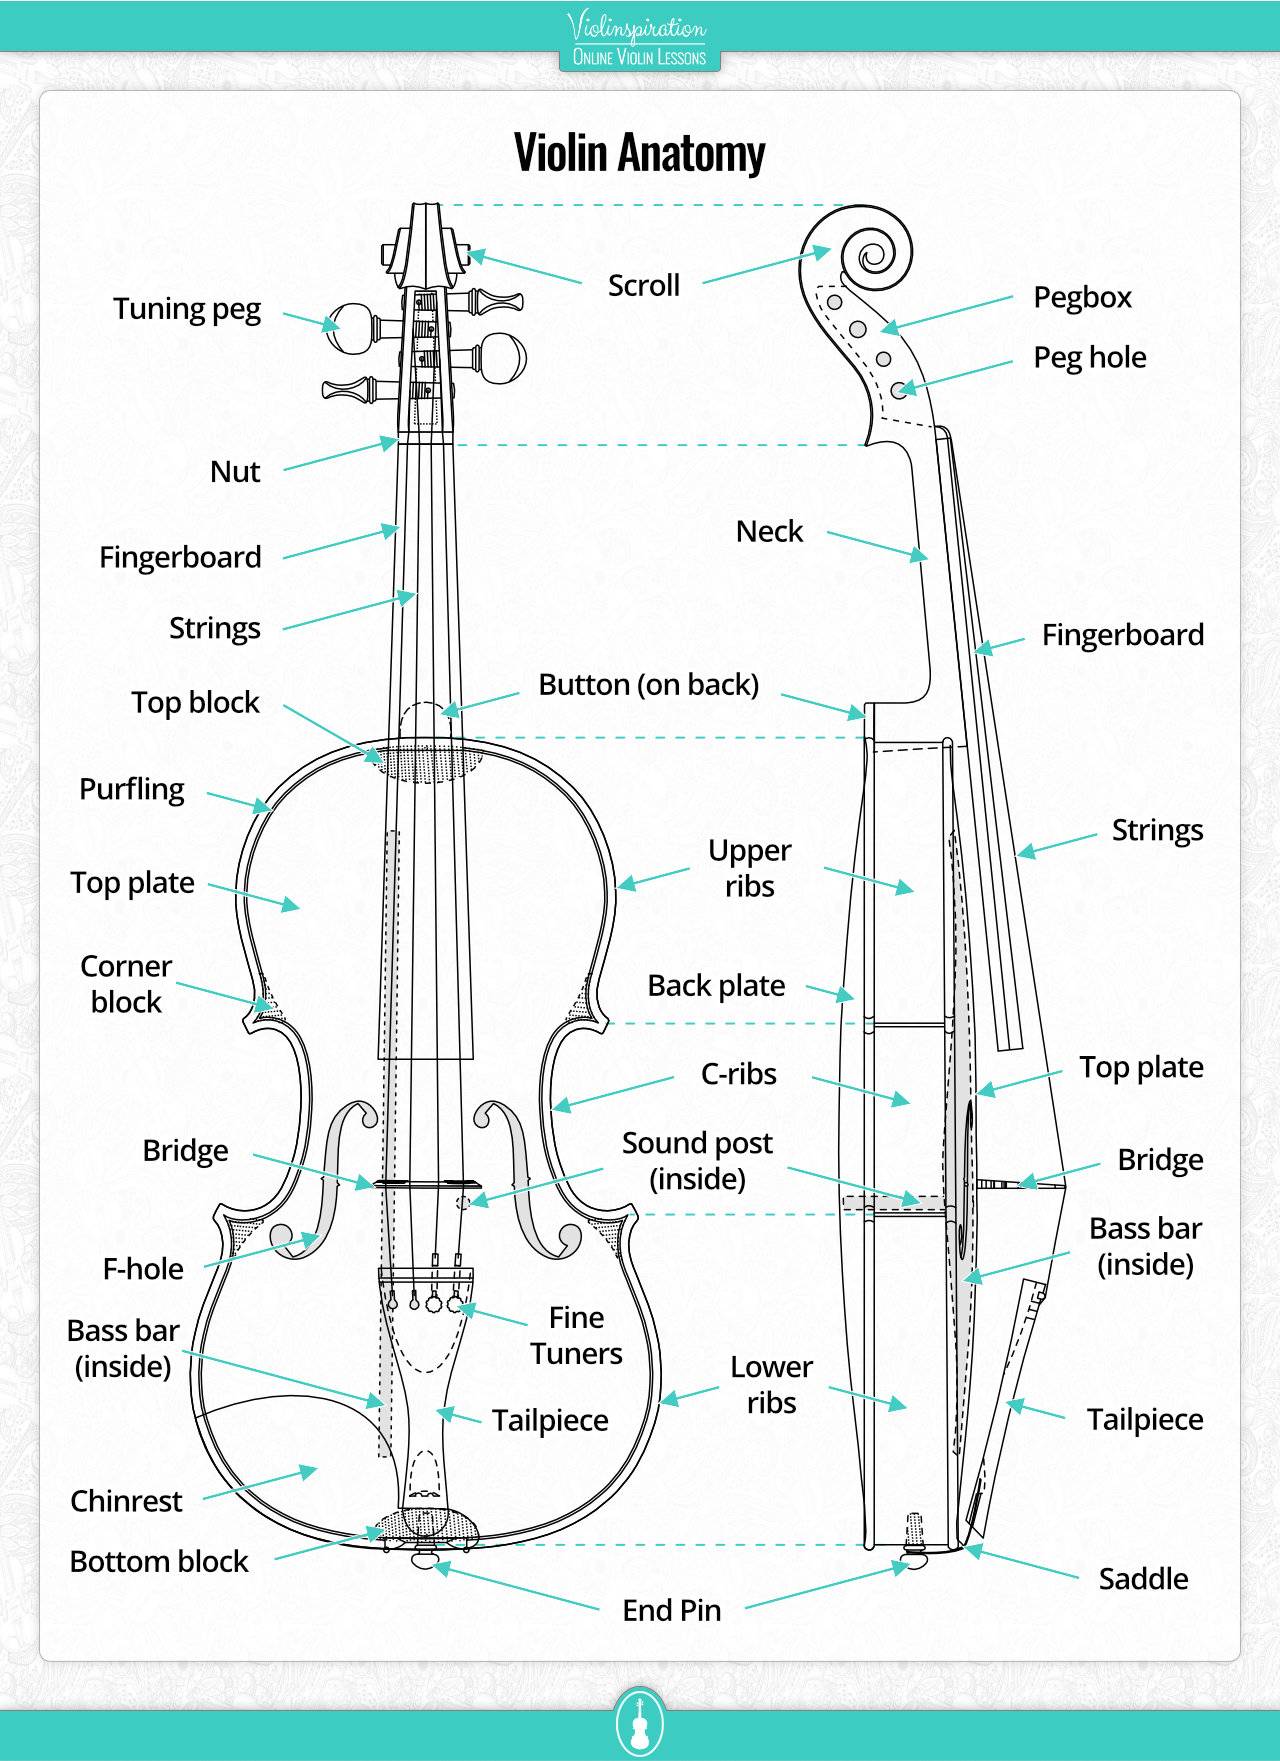
Check out this chart below for detailed violin anatomy. Notice how the fingerboard is directly across from the neck and hovers over the top plate of the violin. It stops right before the f-holes, creating an intentional space for bowing between the end of the fingerboard and the bridge.
How long is a violin fingerboard?
A full size (4/4) violin fingerboard nowadays is usually 270 mm (10.63 in) long. It is typically cut at 24 mm (0.94 in) at the nut, 32 mm (1.26 in) at the neck root, 42 mm (1.65 in) at the end near the bridge, and 5 mm (0.2 in) thick.
These measurements can be open to some changes, but most violin fingerboards will have these standardized dimensions. This length has allowed violinists to play a huge range of notes – 4 octaves and two notes, which gives in total 51 notes.
The length of the fingerboard for a smaller instrument will be shorter.
Does a violin have a fretboard?
No, the typical acoustic violin does not have a fretboard but there are violins, usually electric, with shallow frets on the fingerboard. Such instruments are not in use when a classical repertoire is played.
If you are just starting to play the violin, I recommend you use fingering tapes to train your ears and eyes on finger placement. Without any frets or tapes, it is difficult to know exactly which note you will get from your violin. Over time, this becomes easier and you can anticipate intonation better and then remove the tapes.
The pros to not having frets include more musicality through vibrato, slides, and glissando. No frets means also fewer calluses!
There are some fretted electric violins, though! The upside is that frets help you with intonation, but may encourage some bad habits. That’s why I recommend always starting with an acoustic instrument to learn at least all the basics of violin playing.
What wood is used for the violin fingerboard?
The wood used for making violin fingerboards is typically ebony because of its strong yet flexible properties. Fingerboards can also be made of rosewood or other hardwood.
Back in the Baroque era, fingerboards were made of weaker woods such as spruce or maple, and then covered with a thin coat of ebony. Also, they were as short as 200mm.
Today, luthiers make fingerboards around 270mm and out of ebony. This change has allowed violinists to play more notes, which aligns with the extended techniques that composers like Paganini demand. It also means that the fingerboard can last longer with more reliable wood.
It is extremely important that the fingerboard is strong enough for your fingers to press down, but still have some curvature. Additionally, because it is wood, it can be easily reshaped if it gets damaged. Over much time, your fingers can wear down the wood from all the pressing down.
How much is a violin fingerboard?
A full-size (4/4) violin fingerboard can cost as little as $13 on Amazon or $28 from Fiddlershop.
Putting or fixing your own fingerboard is extremely tricky, so I’d leave it for professionals and the enthusiastic tinkers like Jerry, who is one of my student’s at Julia’s Violin Academy. You can see violin parts done by him in the article “What is a Violin Made Of?”
Violin Fingerboard Chart
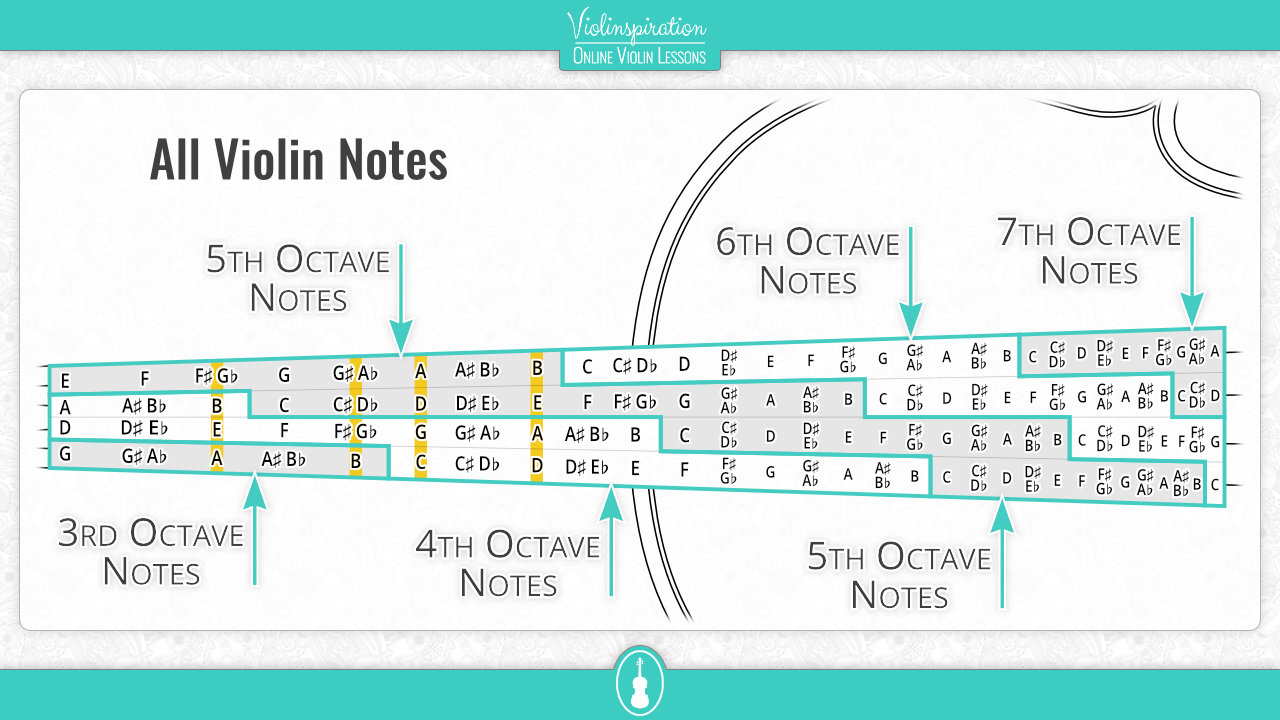
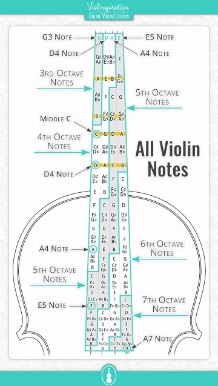
To better understand fingerboard geography in a visual way, I have attached a fingerboard chart down below. This maps out each note by the half step, naming the note both with flats and sharps.
Notice how the spacing between notes is bigger towards the nut, and much closer towards the other end of the fingerboard. It means for you, that you have to learn the spacing between your fingers with each new position you learn.
As you can see, the violin has 51 notes from G3 to A7. Many of the notes are repeated on different strings. For example, the 4th octave B found on the G string can also be found on the D string and the A string. Though each B will be the same pitch, the timbre will be different depending on which string you use.
Download Poster with
All Violin Notes
on the Fingerboard
High-quality poster
Most of the notes you will be playing as a beginner are played in the first position. For the G string, for example, these notes include open G through the D, which you would use your 4th finger for. Any pitches beyond that D will require you to shift to a higher position.
Fingerboard Tapes
Beginner violinists often use fingerboard tapes to mark out the correct pitch. Because the violin does not have frets, it can be extremely difficult to remember where to place your fingers over and over again to get the correct note. And without checking with a tuner for every note that you play, you might not even realize that you’re playing the wrong note.
Materials, detailed instructions on placement, and tips can be found in my blog post: “DIY Violin Fingering Tape (Cheap & Easy).” Remember to always check your tapes against a tuner and to measure the distances according to the size of your instrument.
To help your fingers and ears learn where to put your fingers, I recommend using three or four stickers for the first position notes. These will guide your fingers and give you a visual reference point that will reinforce your ears. They can also be helpful for learning where to put your thumb, and allow you to focus on other aspects such as the correct bow hold, bowing technique, and dynamics.
Although there are many philosophies around using tapes, I like to use them. I recommend taking off the violin tapes when you have a better grasp of what pitches your violin gets from putting your fingers down in a specific place. Once you feel more comfortable and have trained your ears and general hand shape, I recommend taking them off. Although it will be scary and difficult to be without them at first, it is like taking off training wheels!

Final Note
You might not think that there could be so much information written about fingerboards when you first look at them, but they have a very interesting history and purpose! Between the material, the size, and the use, violins are reliant on strong fingerboards to keep playing music the way we currently do. Their construction allows violinists to play a wide variety of music with a huge range of pitches.

