When you start playing the violin, the first thing your left hand learns is the first position. This is the basic, most fundamental position for the fingers, all other violin positions are referenced from here.
So let’s look in detail at all the aspects of the violin first position!
What Does First Position Mean on Violin?
The first position on the violin is the placement of the left hand in its most fundamental place, which is at the nut end of the fingerboard. The first finger by default stops the note that is one tone (whole-step) above the open string.
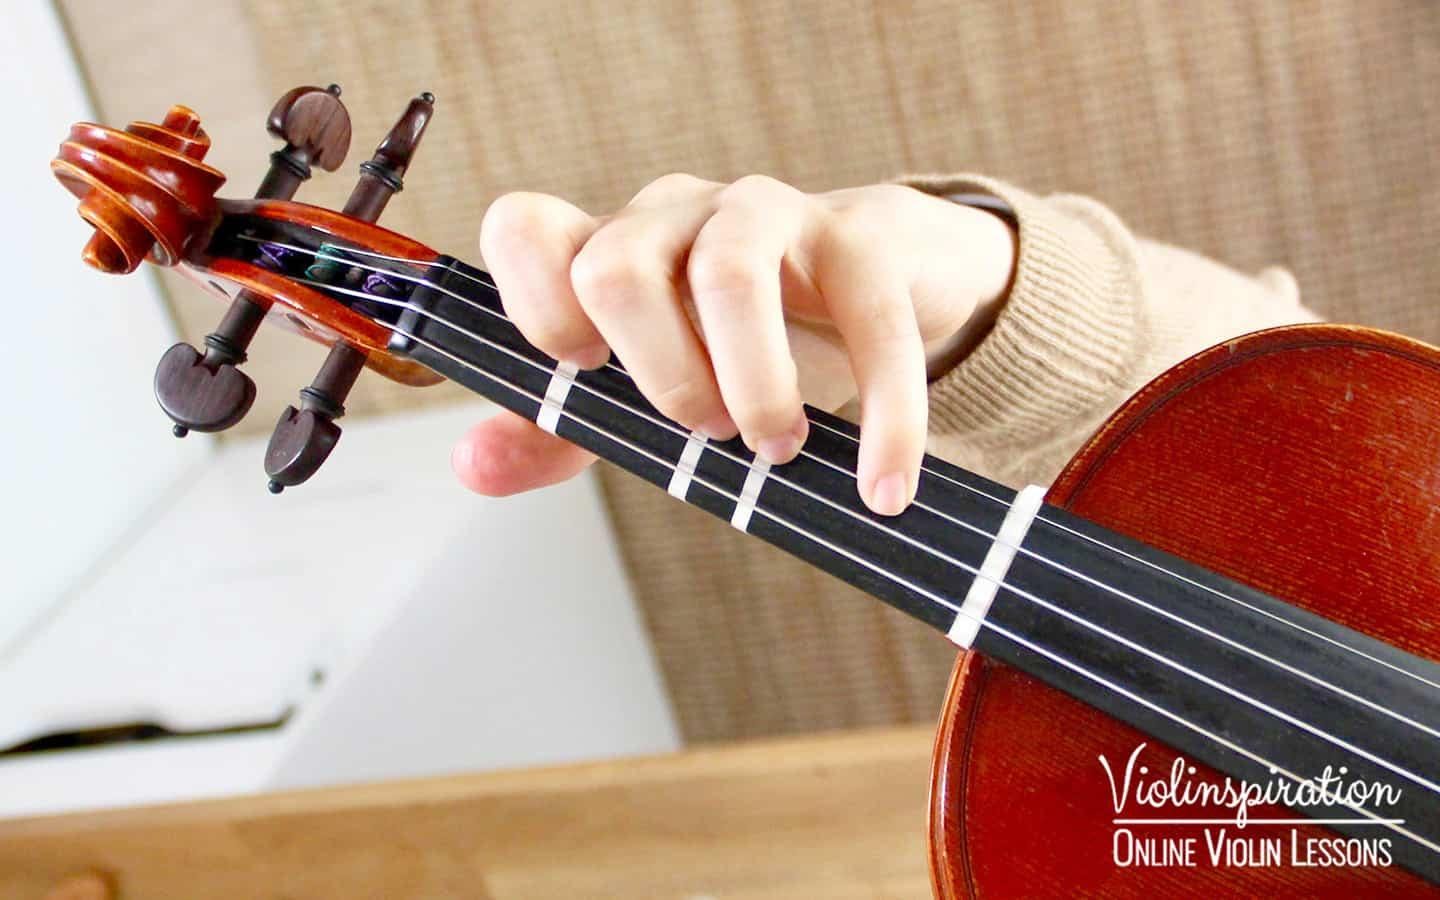
The first position refers to the positioning of the hand and not the fingers, in such a way that the fingers can be placed on the default position, usually marked by beginners with tapes, or individually shifted up or down by a semitone. It is in fact rare that all the fingers will be playing just the notes where the tapes are, yet the position of the hand stays the same.
If you move all the fingers down a semitone, however, your hand will need to move as well and you will be in half position. Similarly, if you shift all the fingers up, you will end up in higher positions. Here’s my video with a quick explanation of the positions on the violin:
Where is the 1st Position on the Violin?
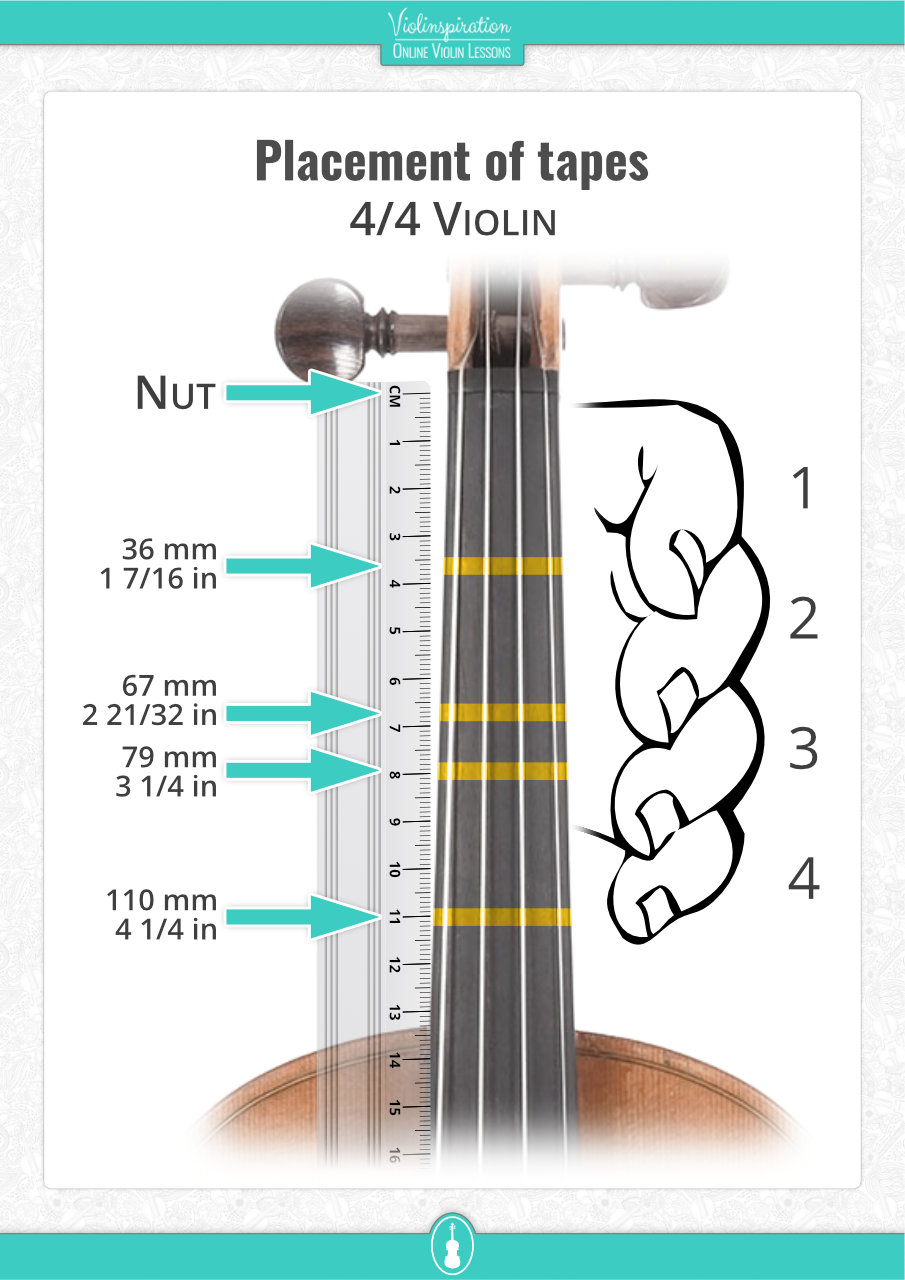
The first position on the violin is near the scroll or nut end of the fingerboard with the index finger placed 36 mm or 1 and 7/16 in from the nut. This way, you can play A on the G string, E on the D string, B on the A string, and F# on the E string.

When your first finger is on the B on the A-string, near the scroll, your second finger on the C#, the third finger on the D, and the fourth on the E, your hand will be in first position.
With this hand positioning, you can move individual fingers half step higher or lower, while you’re still in the first position. This allows for many different finger patterns, which you will need in order to play in different key signatures.
If you’d like to study the placement of fingers on a violin even further, check out my article on Finger Patterns and on Finger Placement.
First Position Tapes on Your Violin
To help your left hand develop good habits and find its way around the fingerboard, as a beginner you will probably want to put tapes on for guidance. This is what the tapes will look like once you have put them in the right place. This will ensure that your finger positions are correct and you play in tune even at an early stage.
In this video, I walk you through placing the tapes on your violin:
To put on each tape you need to find the right position for it. You can use the chart that shows the exact distances between the nut and each tape or by placing your finger on one of the strings and checking the note with a tuner to make sure it is the right one.
How to place the tapes
For the first tape you can play the B on the A-string, and when this is in tune, put the tape in exactly the place where your finger was. Then check the accuracy of the tape by playing the notes on each string and making sure they are the correct notes.
The first tape should help you play an A on the G string, E on the D string, B on the A string, and an F# on the E-string. If you look at the following picture, you can see they are all along the same line across the fingerboard.
If any of them are out of tune when you play them, lift the tape and adjust it just a little. Then check again. Keep doing this until you have the tape in the right place.
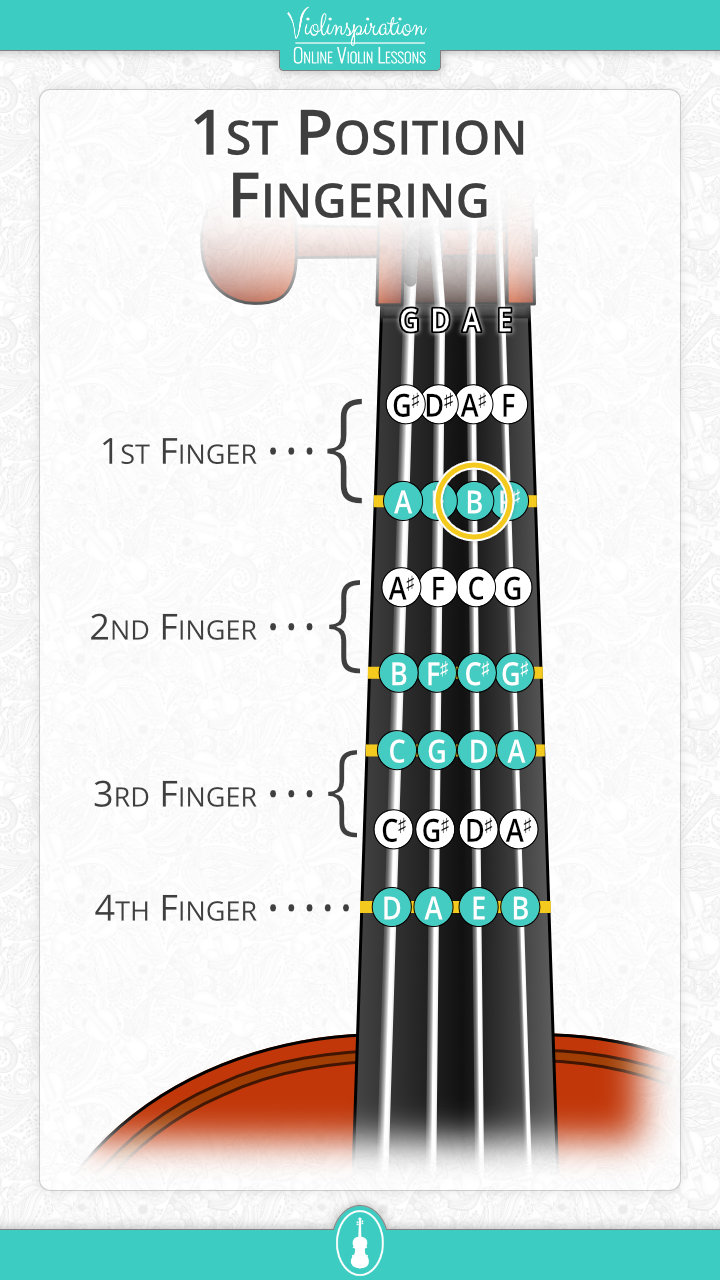
The second tape will go along the second green line, so the notes will be B, F#, C#, and G# note respectively, the third tape will be on the CGDA-line, and the last one on the DAEB-line.
To find out more about violin fingering tapes, what types to use, or where to buy them, click here and read my blog post “DIY Violin Fingering Tape (Cheap & Easy).”
Basic Finger Patterns
Let’s have a look at the most commonly used patterns for your fingers.
The First Fingering Pattern: “High Two”
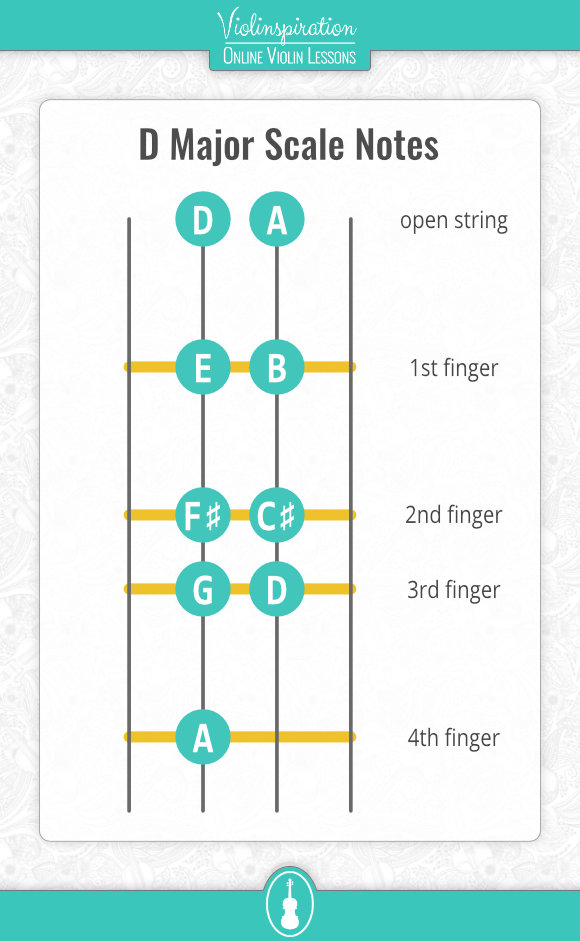
When you place your fingers on one string, each finger goes on one of the tapes you have put on your violin. This violin fingering is the very first, most basic finger pattern. In this finger placement, you have a normal first finger, a high second finger, and a normal third and fourth finger.
You are going to use this pattern e.g. when playing the one-octave D Major scale.
The Second Fingering Pattern: “Low Two”
If you shift the second finger a semitone down, so it is next to the first finger, between the first and second tapes, you have a low second finger.
You will use this pattern when e.g. when playing one-octave G Major scale starting on the third finger on the D string.

Fingering Patterns in Different Scales and Key Signatures
To be able to play all the violin notes in a given scale or key signature, you will use various fingering patterns and a combination of finger positions that varies by string and by position. But for now, it is important to practice the placement of the fingers on the tapes. This way your fingers get used to being placed in certain spots. In other words, you develop muscle memory.
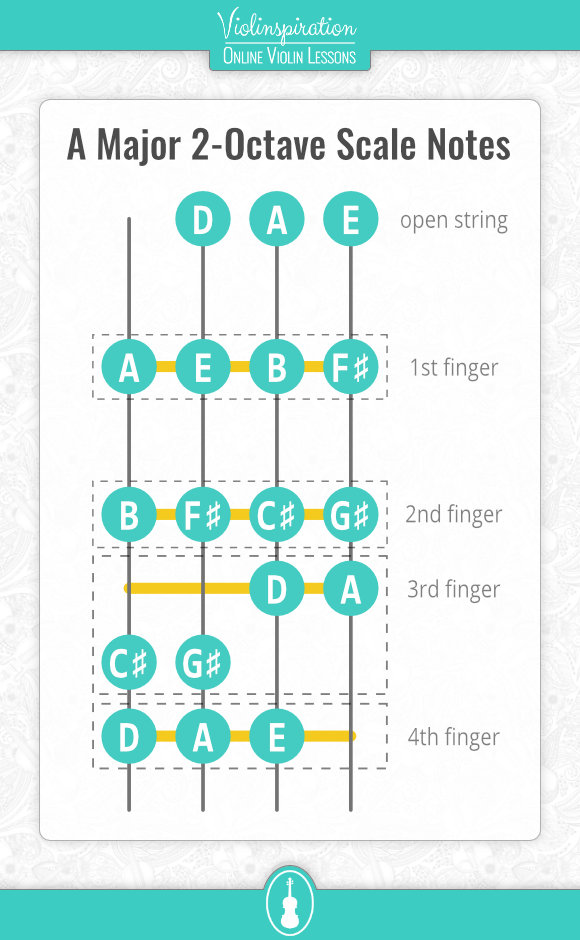
The most common beginner scales include G Major and A Major scales. Take a closer look at the pictures below and observe how the fingering patterns change between the two scales and also when changing strings.
Here you can download the booklet with 5 most common violin scales for beginners:
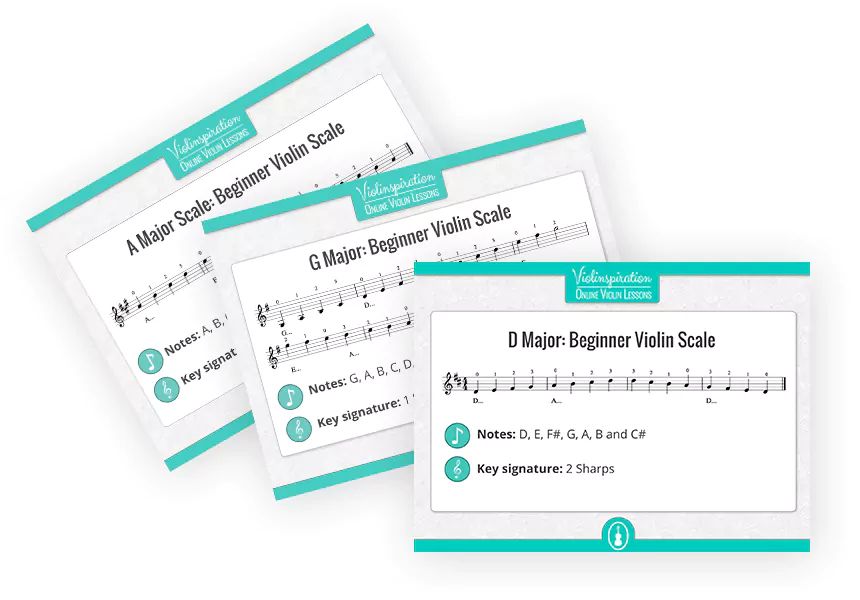
5 Most Common Violin Scales for Beginners
Get Free Easy Exercises
To learn more about fingering charts and the violin tabs, check out this blog post.
Violin Posture in the First Position
What helps to play correctly and not to develop any pain is the correct posture. Let’s examine what are the elements of proper violin posture for playing in the first position.
Prepare your body
First of all, your posture needs to be straight, with your spine vertical, and your head resting comfortably on top of your spine, also vertical. This is the same whether you’re standing or sitting.
If you’re standing, place your feet around shoulder-width apart. Some people place the left foot a little forward from the right, in a V shape, though this is not essential.
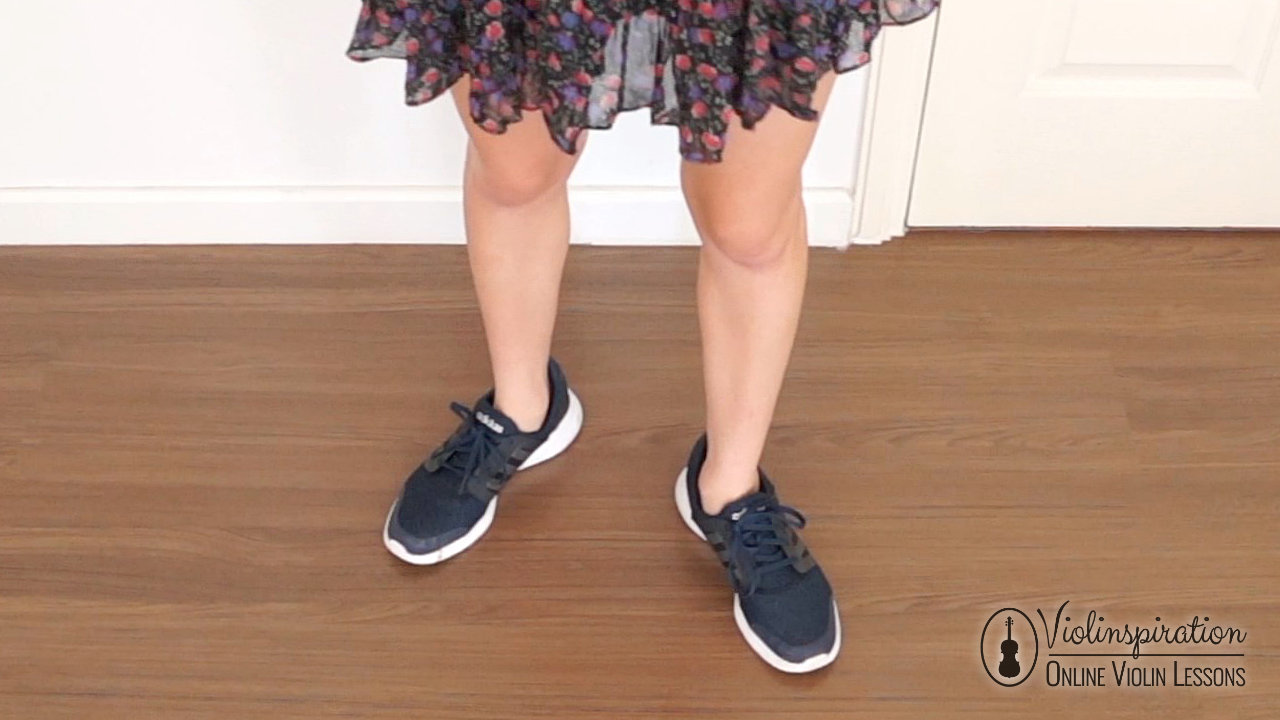
If you’re sitting, make sure that your seat is angled slightly forward, so your knees can be below the level of the seat. This will allow for your pelvis to tilt slightly forward and make it easier for you to keep your back straight.
Hold the violin with your chin
Once you have found the posture for your body, you can place your violin on your shoulder, checking that you don’t accidentally tilt or skew your body in order to hold the violin.
Simply place your chin on the chinrest and allow the weight of your head to rest on the violin. You don’t need to lean your sideways, if you do that, eventually, you will have postural problems, and pain.
Your head is heavy enough to press down on the violin and hold it in place without any additional effort or grasping, provided that the chinrest and shoulder rest you’re currently using are adjusted to your needs.
The left hand will also help in keeping the violin up and in the right place, but it has other work to do, so most of the job of holding the violin will be done by your head.
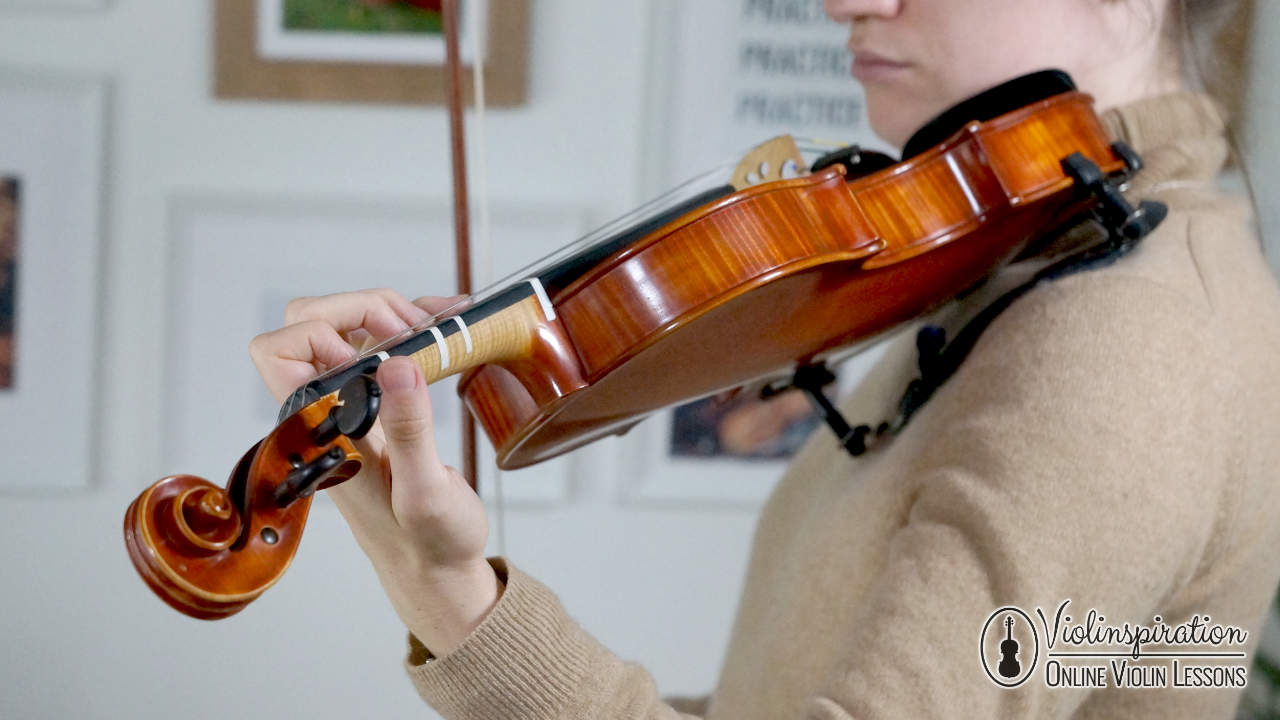
Be aware of the right-hand movements
At this point, you are ready to place the bow on the violin. Put the bow on the strings, above the gap between the bridge and the end of the fingerboard. When you first put the bow on the violin, you can place it in such a way that the middle of the bow touches the string. Make sure that the bow is at a right angle to the fingerboard.
In this position, the right elbow also forms a right angle. As you move the bow to make a sound, the elbow will open and close to keep the bow straight.
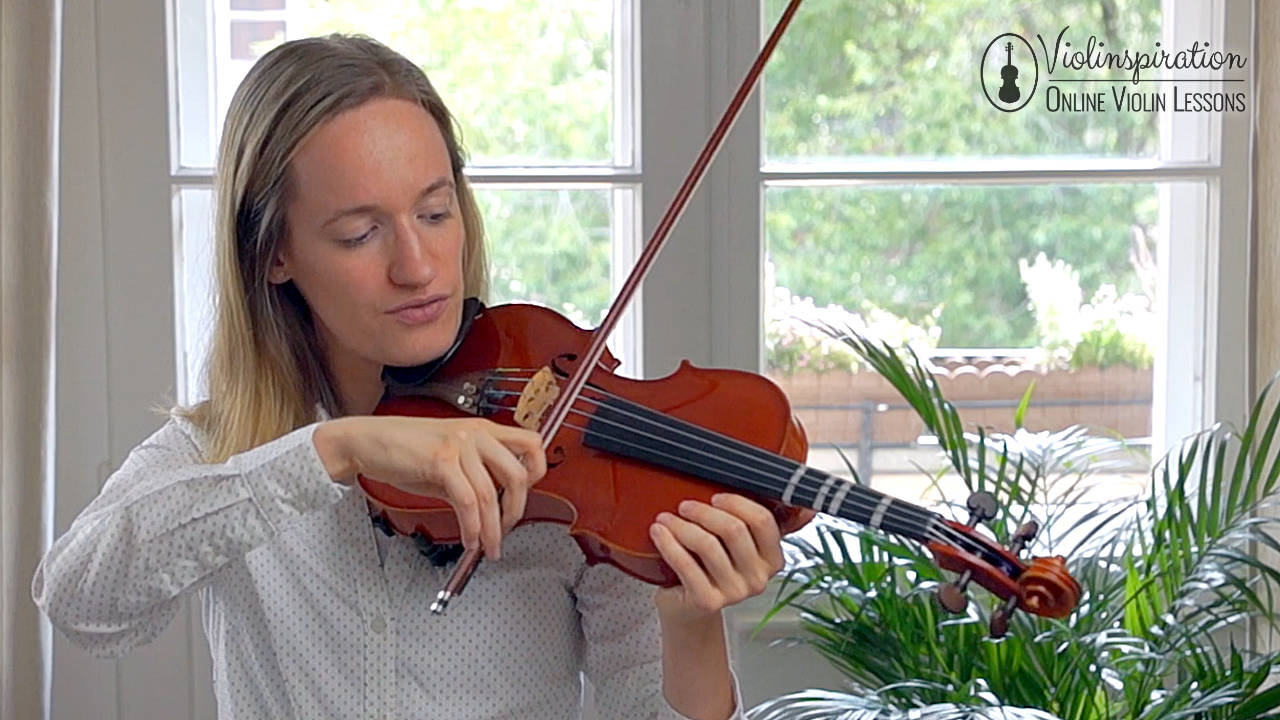
When you change between strings, you will adjust the vertical position of your elbow, depending on which string you are playing.
Check that your wrist is relatively straight, there should be no strong bends there, as that will create tension and rigidity. Instead, look for a relaxed way to stay upright.
Double-check your posture
Check whether your body and head are vertical, not leaning either sideways, backward, or forward. You can do this by:
- asking a friend
- looking at your posture in the mirror
- recording a video of yourself holding the violin and playing.
Relax
When your posture is quite good, make sure that you are as relaxed as possible. Drop your shoulders if they have pulled up and generally relax as much as you can. You are now ready to play some notes.

What Are the Notes in First Position on the Violin?
The first or index finger is used for playing the following notes: A, E, B, and F#. If you’re playing a high 2nd finger, the notes will be B, F#, C#, and G#. For the 3rd finger we have C, G, D, and A and for the 4th D, A, E, and B.
These are the notes in green on the picture. If the fingers need to move into a higher or lower place, they will shift onto the appropriate white note.
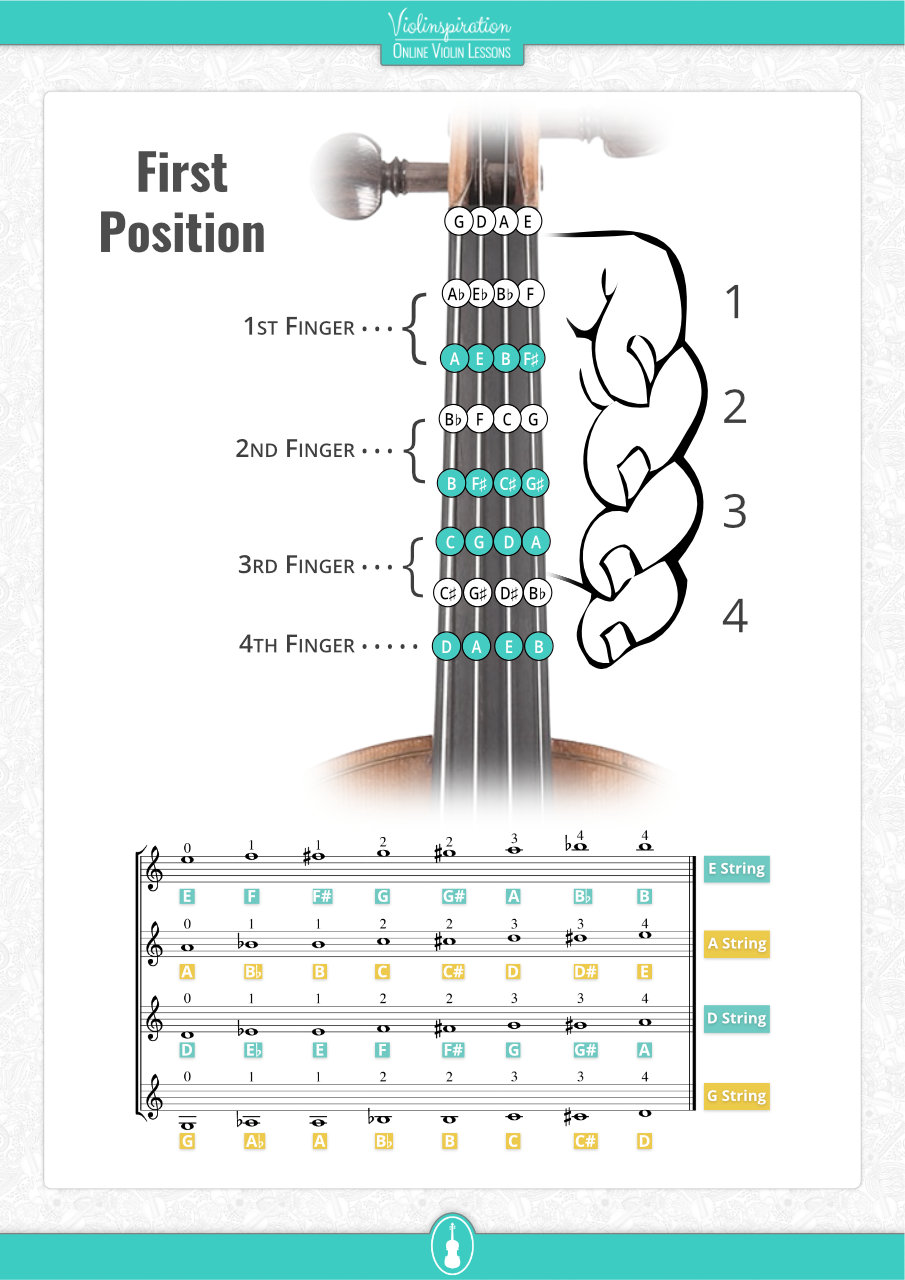
To study all notes in the first position on each string, check out the following articles:
How to Play the Violin in the First Position?
To play the violin in the first position you need your violin, bow with rosin, and sheet music. You can use sheet music with violin tabs or learn how to read violin sheet music. Anyway, memorizing all the notes in the first position will help you. Choose between scales, etudes, and pieces, then try to incorporate different bowing techniques.
Of course, it’s always easier said than done! In order to improve your playing, you need a step-by-step plan and the teacher’s feedback. I offer that and much more in Julia’s Violin Academy where you can learn in a group of like-minded students, most of them being adult beginners. If you feel that is something you need, do not hesitate and request your invite to JVA today!
Yet another aspect of your playing is the intonation.
How to Check if You’re Playing in Tune?
Practice playing the individual notes with a tuner, which will show you whether they are in tune or not. You should also listen carefully to what you play and look for the ringing tones.
As you play each note, allow your left hand to gently adjust its position to make sure it can be placed in the correct place on the fingerboard.
Even though the overall position of the hand stays the same, within this place it will want to move and adapt with the changing of the notes you are playing. So let it stay flexible and allow it to move. While you do this, feel into your hand and fingers, get a felt sense of the positioning.
As you play the notes and check them for accuracy, also listen. Train your ears to tell if you are playing in tune. To make it easier, you can check some notes against the open strings. Any G, D, A, or E note should sound “the same” as the respective open string, either the same pitch or an octave higher or lower.
Also, when playing these notes, the note will sound more resonant when it is in tune, because its vibration will create sympathetic vibrations in the open string corresponding to the note you’re playing. Some other notes, for example a B, also achieve a similar effect, only more subtle, because they are harmonics of these notes.
Essential Beginner Exercises in the First Position
When you’re learning to position your hand, it helps to move your focus onto something else, something where you have to use first position fingerings, but your main focus is not the position itself. This takes the pressure off having to be there and lets your body learn it by itself.
Here is a list of eight essential exercises, all of which can be done in the first position, and when you move onto higher positions, they can be extended to that also:
1. Long notes

Practicing very long notes helps with intonation and bow control. Pick a scale and practice all notes very slowly, listening carefully to the tone you create.

5 Most Common Violin Scales for Beginners
Get Free Easy Exercises
2. Slurs
Slurs are present in fast and slow pieces, so it’s another essential skill for you to learn. One of the most helpful resources for you here will be the School of Violin Technics by Sevcik:
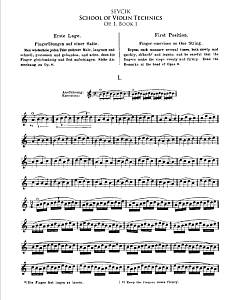
School of Violin Technics Op. 1, Book 1 by Sevcik
3. String crossings
I share my tips for cleaner string crossings in the video below.
4. Fourth finger exercises
The fourth finger tends to be the weakest, so it takes some time before you will be able to use it with the same ease as the first three fingers. The following exercise will help you strengthen the fourth finger in a very easy way:
5. Scales
Practicing scales helps you learn proper violin fingering for each key signature and develop muscle memory. It’s always a great preparation before playing a piece! You can download a free booklet with the 5 most commonly used beginner scales below.

5 Most Common Violin Scales for Beginners
Get Free Easy Exercises
6. Arpeggios
I always recommend practicing arpeggios next to scales. By playing arpeggios you learn new finger patterns and intervals. Make sure to check out what are arpeggios and how to practice them in my article “What Are Arpeggios – Definition and Exercises.” Below you can download a PDF with easy arpeggios for beginners:
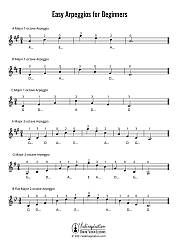
Arpeggios for Beginners
Get Free Easy Exercises
7. Etudes
Etudes are exercises that look like pieces but are focused on developing certain technique. You don’t have to play them but if you do, for sure you will progress faster. You can learn more about etudes and download or buy a book with etudes for your level in my blog post “Violin Etudes in Order of Difficulty – A Complete List.”
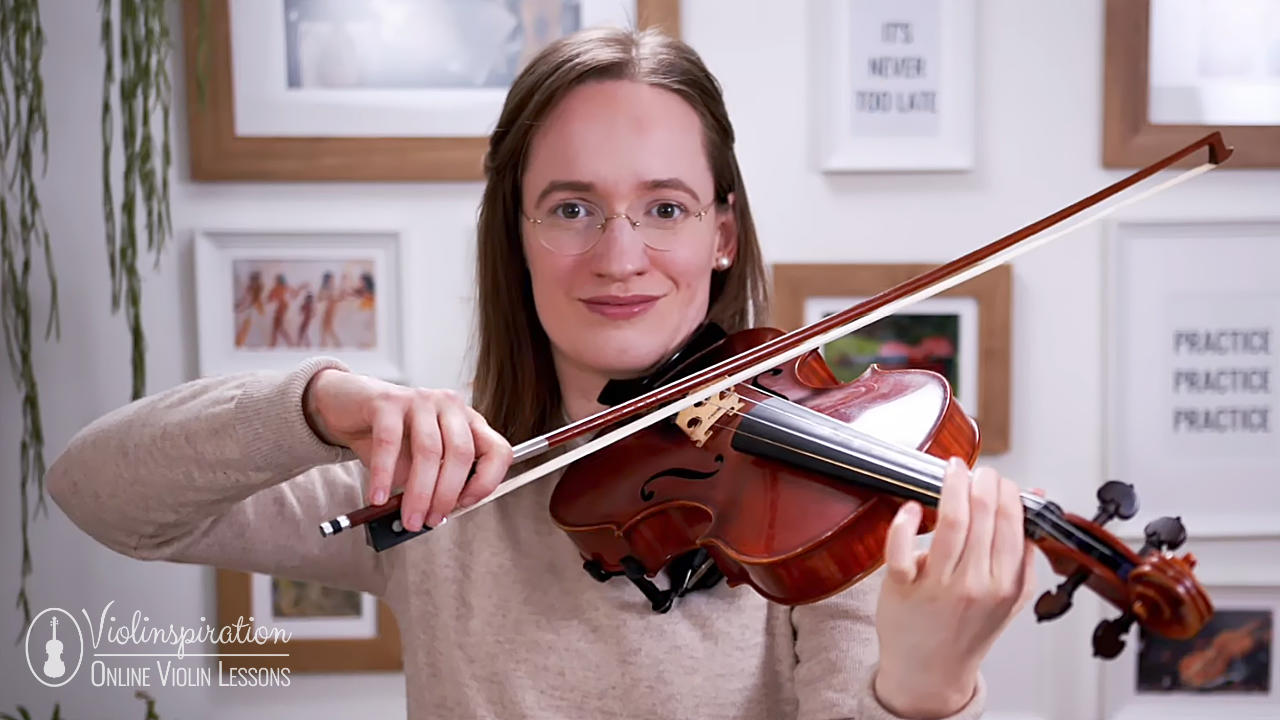
8. Violin Studies
Violin studies, similarly to etudes, are created to develop certain techniques. The best violin studies to learn by beginner violinists are those written by Ševčík and Wohlfahrt.
Ševčík wrote a series of studies covering everything you can learn in terms of violin technique. You can download Book 1 for free here:

School of Violin Technics Op. 1, Book 1 by Sevcik
Book 1 of Wohlfahrt’s Sixty Studies is all in the first position. You can buy your copy here:

Op. 45: Sixty Studies for the Violin Book 1 by Wohlfahrt
Support us for more FREE content No extra costs for you Recommended by Violinists
Easy Songs in the First Position
The best way to practice the first position is by playing lots of fun songs!
As you play, you won’t even notice that you have become really comfortable placing your fingers on the right spots of the fingerboard.
You can start with the super easy tune “Marry had a little lamb”:

Mary Had a Little Lamb
Free Violin Sheet Music
If you feel ready for a classical piece, I highly recommend you learn “Ode to Joy” as it requires basic bowing and basic violin fingering.
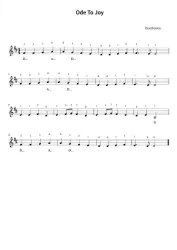
Ode to Joy – Beethoven
Free Violin Sheet Music
If you’d like to know what are the other best and most fun to play songs for beginners, check out my posts:
- 25 Easy Violin Songs for Beginners That Everyone Knows and Loves
- Top 20 Easy Violin Songs Anyone Can Learn
- Legend of Zelda Violin Sheet Music for All Levels
- and there are also easy Christmas pieces: The 12 Best Christmas Songs to Play on Violin
Or you may go directly to my Video Lessons library with 200+ videos and browse for classical, pop, folk, or film music. If for some reason your favorite tune isn’t there, please let me know in the comments below what piece would you like to learn in an easy version.
Final Note
The first position is the fundamental positioning of the left hand on a violin. I hope that this article was helpful for you, and now you’re prepared for playing in this position. Now it’s your turn: pick a few exercises, add one or two pieces at a time, and practice well as you can!
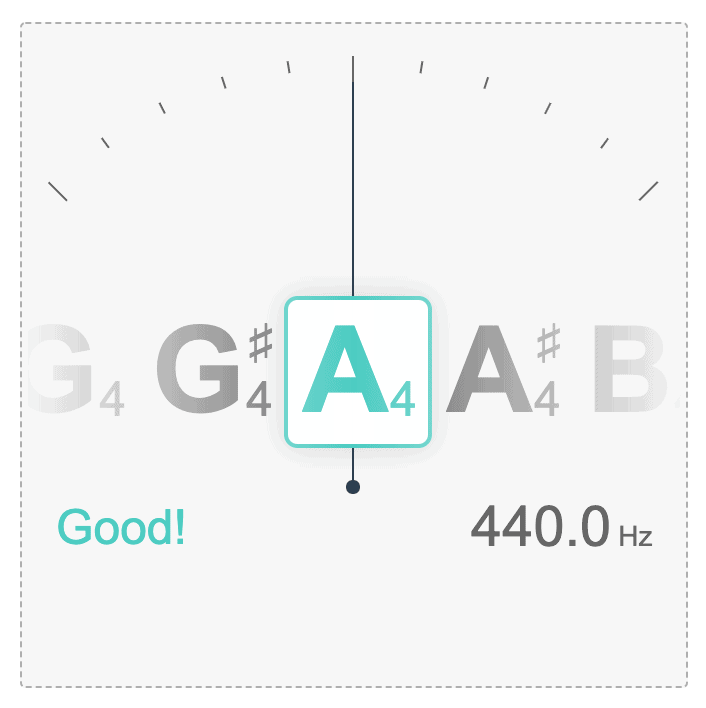
Make sure you’re playing in tune by using my free online tuner, a chromatic tuner, or if you decide to be a member of Julia’s Violin Academy, use InTune. InTune is the software available to all Academy students that tracks everything you play and shows you statistics, so you will always know what to improve. Also, remember to submit your video to receive feedback from a professional violin teacher.
As a last note, be patient and play a variety of pieces, scales, and etudes before trying out different positions on the violin, as the first position is an important base for the other ones.
Happy practicing!
Fillable Practice Plan [PDF]
