Learn about violin technique exercises that’ll develop your intonation and sound!
If you’re looking to become a better violinist, you’ll want to focus specifically on your violin technique. Between your two hands doing completely different things, you have a lot to think about, and there are a lot of skills to hone in on.
The violin technique exercises I’m sharing today will help you improve six difficult techniques you’ll often encounter in both hands.
FREE Violin Technique Exercises
Improve Your Playing by Practicing These Exercises
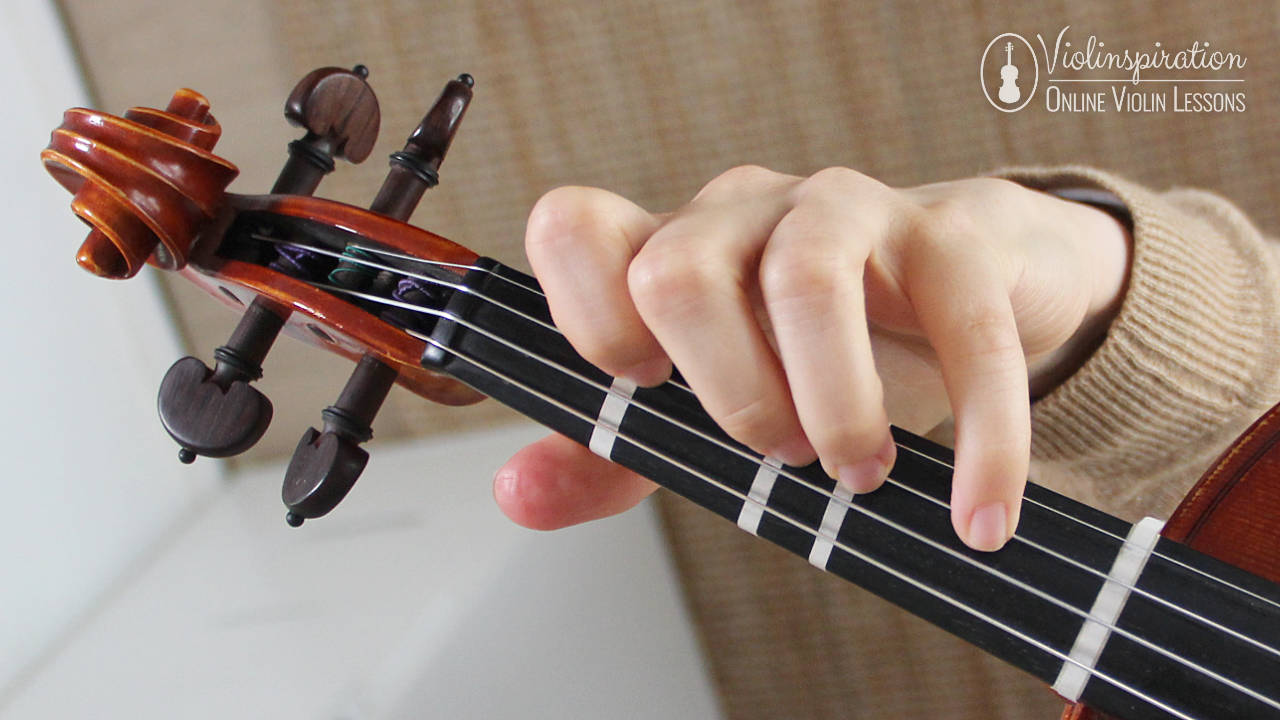
3 Left Hand Techniques
Many violinists focus on left-hand techniques for a very long time because finger placement determines whether your intonation is good or bad. Let’s walk through a few difficult left-hand situations, and violin technique exercises we can use to improve our skills.
1. Finger Patterns and Placements
If you’re learning a variety of songs, you might notice that they are in different key signatures. The sharps or flats at the beginning of each line of music tell you which notes should be raised or lowered each time you play them.

Different key signatures require unique finger patterns. You’ll need to place your finger on a slightly different spot on the fingerboard to create a sharp or flat note.
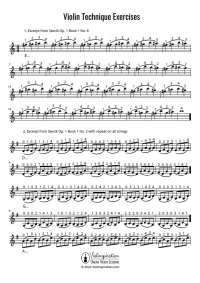
The exercise I like to use for practicing new finger patterns is by Otakar Sevcik, an influential violin teacher who wrote many helpful exercises for others to advance their violin playing.
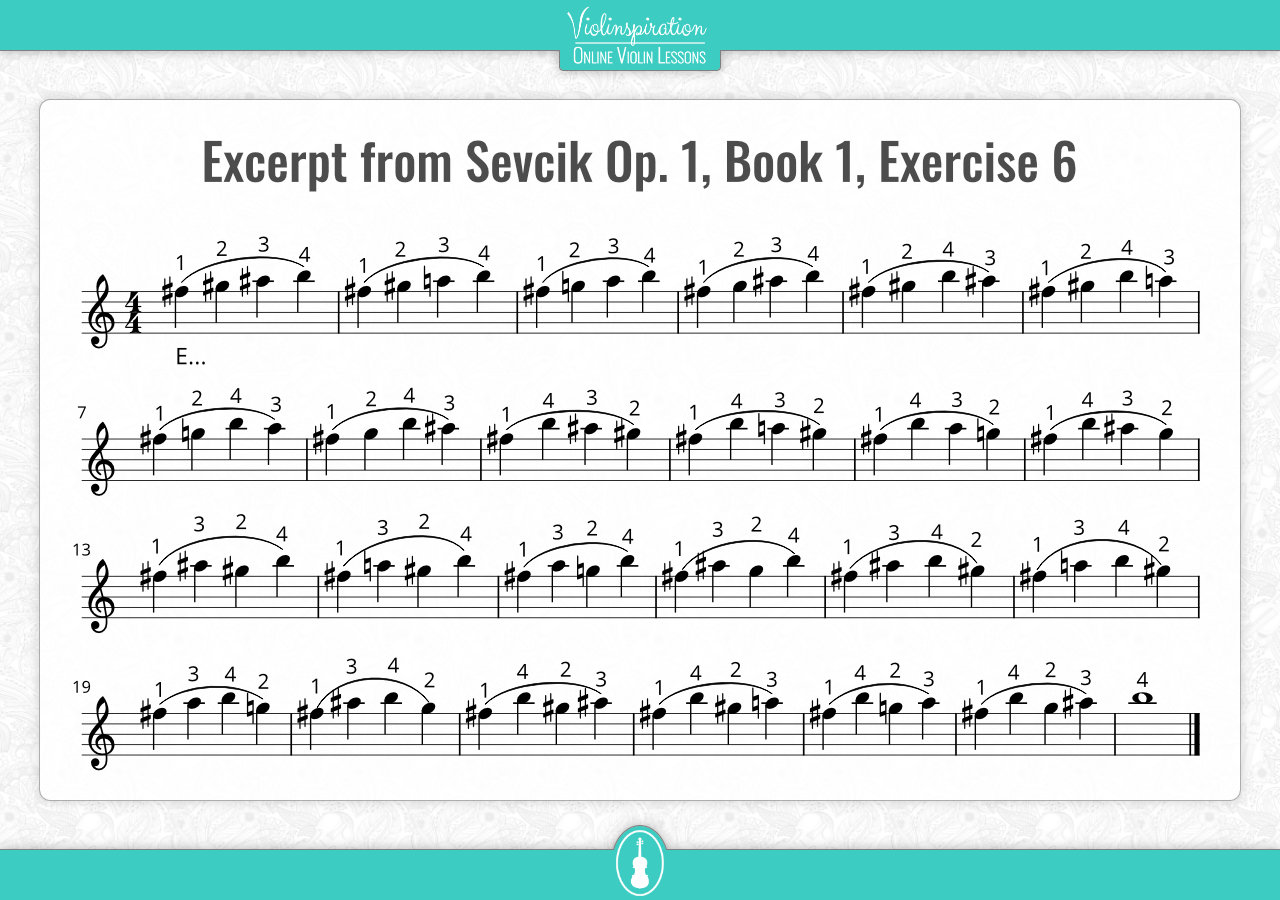
This violin technique exercise goes through all four fingers on the string, changing just one note by a half step at a time. Your hand stays entirely in the first position and helps to build a strong hand frame, even when just one finger changes its placement at a time.
If you’re not sure where to put your fingers, have a look at the first position chart and check your intonation with a tuner.
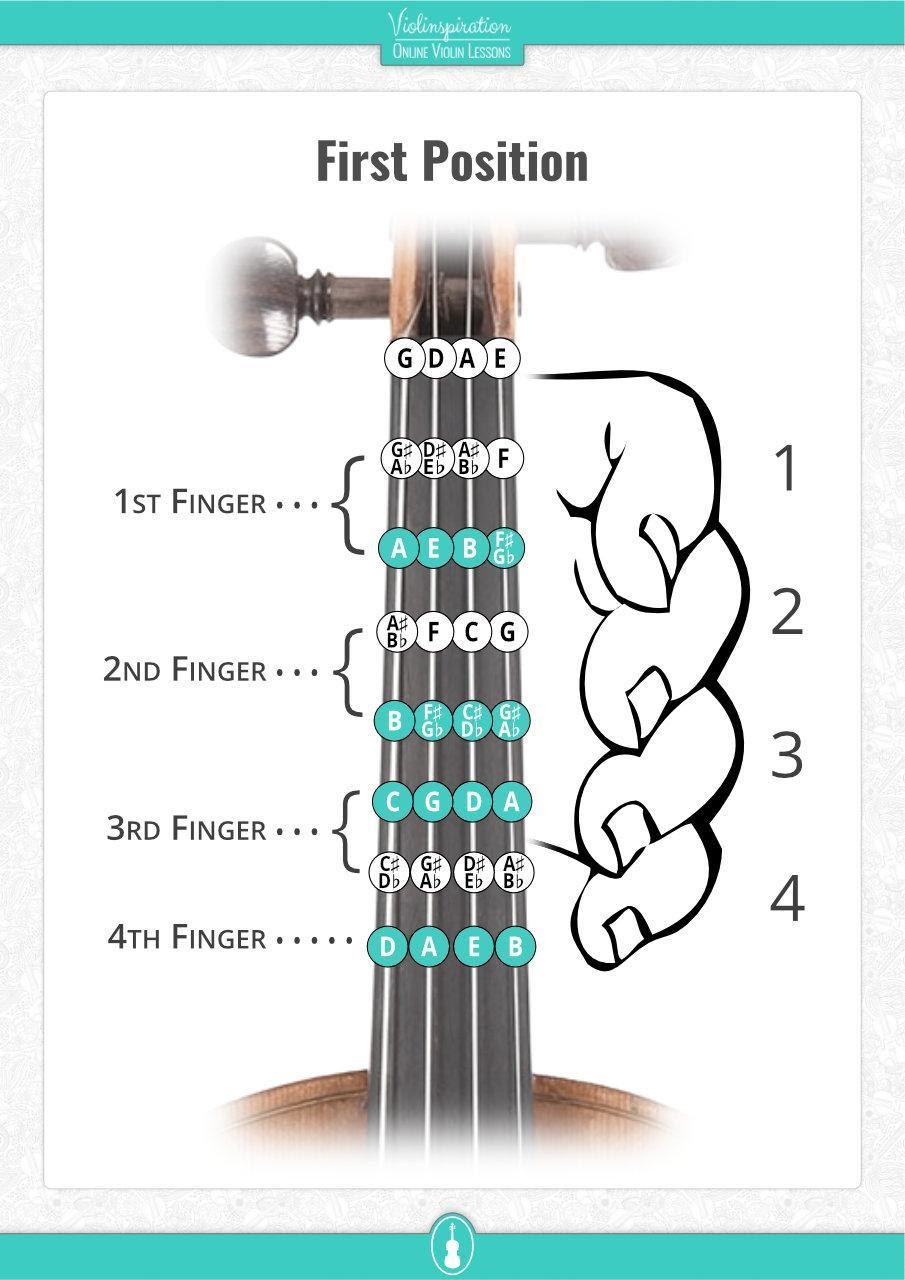
Start by practicing each note slowly, and listen carefully for accurate intonation. In time, you might be able to go faster, but this exercise isn’t a race. The goal here is accuracy, not speed.
2. Using Fourth Finger
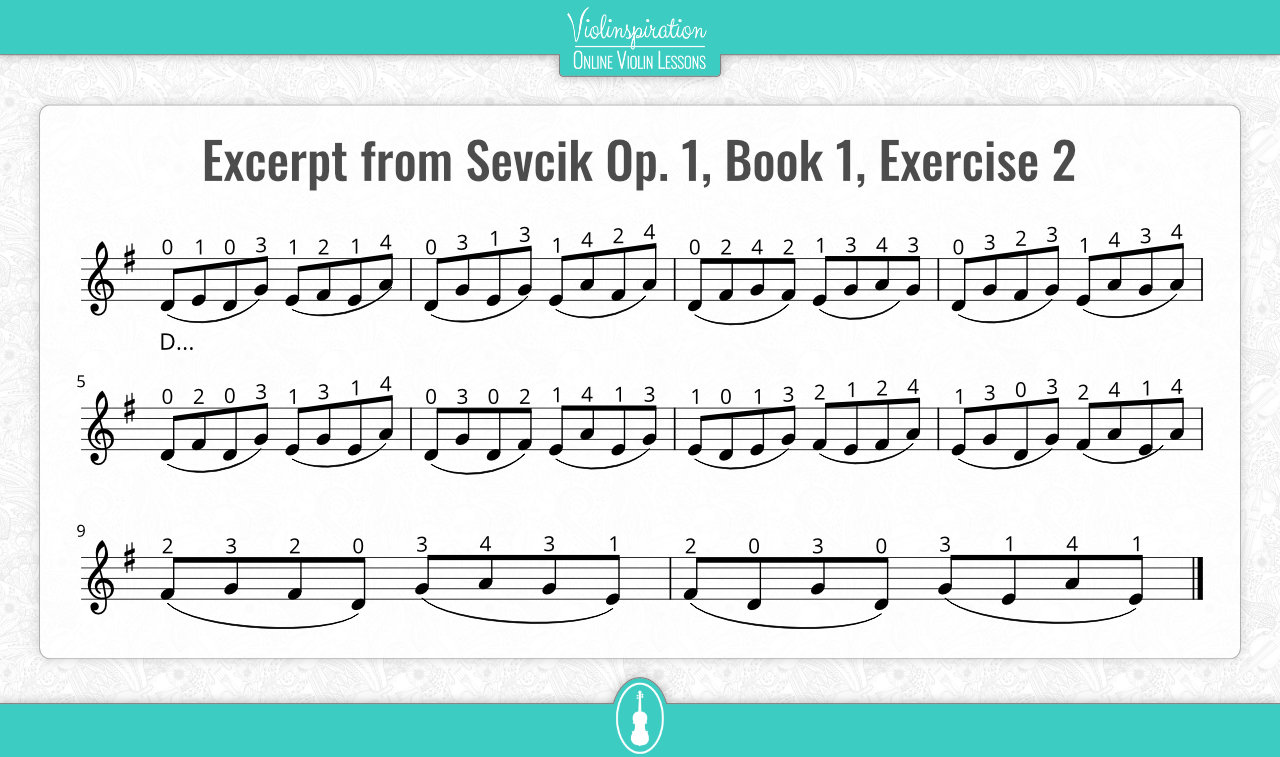
Many of us violinists struggle to play music that uses the fourth finger, because it’s the shortest and weakest finger, and we don’t use it much for anything else. Playing a note with your pinky finger instead of an open string can be very helpful in a passage where you’d like to stay on just one string.
To practice the fourth finger, I like to use a different exercise by Sevcik. This one is helpful because you don’t have to play the fourth finger repeatedly or quickly–it just pops up here and there. Remember to practice this exercise also on the other strings!
3. Violin Harmonics
Violin harmonics pop up in difficult violin repertoire, but they’re a fun technique to learn at any level! Harmonics is how we play overtones on the violin. If you’ve watched a video of a violinist playing a complicated piece of music and you heard something that sounded like a whistle tone, that was probably a harmonic!
There are a few different ways to play harmonics, but today we’ll just focus on artificial harmonics. If you’re entirely new to this technique, watch my overview video before continuing:
An artificial harmonic is played with the first finger pressed down, and with the fourth finger simply resting in its place on the string. If you’d like to make an artificial harmonic sound on an open string note, lightly touch the string with your third finger. You’ll hear a harmonic version of the open string note.
To practice artificial harmonics, let’s play an entire scale of them! This will prepare you for a more advanced repertoire that you may want to play in the future. Also, it will help you play octaves with better intonation–your fingers are placed the same distance away as they are when you play octaves.
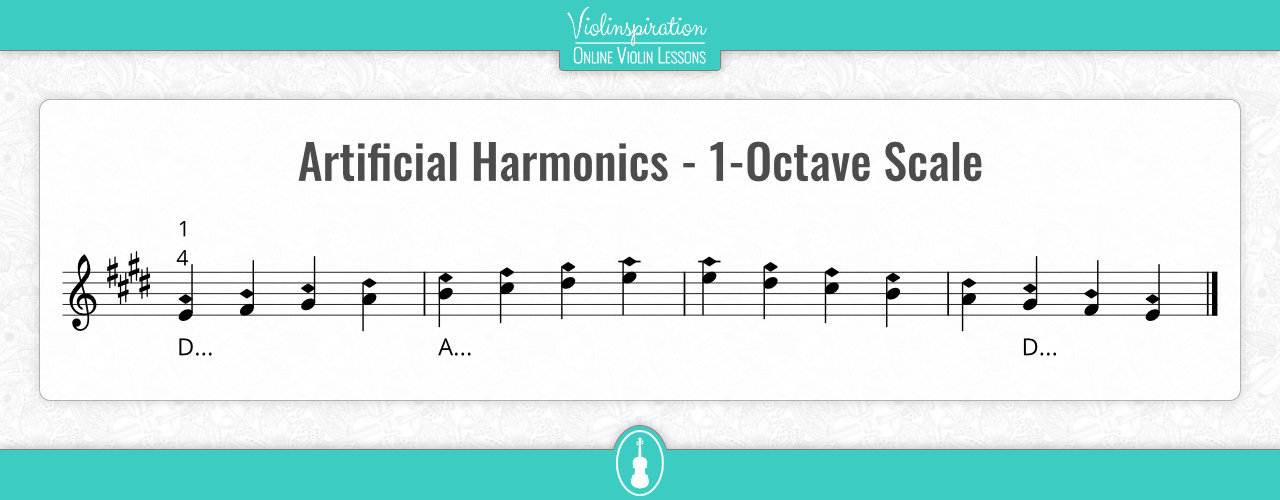
When playing artificial harmonics like in this exercise, you have to shift between each note. If you’ve never tried that, make sure to read first my two blog posts on this topic:
3 Right Hand Techniques
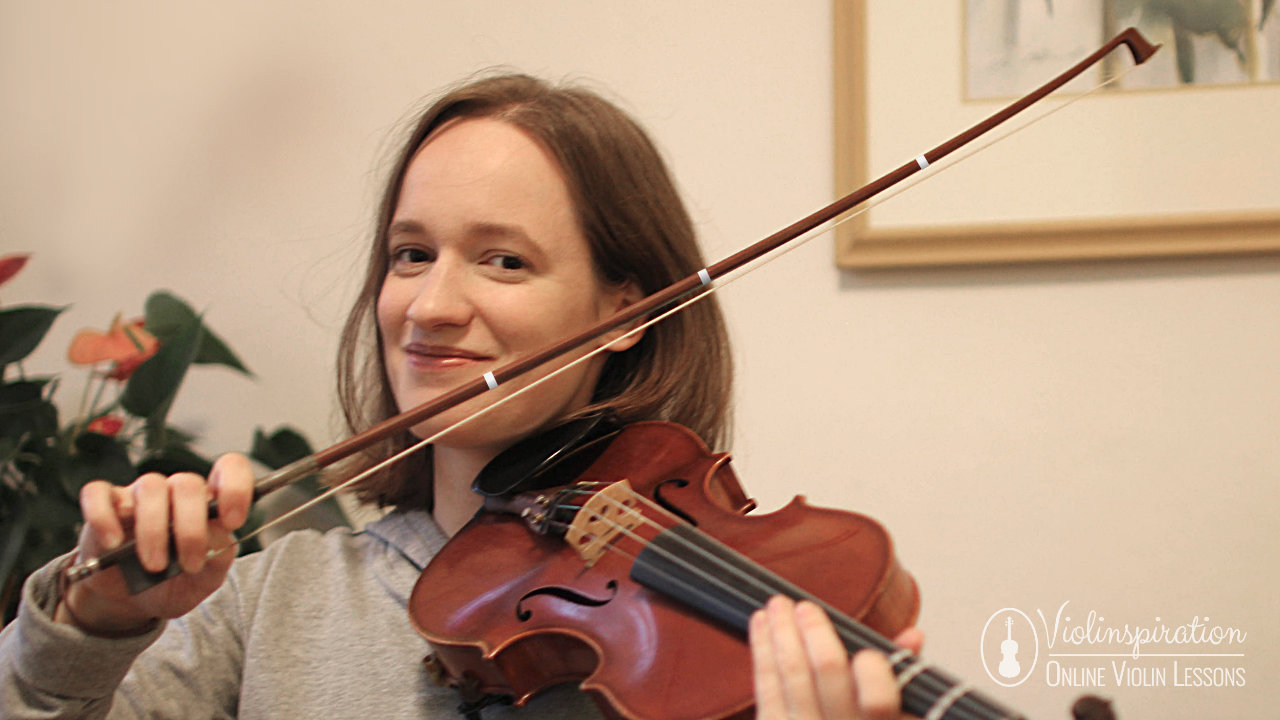
The right hand and arm use the bow to create sound on the violin. There are lots of different bow strokes out there to create unique, very specific sounds. Here are three tricky skills to master, and the violin technique exercises that’ll help you improve.
1. Bow Distribution
Have you ever played a long slur and run out of bow before it was finished? Me too. We need to practice how much bow we use per note to play passages like this.
A great way to practice bow distribution is by playing a scale with eight notes per bow.
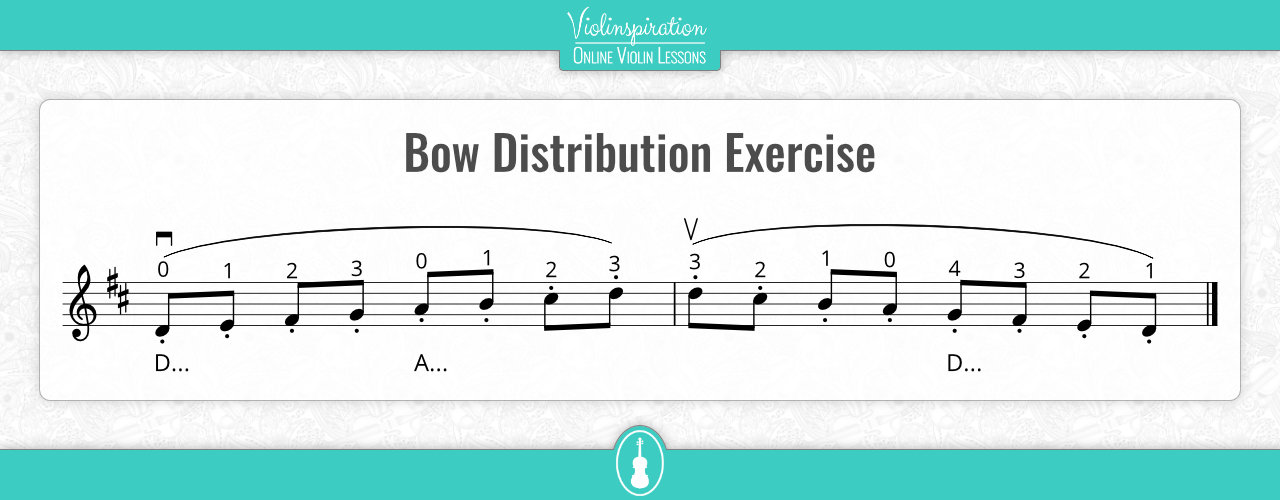
Stop your bow after every single note to really map out exactly how much bow you’ve used. This helps to see what fraction of the bow you should use for each and every note. I always try to use half the bow for the first four notes so I can be sure I’m on track to use the entire bow for all eight notes of the scale.
2. String Crossings
Do you remember when you first started learning the violin and couldn’t play on just one string at a time? You probably bumped the surrounding strings many times before you were able to get a clear tone.
It’s very important to know exactly where to place your arm and bow to play each separate string, and string crossings are very similar. You should know the starting place for your arm, and where it needs to end up to move to the destination string.
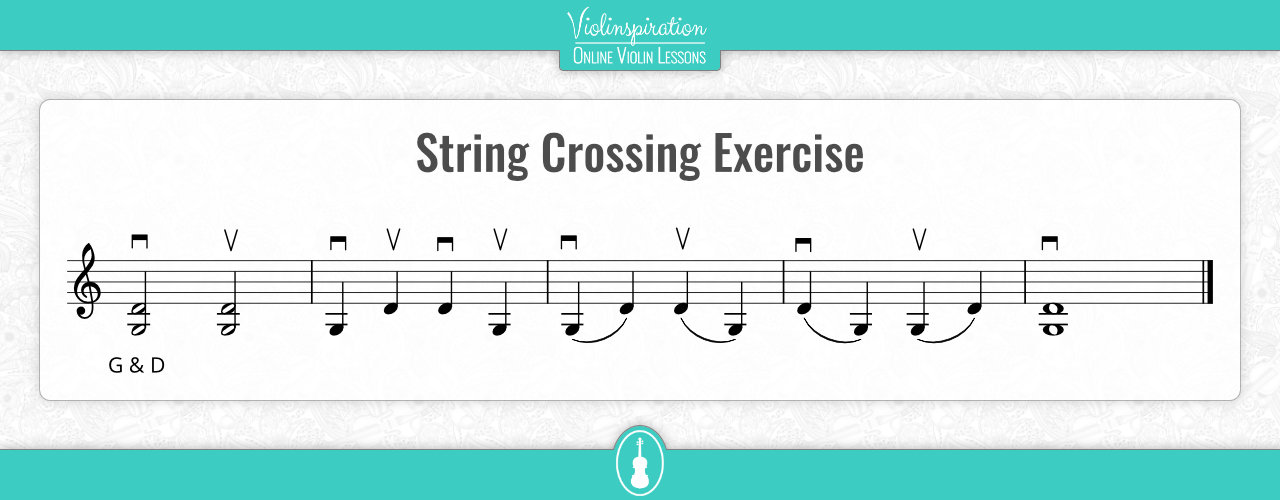
Practicing string crossings will help you play passages smoothly and gracefully. The string crossing exercise I’m sharing with you can be practiced on all four strings, and you can even work on the single notes on strings that don’t touch, for an extra challenge.
When working on seamless string crossings, use also tips that I share in this video:
3. Uneven Bow Strokes
Sometimes we’ll find music that has very “uneven” bowing patterns–a couple of notes in a down bow slur, then just one note played up bow. It’s difficult to make each bow stroke sound similar, often we’ll accidentally create large accents on the separate notes!
Many violin technique exercises will use awkward, uneven bowings to help you learn how to control the bow stroke, but I think the easiest and most effective way to get better at this technique is to practice a scale with a dotted rhythm. This naturally creates an uneven pattern.
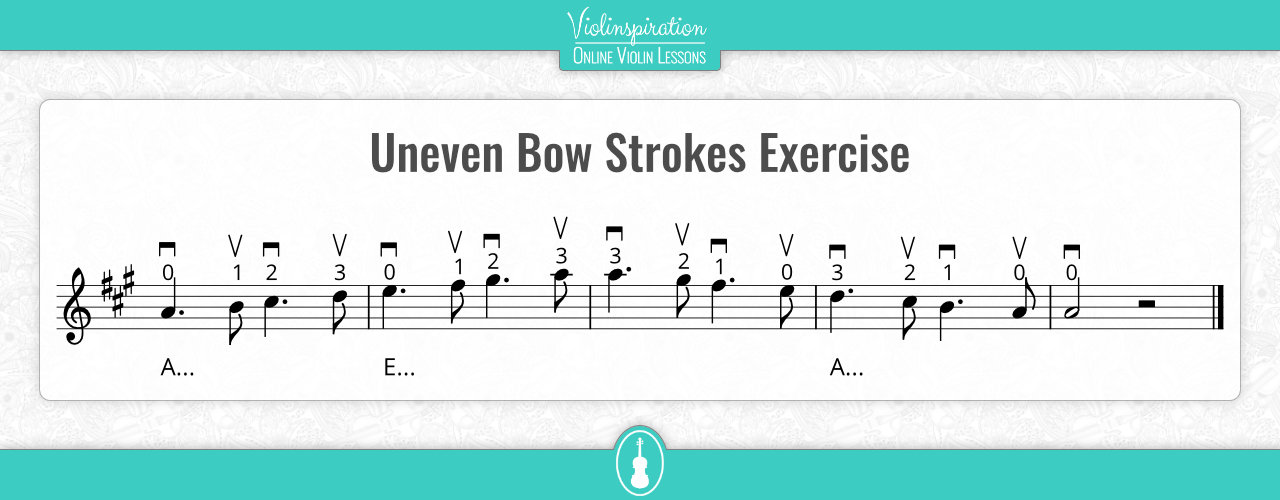
This exercise is very versatile: practice on any scale, and change which bow direction you start with each day! Maybe on even days, you start down bow and on odd days, you start up bow? 🙂
Or, if you’re a member of Julia’s Violin Academy, visit the Resources section and download your copy of the book.
FAQ
Let’s check the most common questions related to violin technique.
What techniques are used to play the violin?
The techniques used to play the violin are as follows:
1. Left-hand techniques
- Double stops and chords
- Shifting to play higher on the fingerboard
- Trills
- Ornaments
- Glissando
- Harmonics
- Left-hand pizzicato
2. Right-hand techniques or bowing techniques
- Détaché
- Legato
- Tenuto
- Portato
- Double Stops
- Chords
- Staccato
- Up-bow & Down-bow Staccato
- Martelé
- Sustained Martelé
- Spiccato
- Flying Staccato
- Flying Spiccato
- Ricochet
- Collé
- Sautillé
- Fouette or Whipped bowing technique
- Jete
- Chops
- Pizzicato
- Marcato
- Tremolo
- Measured Tremolo
- Sul Ponticello
- Sul Tasto
- Col Legno
- Au Talon
- Arco
What is the hardest violin technique?
Among the hardest violin techniques, we can find: ricochet, double-stoped glissandi/tenths/harmonics, fingered octave trills, up-bow & down-bow staccato, left-hand pizzicato played with the melody line, playing microtones, striking/slapping the strings. However, playing the violin is a personal experience, so anyone you ask would have a different opinion on what the “hardest” violin technique is.
How can I improve my violin skills?
You can improve your violin skills by practicing consistently – that’s the most important thing you can do to see a difference in your violin playing. A nicely organized practice plan with technique exercises adjusted to your current level will help you improve faster.
Still, getting more advanced as a violinist takes a long time. It’s the same for any person to get good at any hobby, and violin in particular is very difficult. Keep practicing technique exercises, and your violin skills will quickly improve!
Final Note
I hope these exercises help you feel confident in tricky areas of violin playing. Working slowly but consistently is key on the violin, and with these violin technique exercises, your ability as a musician will continue to grow.

FREE Violin Technique Exercises
Improve Your Playing by Practicing These Exercises


