Here is a quick article for beginning violinists with the top 6 violin techniques every violin player needs to know!
This article features some of my favorite techniques on the violin to add to your skillset. These tips will cover a range of essential violin techniques from vibrato to bowing techniques to practice.
I also added video lessons and demonstrations to as many of the techniques as possible, along with sheet music and free PDFs for you to download.
I hope this article can serve as a quick introduction to the most important techniques to learn on the violin!
1. Proper Bow & Violin Hold
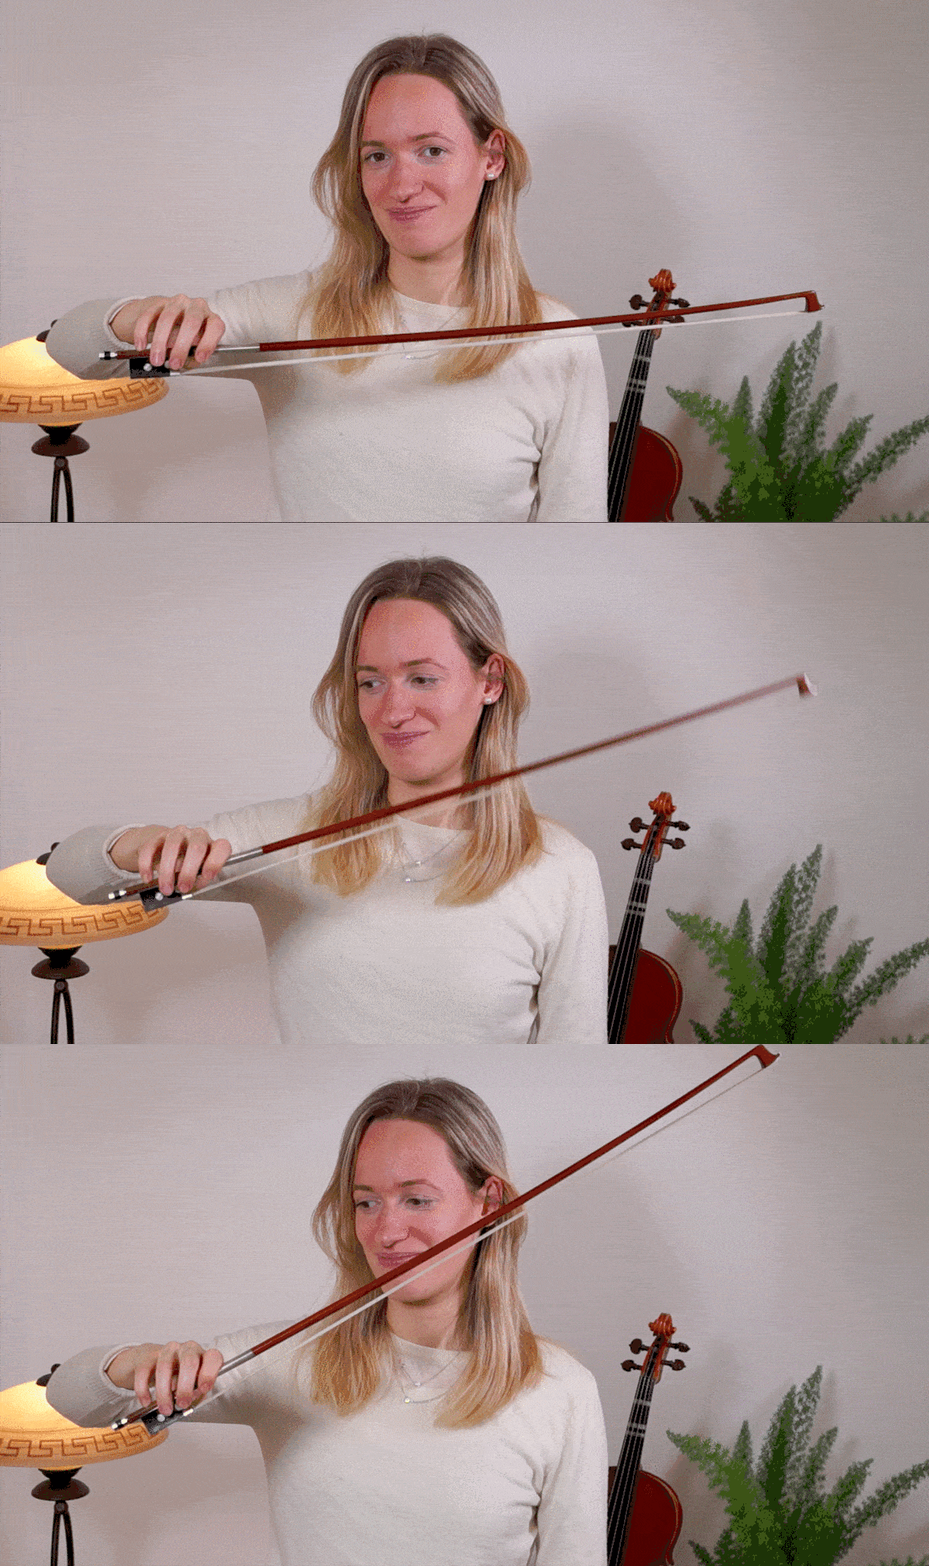
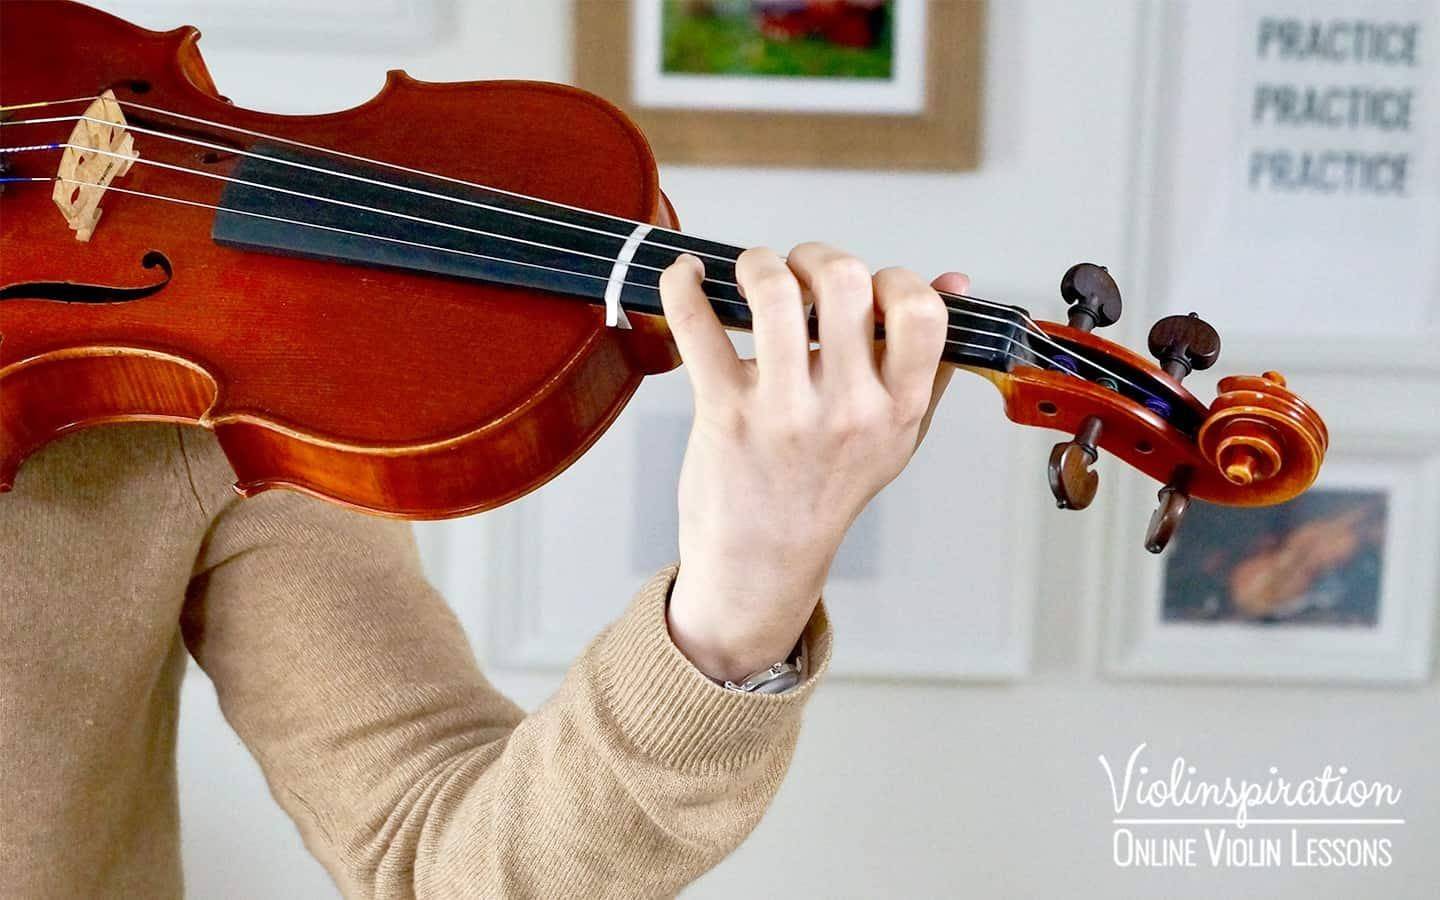
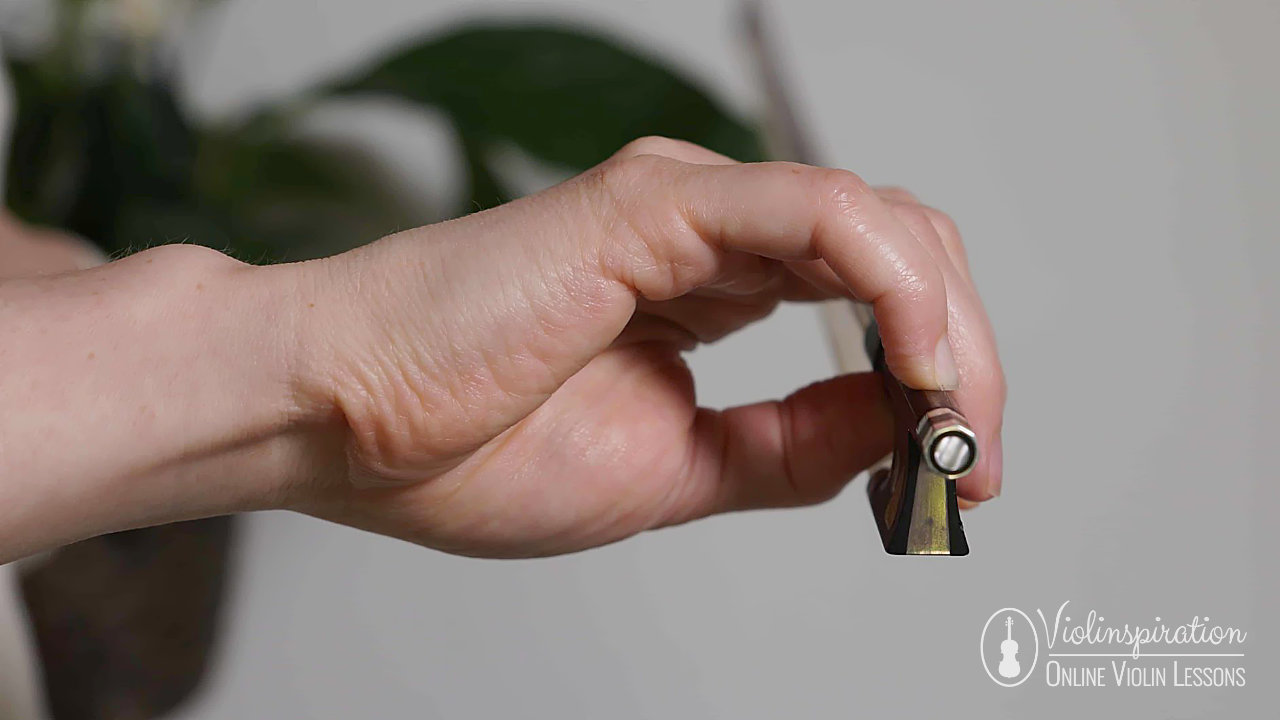
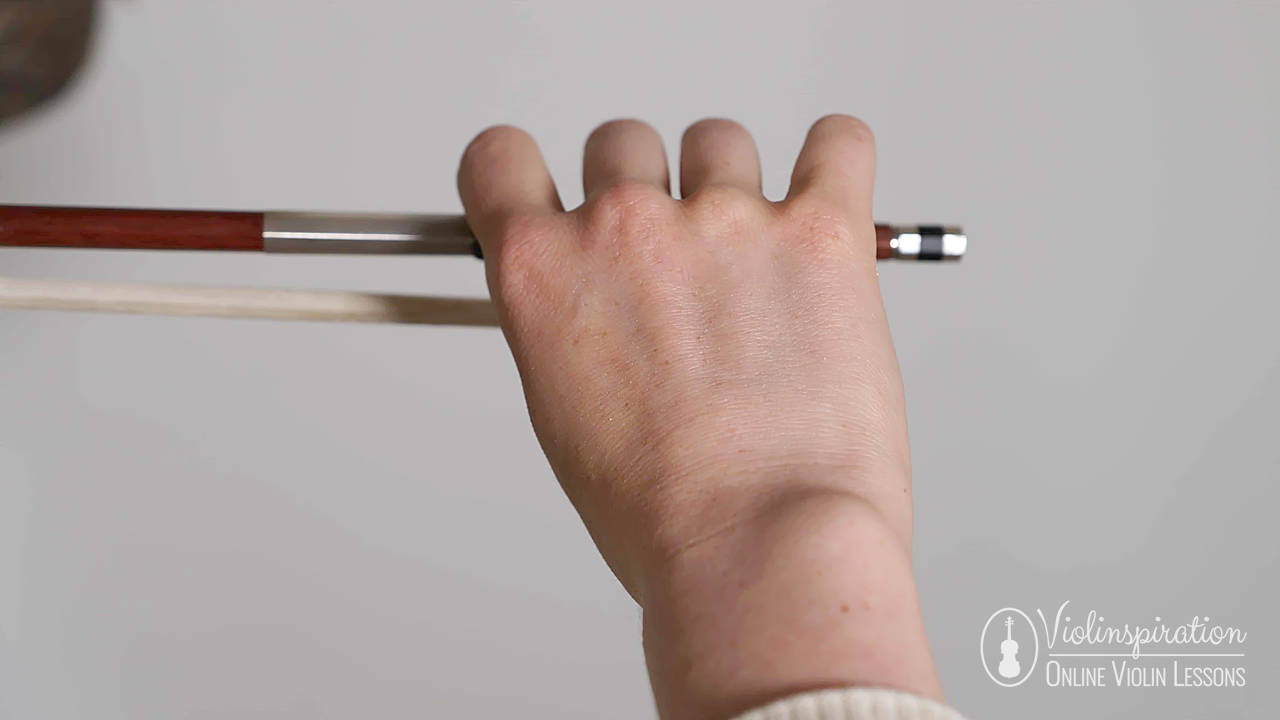
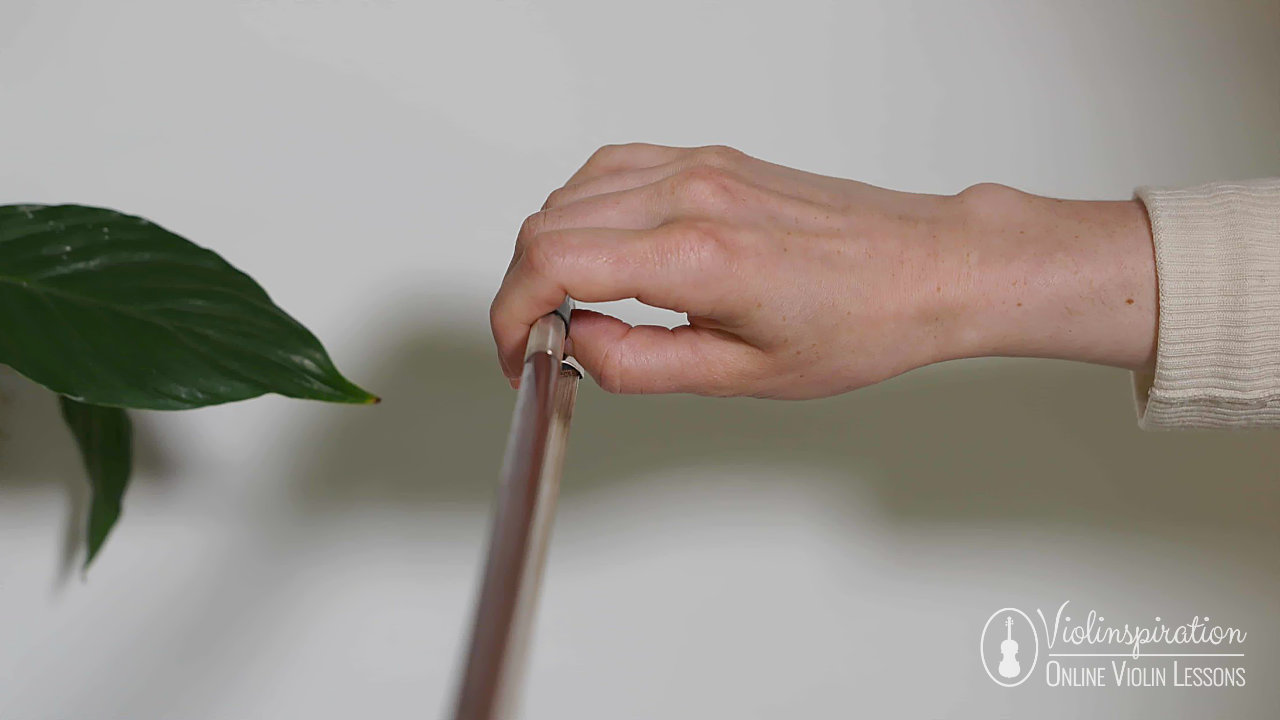
Before you start learning how to play the violin, the first thing you need to do is ensure you have the correct bow and violin hold.
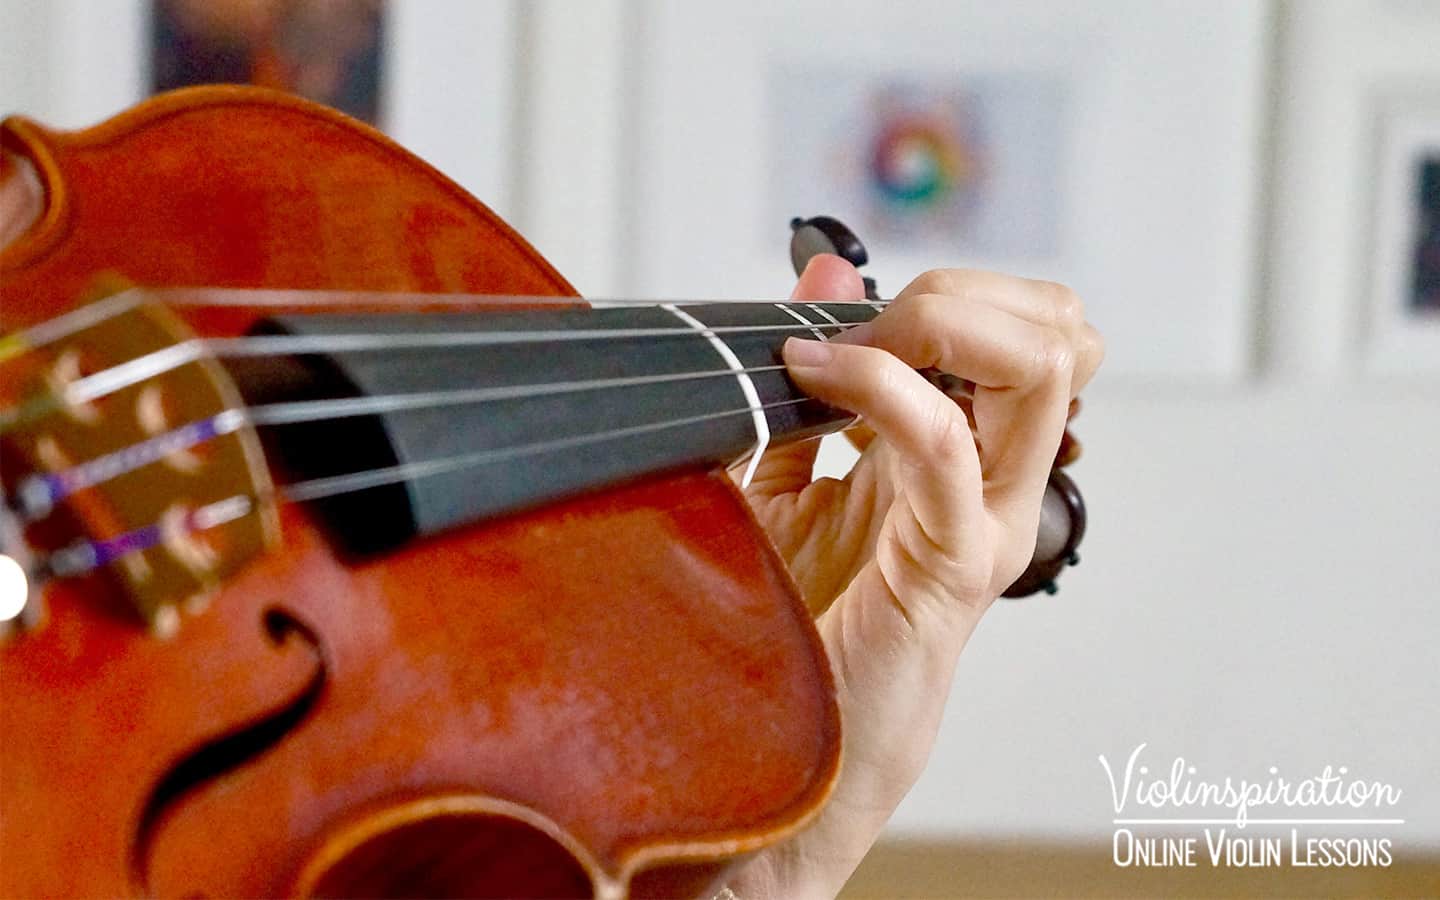
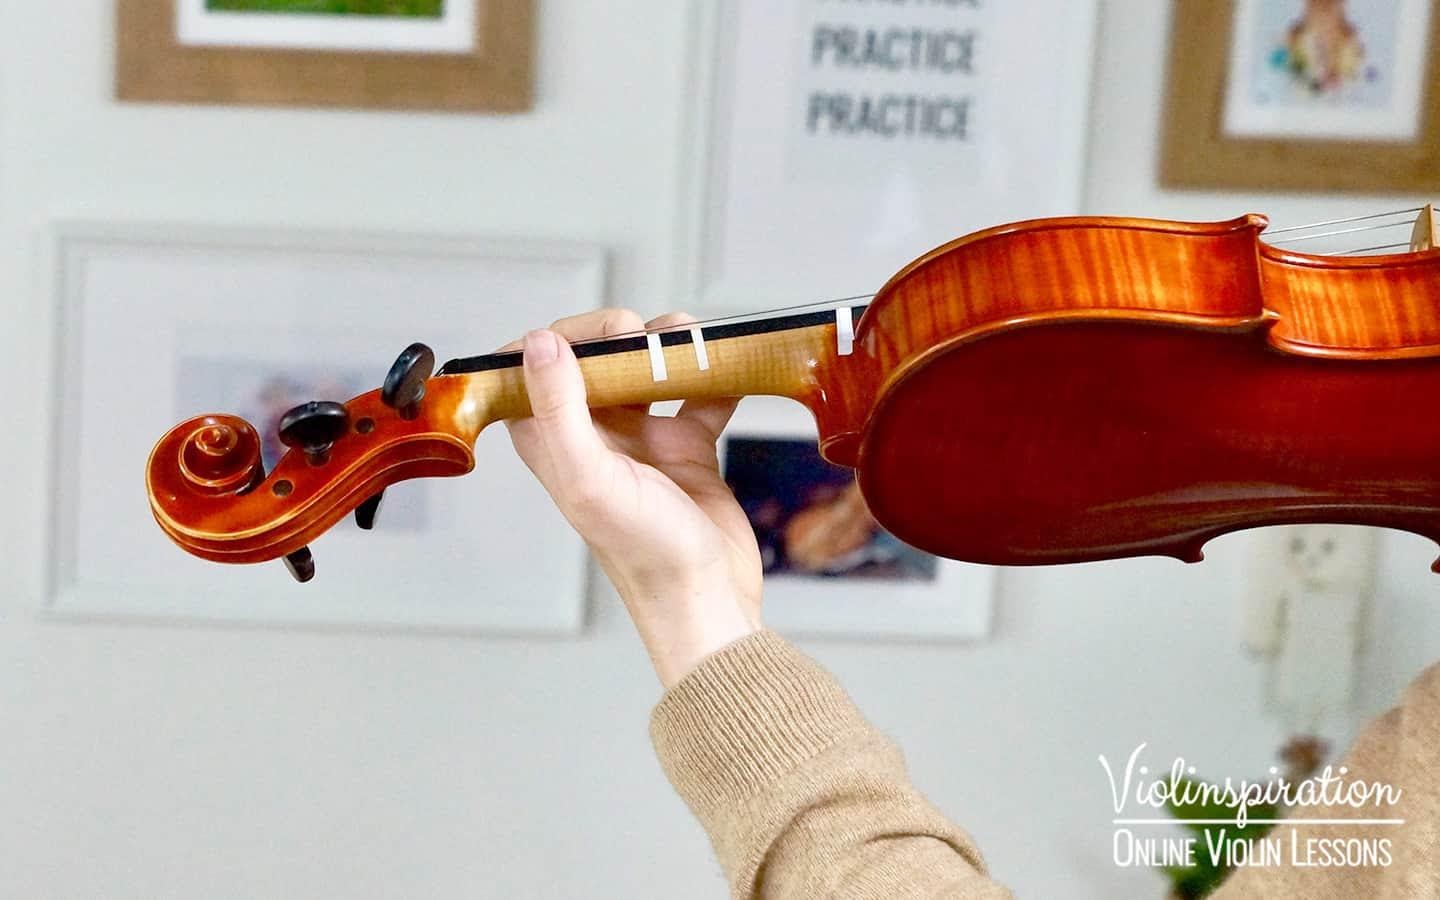
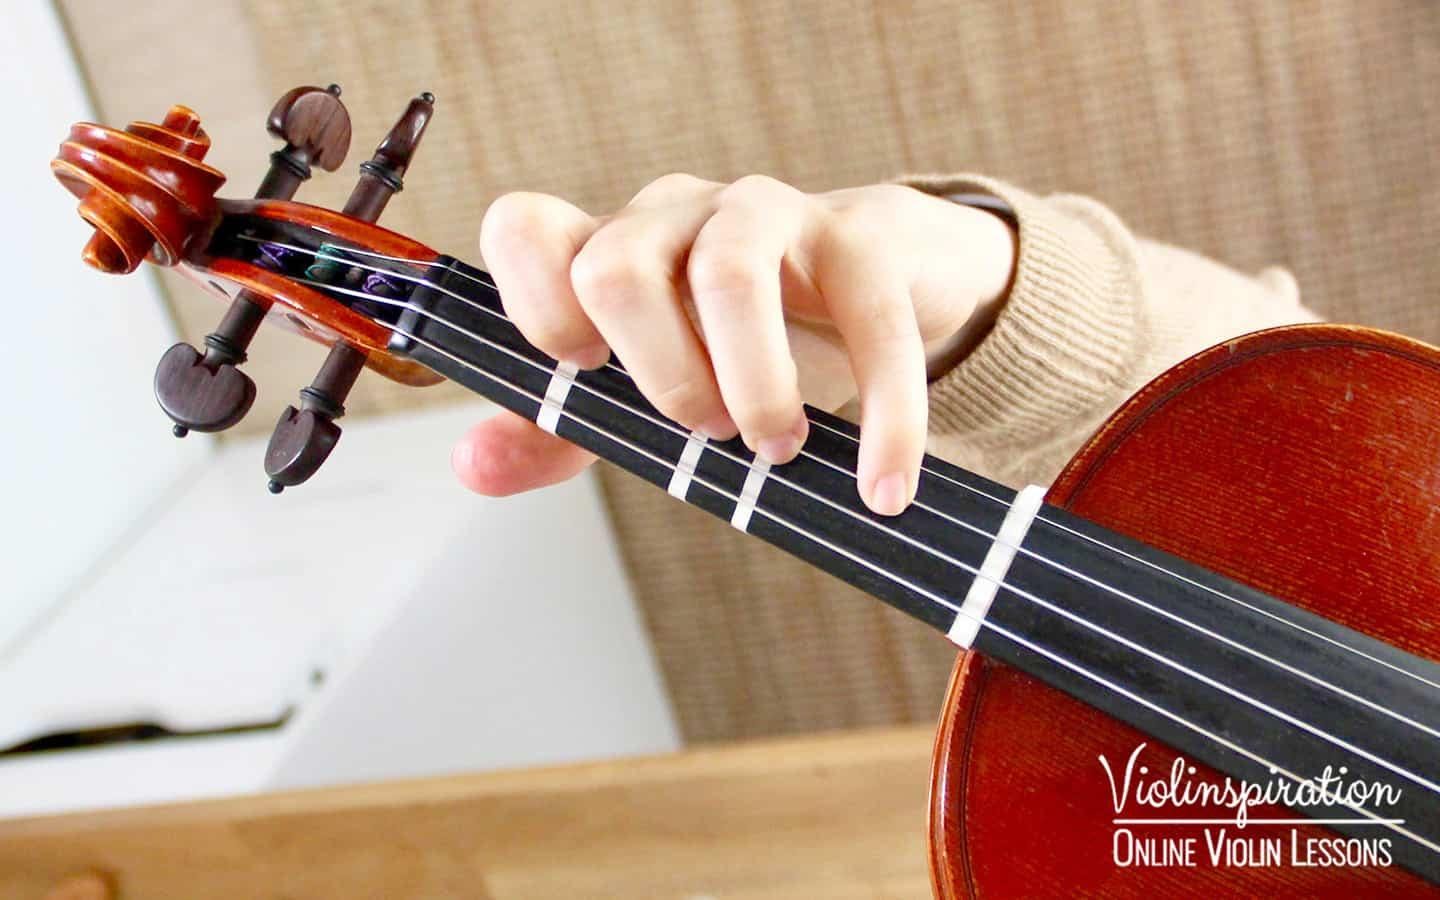
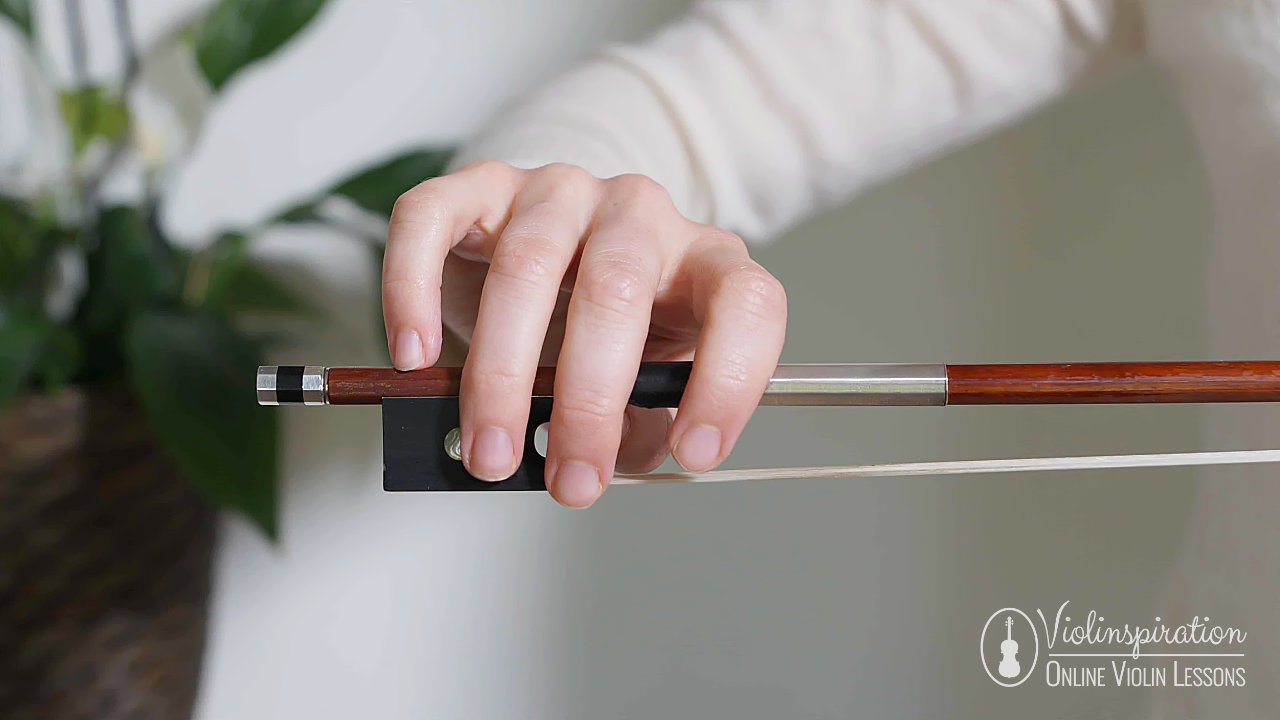
Knowing how to properly hold the bow and the violin is very important for violin players, as it ensures you have the maximum level of flexibility in performing all other violin techniques. It also sets you up for pain-free violin playing!
On the path to perfect posture, one of the major things you’ll need is standing up straight.
After that, make sure to get into the correct bow hold and violin hold.
I made separate lessons on both of these techniques that you can find here:
To get started, here are some pictures that will show you what it should look like if you are holding the violin and bow in the correct playing position:
2. Straight Bowing
When you just start playing the violin, don’t be surprised if you hear a squeaky and scratchy sound!
One of the reasons for it is that beginners are not able to perform a straight bowing yet.
The straight bowing violin technique will change your scratchy sound into a beautiful, clean, and resonant sound. No matter what song or technique you will ever play on the violin, straight bowing is always needed in order to make your violin sound good.
That is why I think it deserves a fair place on top of my “violin techniques” list!
To practice straight bowing, simply stand in front of the mirror and make a bow stroke on each one of the open strings. Adjust your hand forward and backward until the bow is perfectly parallel to the bridge of your violin.
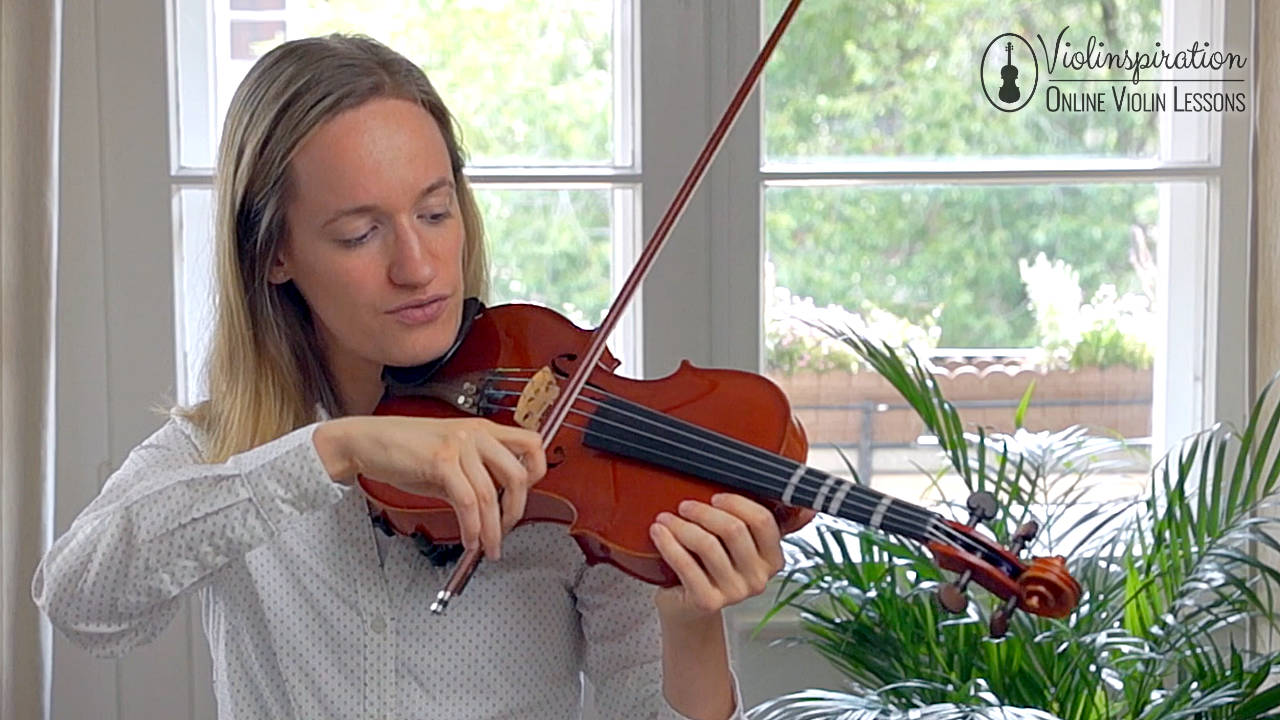
Playing in the middle between the bridge and the fingerboard will allow the sound to be the most resonant. If you play closer to the bridge, it will sound louder. The closer you play to the fingerboard, the softer it gets.
When doing your straight bowing exercises, try to make sure the contact point of the bow is exactly in the middle between the bridge and fingerboard. You can achieve this by looking at the fingerboard while you play and checking where the bow is touching the strings. This point is called the contact point. You can learn more about contact points in this guide:
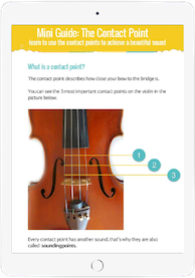
FREE Contact Point Guide
Improve Your Contact Points Technique
The straight bowing violin technique is the first thing that any starting violinist should learn!
3. First Position Fingering
If you want to play more than only open strings on your violin, it’s time for another violin technique to learn: the first position!
Let’s begin with placing fingerboard stickers on your violin. This will help you to know where the location of each of the fingers is.
Here is a complete guide that shows you how to put your fingerboard stickers on the violin.
After that, get familiar with each one of the notes in the first position. Here is an easy chart that will help you out:
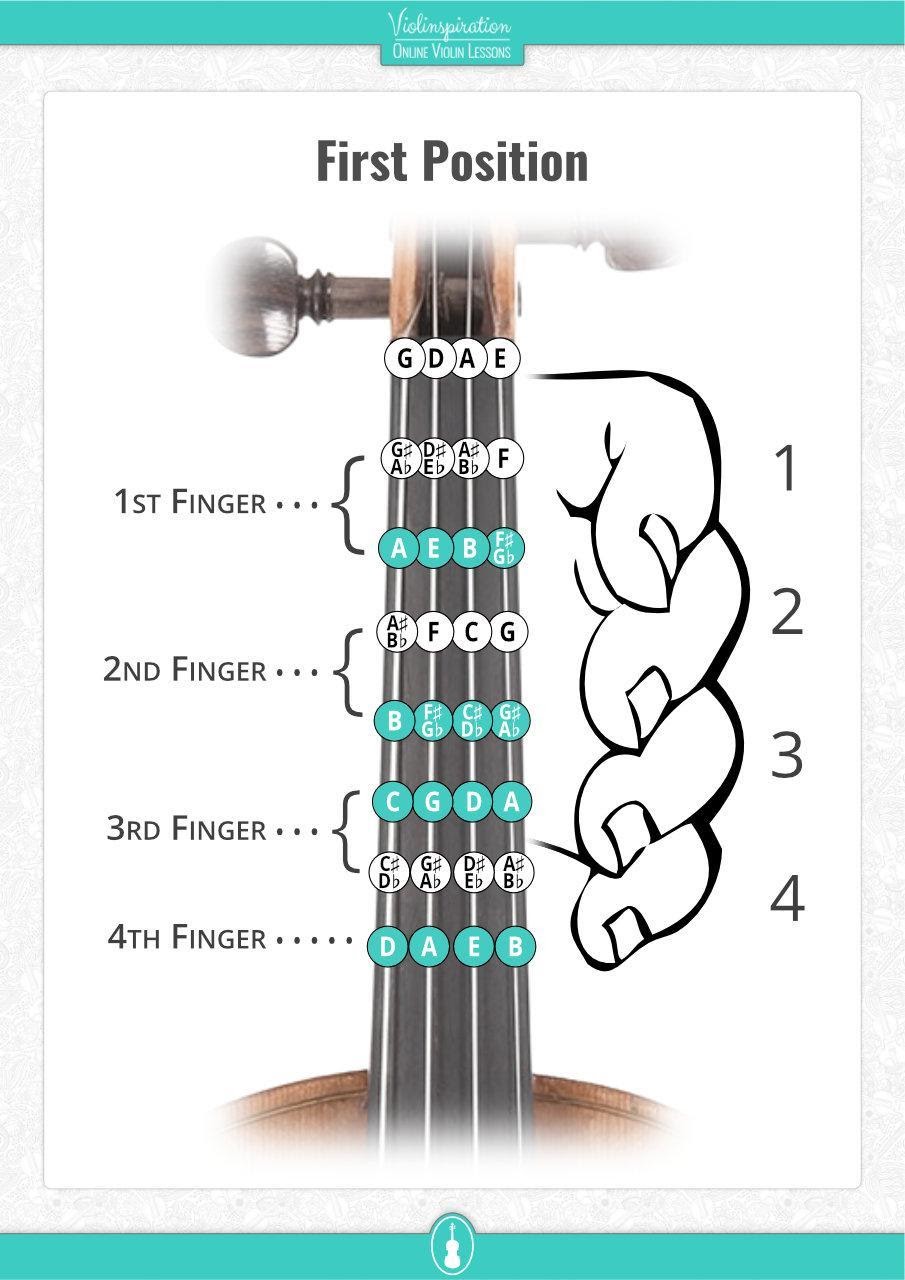
You can also download the chart in PDF over here and print it out:
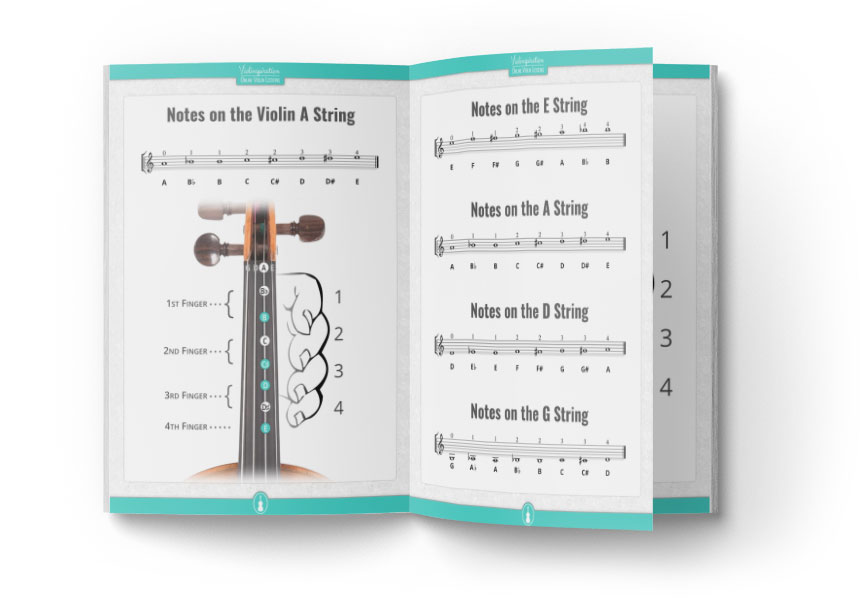
Get Your Free Fingering Charts
of All Violin Notes
Now you know all the basic notes in the first position, the next logical step is to start practicing all the most common finger locations.
Start by playing all the notes in the first position with me by watching this video:
After that, I recommend you practice your first position fingering with scales. Here are the 5 scales I recommend to get started with.
After that, you can also start learning simple songs in the first position. You can quickly find the easiest violin tunes in my Video Lessons library.
4. Slurs
Slurs are a great bowing technique! It is both beautiful in slow and lyrical songs but also is often used in quick music like Irish jigs.
It’s one of those “vital” techniques that each violin player should be able to perform! Your notes will be smoothly connected, which makes your violin pieces sound a lot more cohesive and beautiful.
To practice this violin technique, I suggest that you begin by doing the following exercise.
First, start by playing the open A string and the B note (first finger on the A string). Play both of the notes right after each other, like this:
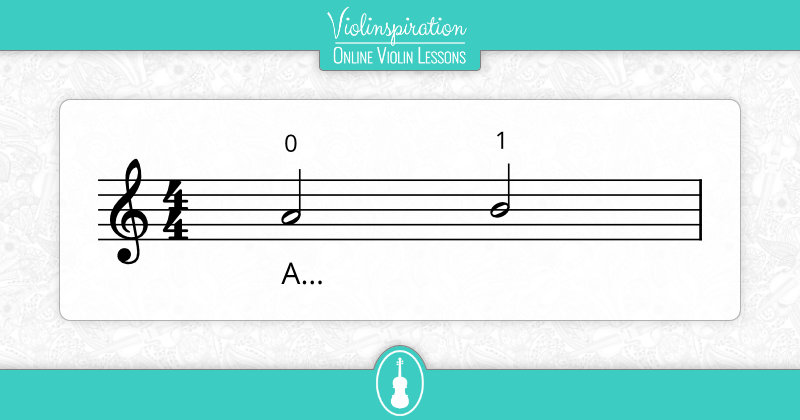
Now, play both of these notes on one bow stroke, like this:
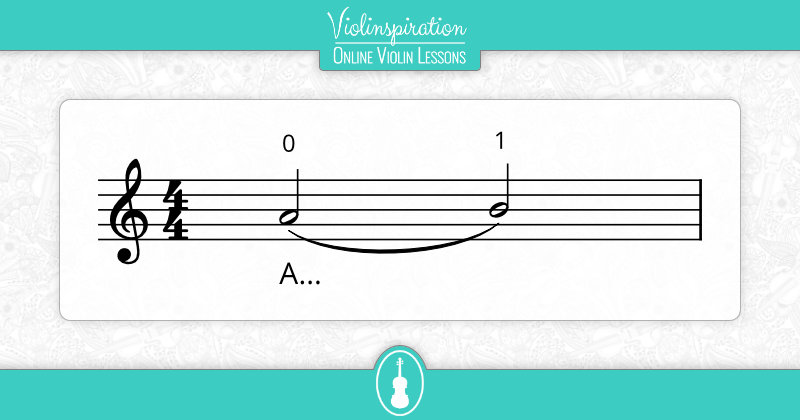
Did you try this? Great! In that case, you officially played your first slur.
Note that there is a line connecting both notes in the sheet music of the slur above. This is the bowing sign of the slur. Each time that you see this line in sheet music, you know that you have to play all the notes under the line slurred together.
The slur in the exercise above is the easiest slur to play: a 2-note slur. There are also many more difficult slurs!
For instance, have a look at the following sheet music of Sonata no. 1 from J.S. Bach. Note how the player regularly has to play more than 8 notes in one slurred bow stroke!
We have 3-note, 3-note, 4-note, 8-note, and more-note slurs, there are detached slurs, and slurs also form the basis of many violin bowing techniques like upbow staccato.
Slurs are such an important technique, that I recommend all my students to practice them every day. No matter if they are advanced or beginning players!
For beginner players, I recommend practicing the essential scales with 2 and 4 notes on one bow stroke.
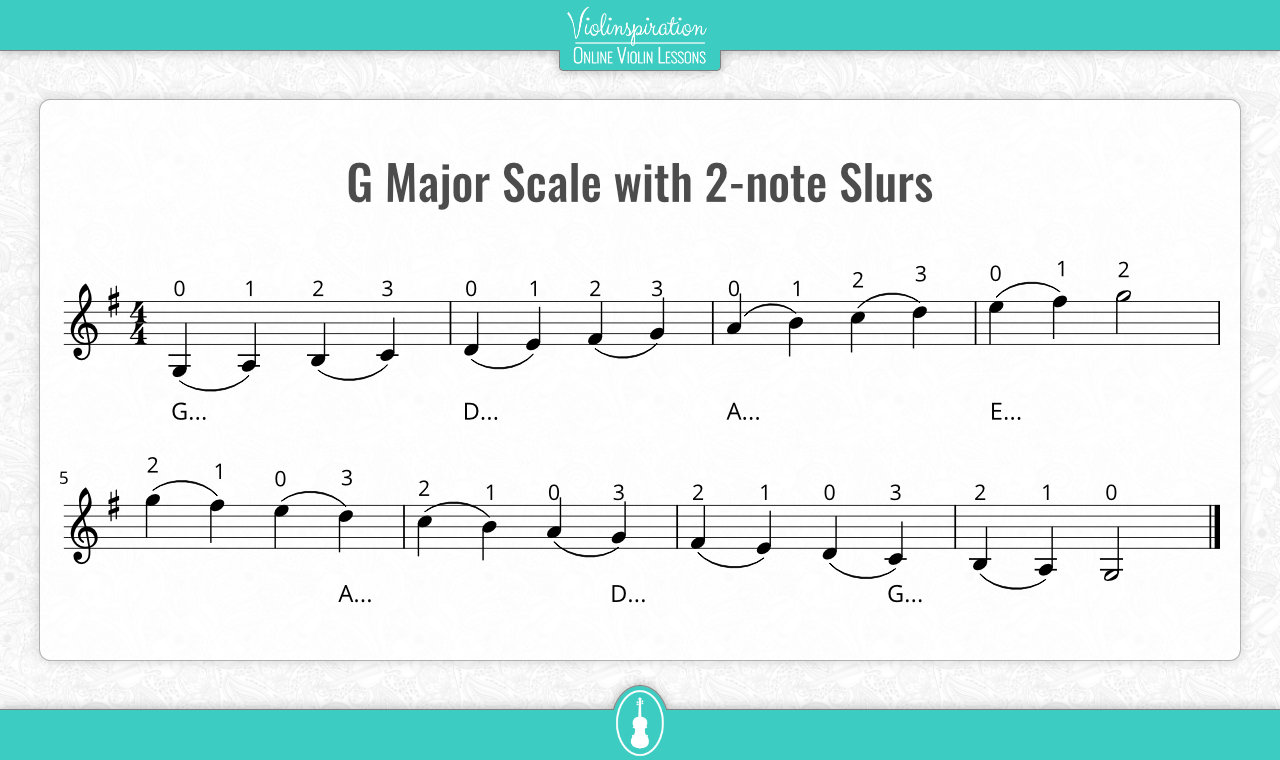
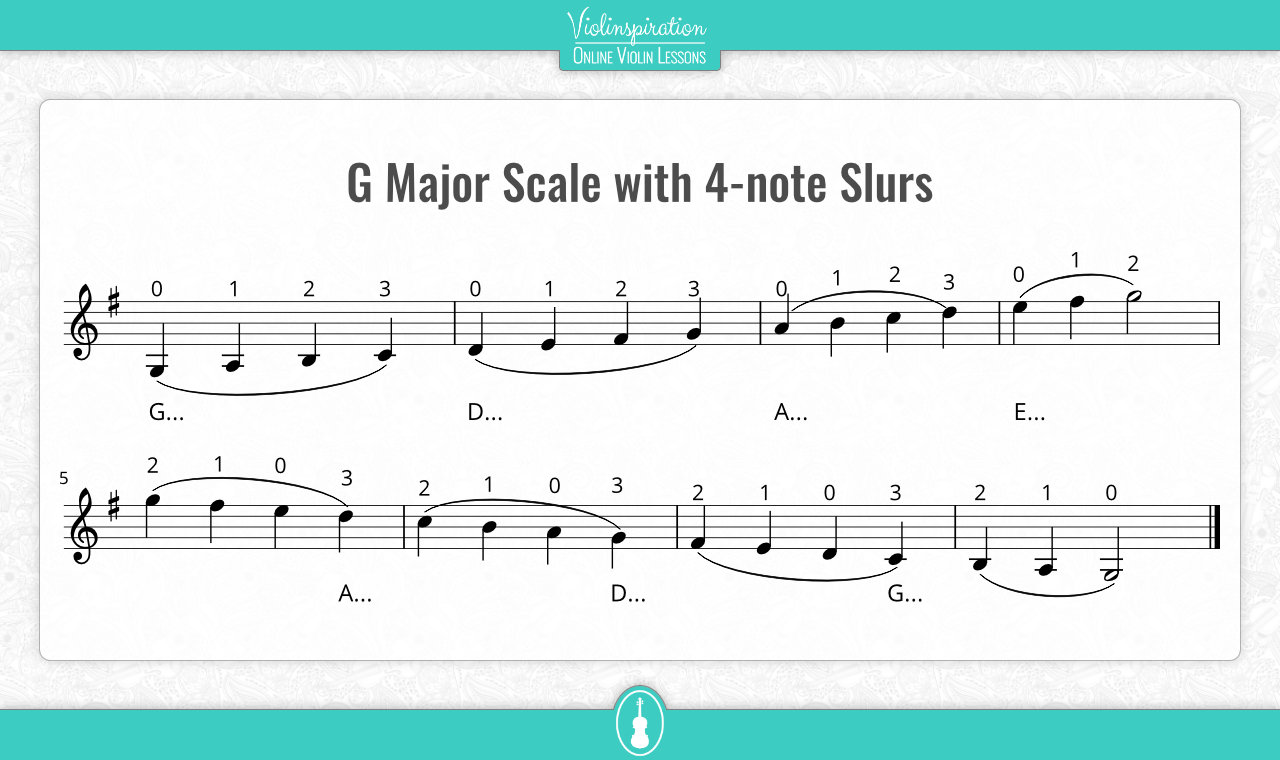
You can download a printable PDF version of the scales above over here:
G Major Scales with Slurs Exercises
Just fill out your information and I will send it to you.
For intermediate/advancing players, I recommend also including 3-note, 6-note, 8-note, 12-note, and 16-note slurs into your daily scales routine.
If you need any more help with how to go about practicing slurs in your scale practice, also be sure to check out Julia’s Violin Academy. In my online violin school for adult beginners, I cover every single scale you should learn on the violin in the first years of playing, including the slur patterns I recommend practicing with.
5. Vibrato
Vibrato is one of the most expressive violin techniques available to us as violin players.
Vibrato is generally used on single notes to make them sound deeper and more resonant. It adds depth to pieces and fits very well to violin music in all styles.
For initial practice, I recommend you start by practicing the basic vibrato motions by doing simple vibrato exercises. Once you get confident in the simple vibrato exercises, you can move on to play slow vibrato on single notes.
When you start to perform the vibrato technique in pieces, first add vibrato to all the longer notes. Then slowly add vibrato to more notes, until you are also able to play vibrato on the shorter notes. As you progress in your vibrato journey, you can also experiment with the width and speed of your vibrato.
During the vibrato motion, you have to firmly place the finger on the fingerboard to make sure your finger does not move to another location while making the vibrato motion. At the same time, you have to keep your hand relaxed to be able to make the quick wiggling motion of the hand and arm.
The combination of both of these elements can be very difficult, that is why many violin players take quite some time to learn this violin technique!
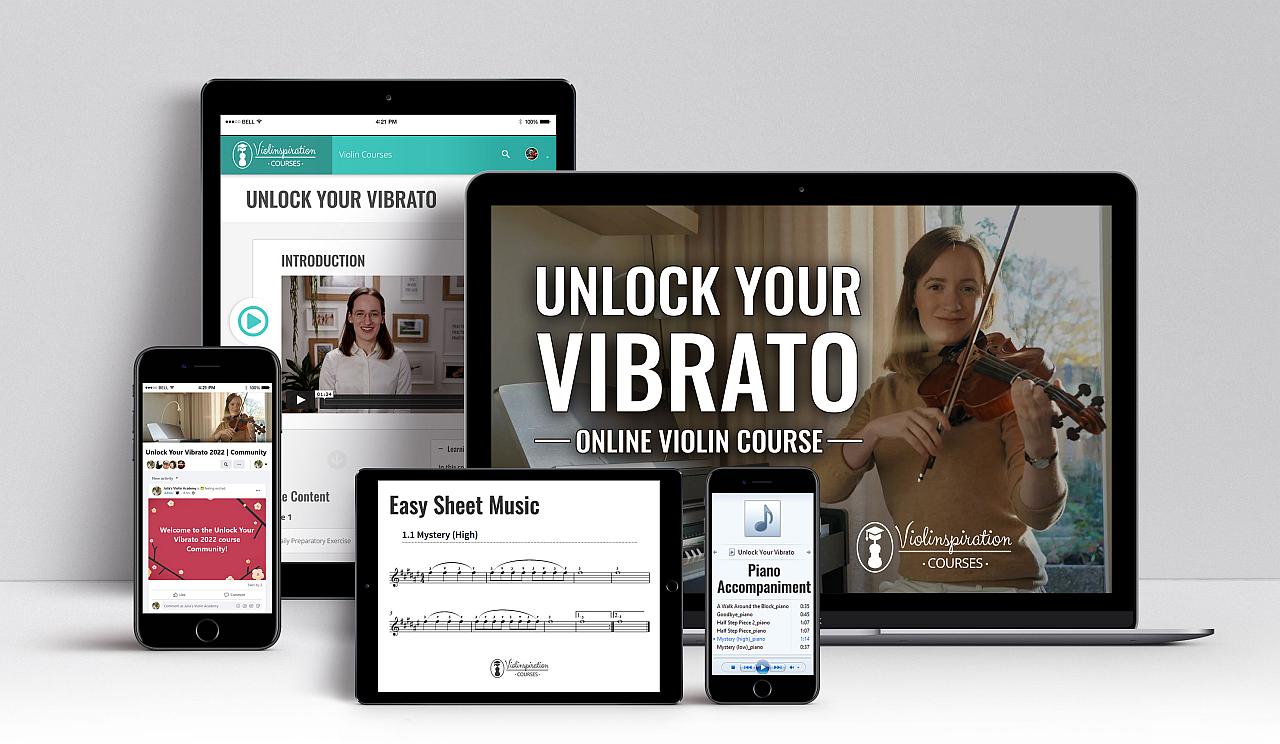
If you’d like to learn vibrato by following a well-organized course, I’ve got good news for you: I created a step-by-step course tailored to violin adult beginners “Unlock Your Vibrato.”
Click the button below to read more about the course.
6. Trills
Trills are used in all genres of classical music and are an essential violin technique to learn! The trill is a rapid alternation between two adjacent notes.
An epic example of this violin technique is demonstrated in the virtuosic Devil’s Trill Sonata written by Giuseppe Tartini:
To get an idea of how terrifying the sheet music of a piece like this looks, have a look at the following sheet music:
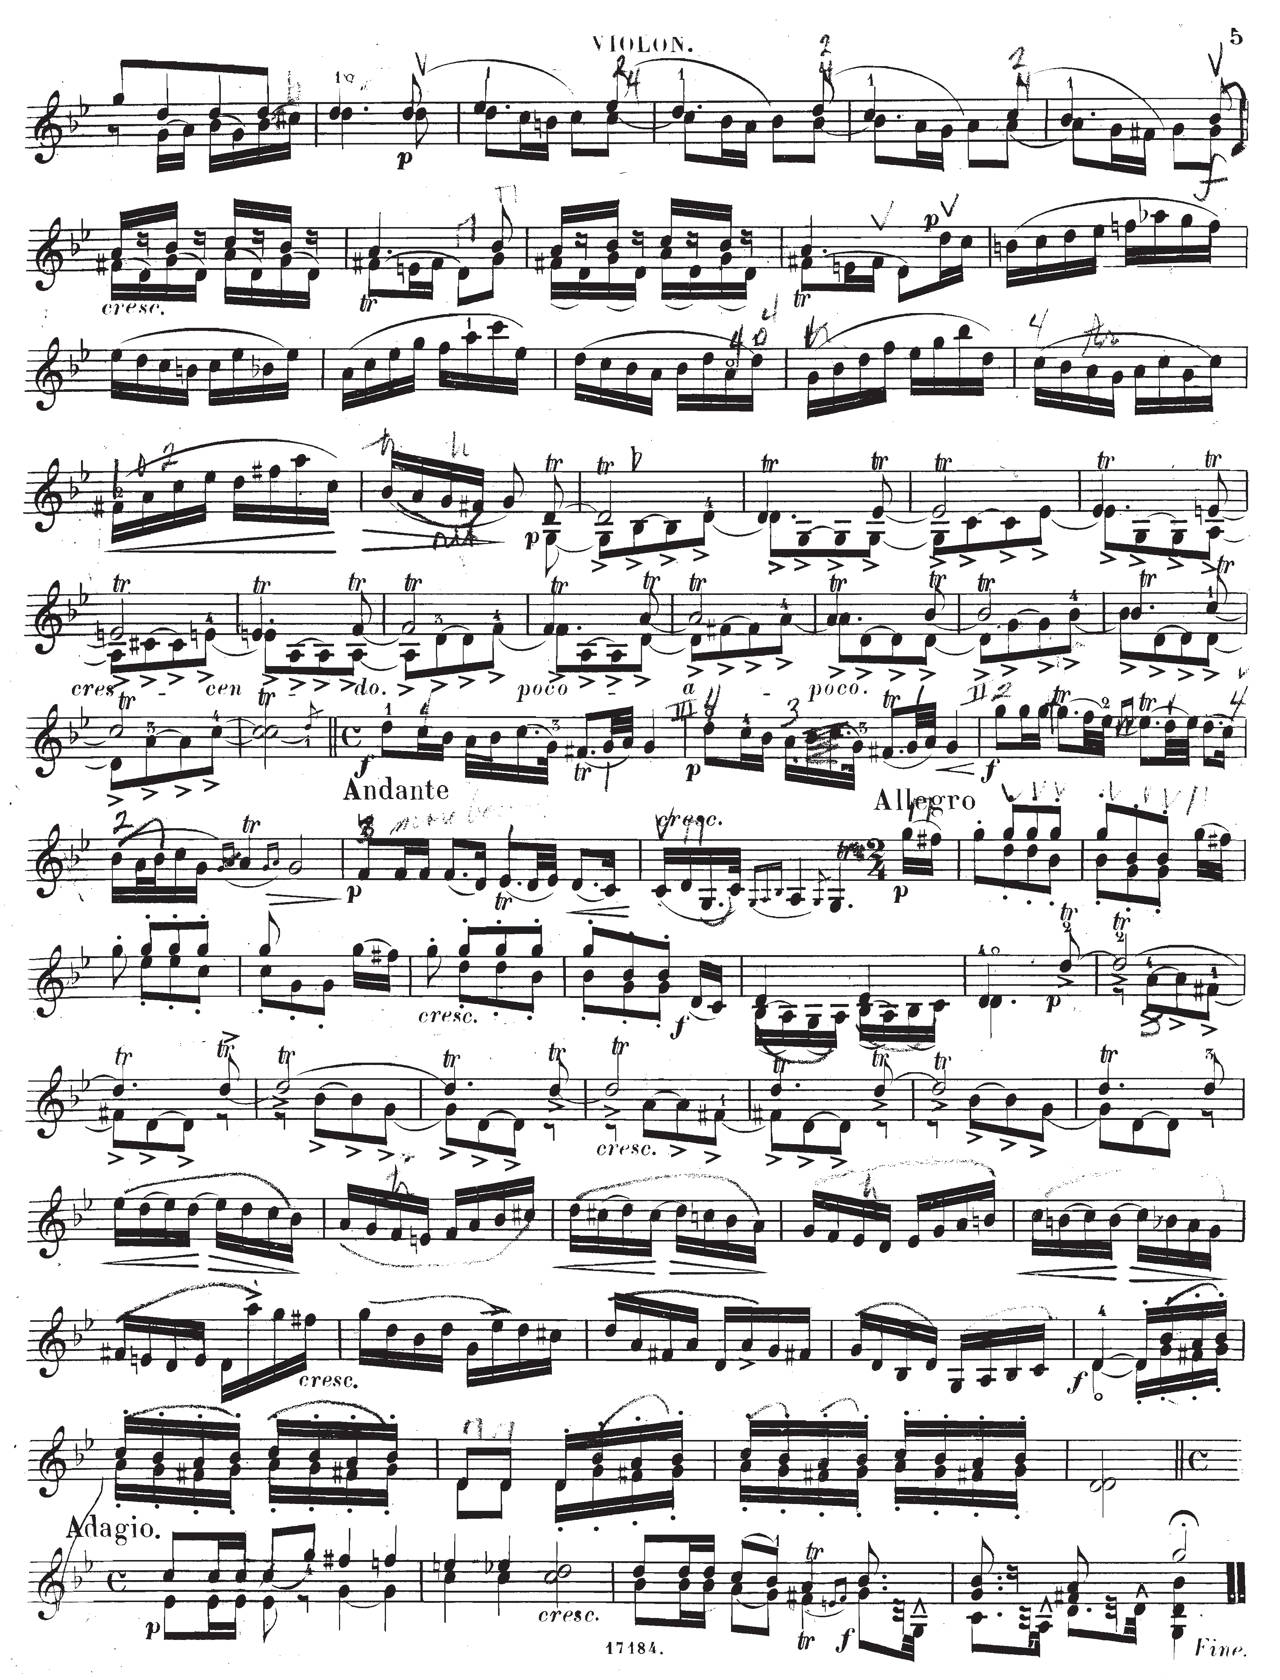
All “tr” signs in the sheet music tell the player that this note needs to be played with a trill.
Luckily, most of us are playing pieces that feature only a few trills and are a lot easier than the sonata above!
To get started with learning this violin technique, have a go at this simple trill exercise:
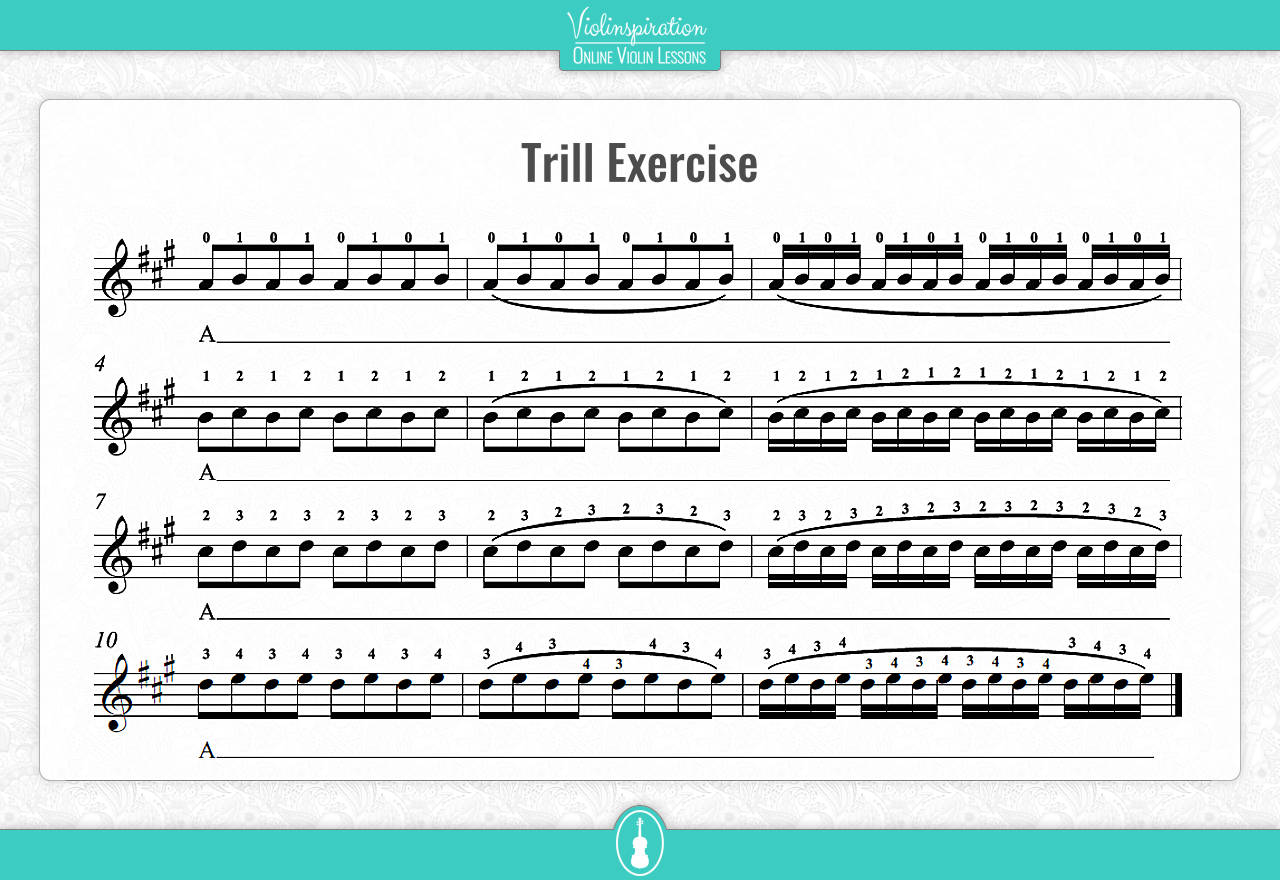
Set the metronome to 60 bpm, starting slow and then gradually increase the tempo.
Don’t forget to make a note of the tempo when you finished practicing, so that when you come back to it, you know what speed to start with.
Other Violin Techniques
There is still a world of violin techniques to explore beyond the basics. And if you already learned all of these techniques above, I recommend considering one of the following techniques:
- Learn all the violin positions: start with the third position, then learn the fifth and second position, continue with learning all the other positions
- Practice double stops and chords
- Get familiar with violin harmonics: learn to play natural and artificial harmonics on the violin
- Learn all violin bowing techniques: have a look at my list of bowing techniques and consider learning some of the techniques mentioned. Some essential violin bowing techniques I recommend you to learn are: martele, (up- and downbow) staccato, and spiccato.
Final Note
Thanks for taking the time to read this blog! I hope it inspired you to start learning the violin techniques mentioned. If you are new here, please consider signing up for my weekly free violin lessons!
Also, if you liked this lesson, please, leave a comment below and share it with your violin friends.

